Login
다운로드
포커스 모드
폰트 크기
WorkBuddy Enterprise supports the following four client login methods, and enterprise members can choose the appropriate client based on their daily usage scenarios. Authentication for all login methods is completed through the browser web client, and the process ultimately redirects back to the local client to establish a session.
Prerequisites:
The latest version of the client / IDE / plugin / CLI has been downloaded and installed from the corresponding channel.
The enterprise administrator has added members and authorized clients in the admin console. For details, see "Members and Departments".
Members can log in with their member accounts using any of the following methods: Google, GitHub, X, Tencent OneID, email password, or SSO enterprise login.
1. Logging in to the WorkBuddy Client
WorkBuddy client login uses the browser authorization + redirect back to client flow. You only need to initiate login in the client, complete account authentication in the browser, and then you will be automatically redirected back to the client to enter the workspace.
Step 1: Open the Client and Click Sign In
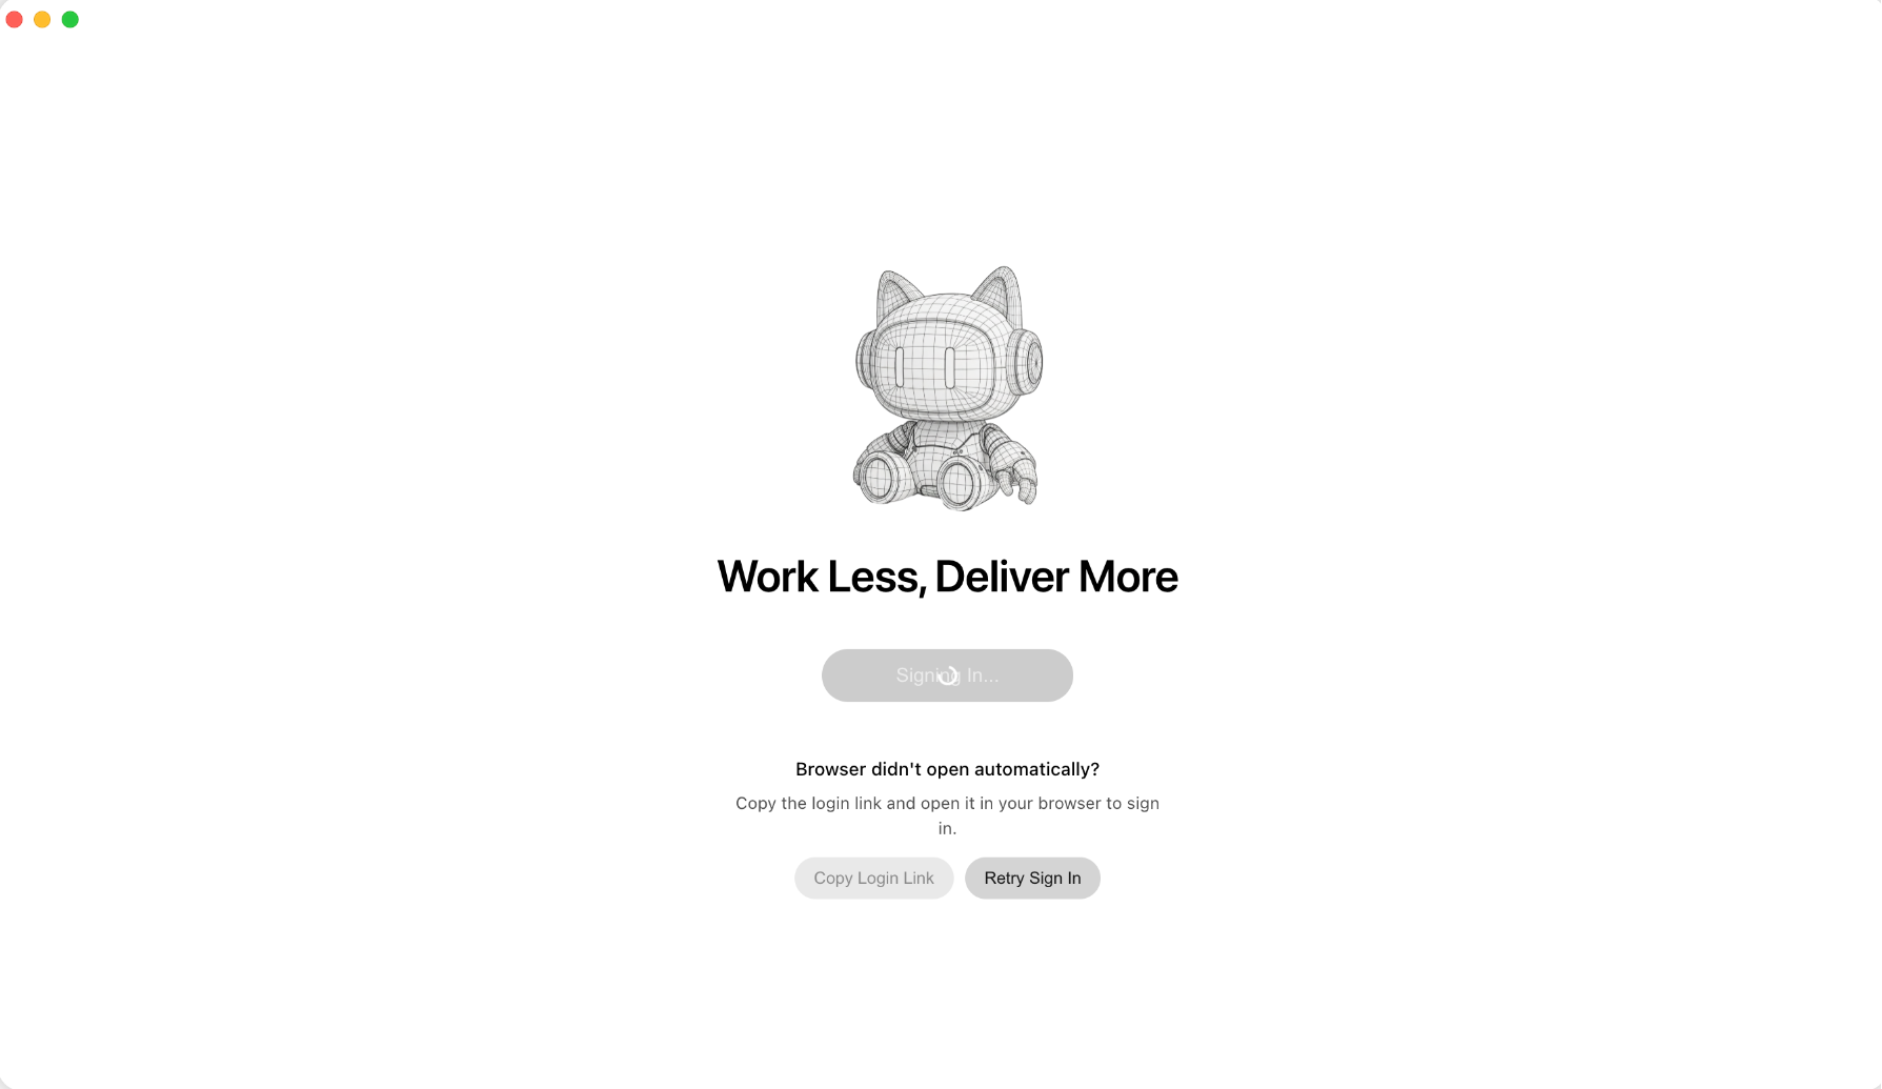
Launch the WorkBuddy client to go to the welcome page Work Less, Deliver More, and click the Sign In button to initiate login.
Step 2: Wait for the Browser to Launch Automatically
After you click Sign In, the client opens the WorkBuddy login page in the system's default browser, and the button changes to the Signing In... waiting state.
If the browser does not open automatically, you can continue manually in either of the following ways:
Copy Login Link: Copy the login link and paste it into the browser address bar to open it.
Retry Sign In: Retrigger the browser to open.
Step 3: Select a Login Method on the Web Page
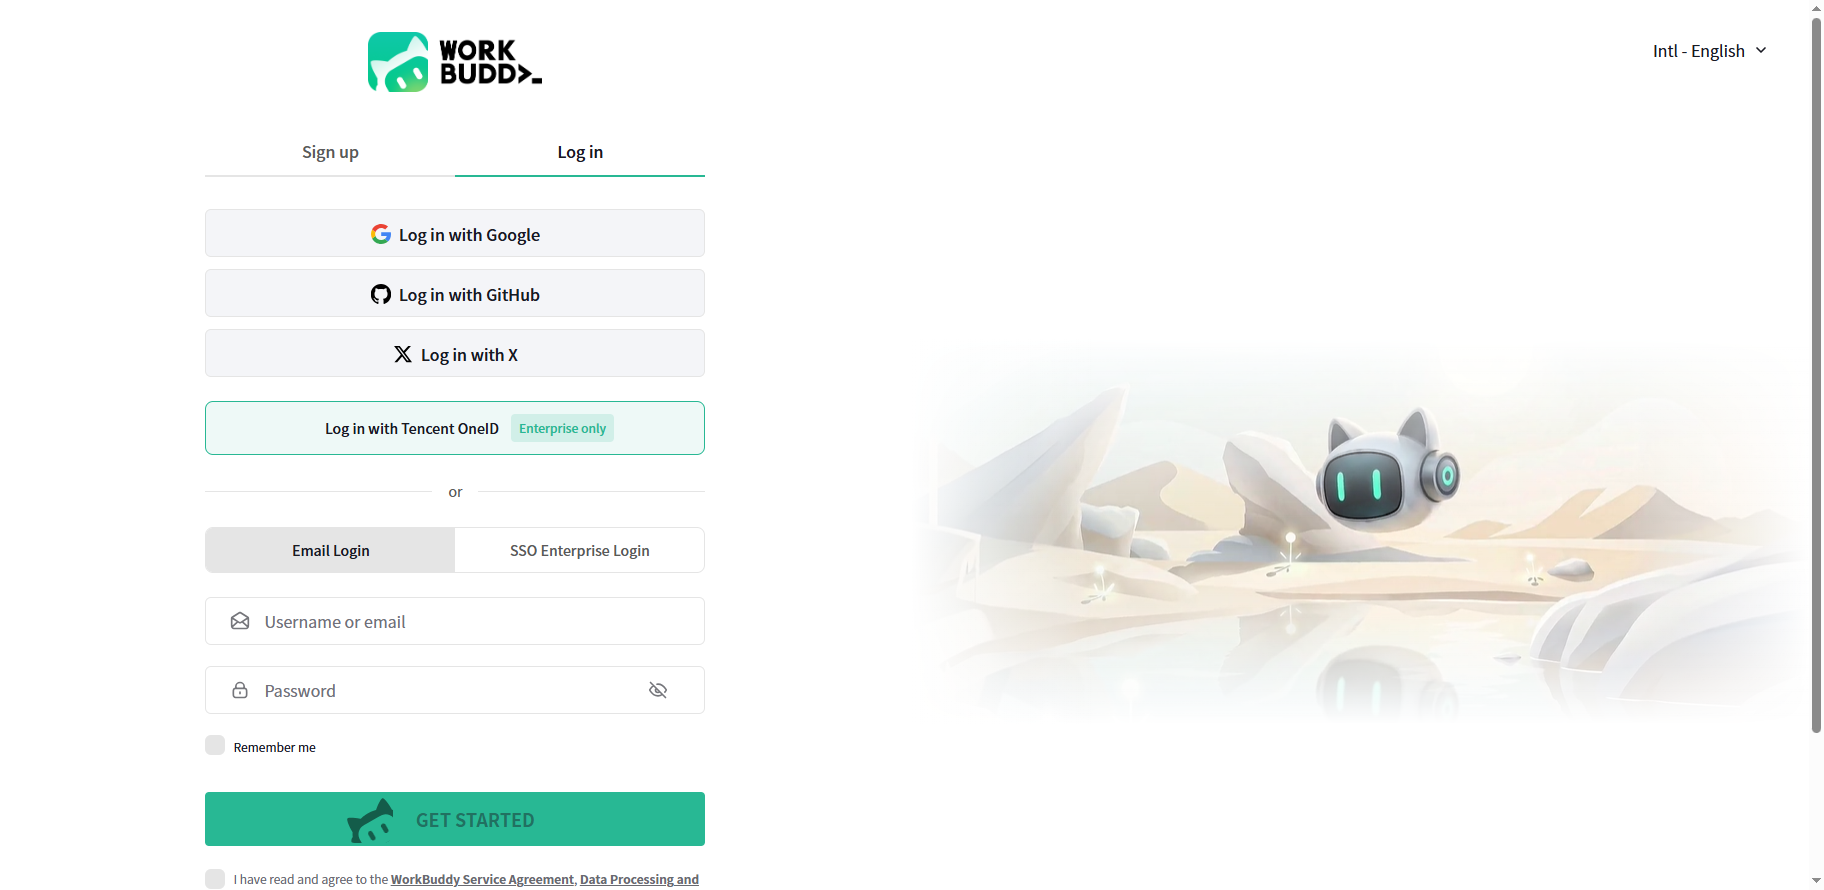
After the browser opens, you will be directed to the WorkBuddy web login page, which stays on the Log In tab by default. If you are a new user, switch to the Sign Up tab. Select an appropriate login method:
Third-party account login: Google, GitHub, and X. This method is suitable for personal trials or lightweight scenarios.
Log in with Tencent OneID (enterprise users only): Recommended for enterprise users and integrated with admin console members.
Email login: Use your username or email + password. Select Remember me to keep your login session active.
SSO Enterprise Login: Use this method when your enterprise has configured an SSO authentication source.
Note:
Before logging in with your email, select I have read and agree to the WorkBuddy Terms of Service and Data Processing and Security Agreement, and then click Get Started.
Enterprise users are recommended to log in through Tencent OneID or SSO Enterprise Login to enjoy centralized management and unified authentication.
Step 4: Complete Account Authentication (Using Tencent OneID as an Example)
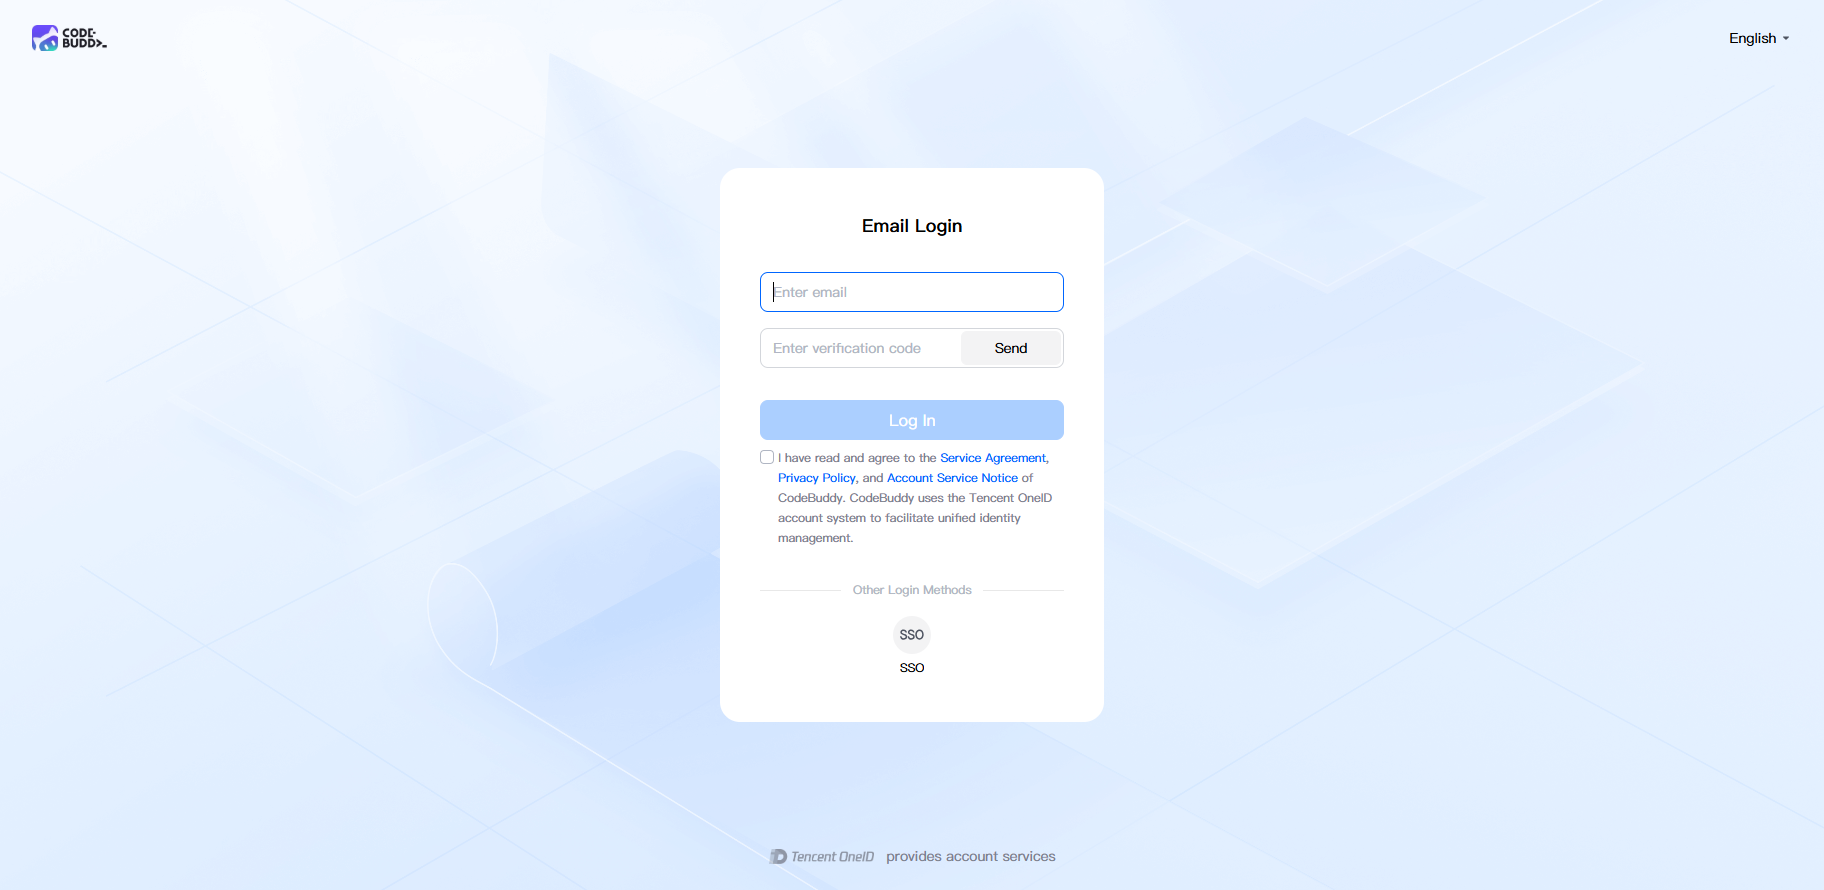
After you click Log in with Tencent OneID, the page redirects to the Tencent Unified Identity login page. Enter your email and click Get Captcha. Enter the captcha you receive in your email and click Log In.
Step 5: Launch the Browser and Open the Client
After authentication is successful, the browser displays a confirmation dialog asking "Open WorkBuddy AI?". Click Open WorkBuddy AI. When you return to the browser page, you can see the login successful status. Click the green Open WorkBuddy button to launch the client again.
To log in with a different account, click Switch Account below the button.
Note:
It is recommended to select Always allow
www.workbuddy.ai to open links of this type in associated apps. The browser will no longer display this confirmation dialog during subsequent logins and will redirect you directly to the client.Step 6: Enter the Workspace
After the client redirects back, you will automatically enter the WorkBuddy main interface and can start using it. You can expand the account menu by clicking the avatar in the lower-left corner to view the following information:
Team: Displays the subscription plan associated with the current account. If a Team Plan has been purchased, it shows the enterprise you belong to. Click it to switch enterprises.
Credits Balance: View the remaining credits for the current account.
Settings: Client settings and preferences.
Memory & Evolution: Manage memory and personalization capabilities.
Appearance: Switch between Light and Dark themes.
Help & Feedback / Check for Updates: Get help, provide feedback, and check for updates.
Sign out: Sign out of the current account.
2. Logging in to CodeBuddy IDE
CodeBuddy IDE is a standalone development tool designed for R&D scenarios. Its login process is the same as that of the WorkBuddy client, using browser authorization + redirect back to the client to complete authentication.
Step 1: Open CodeBuddy IDE and Click Sign in
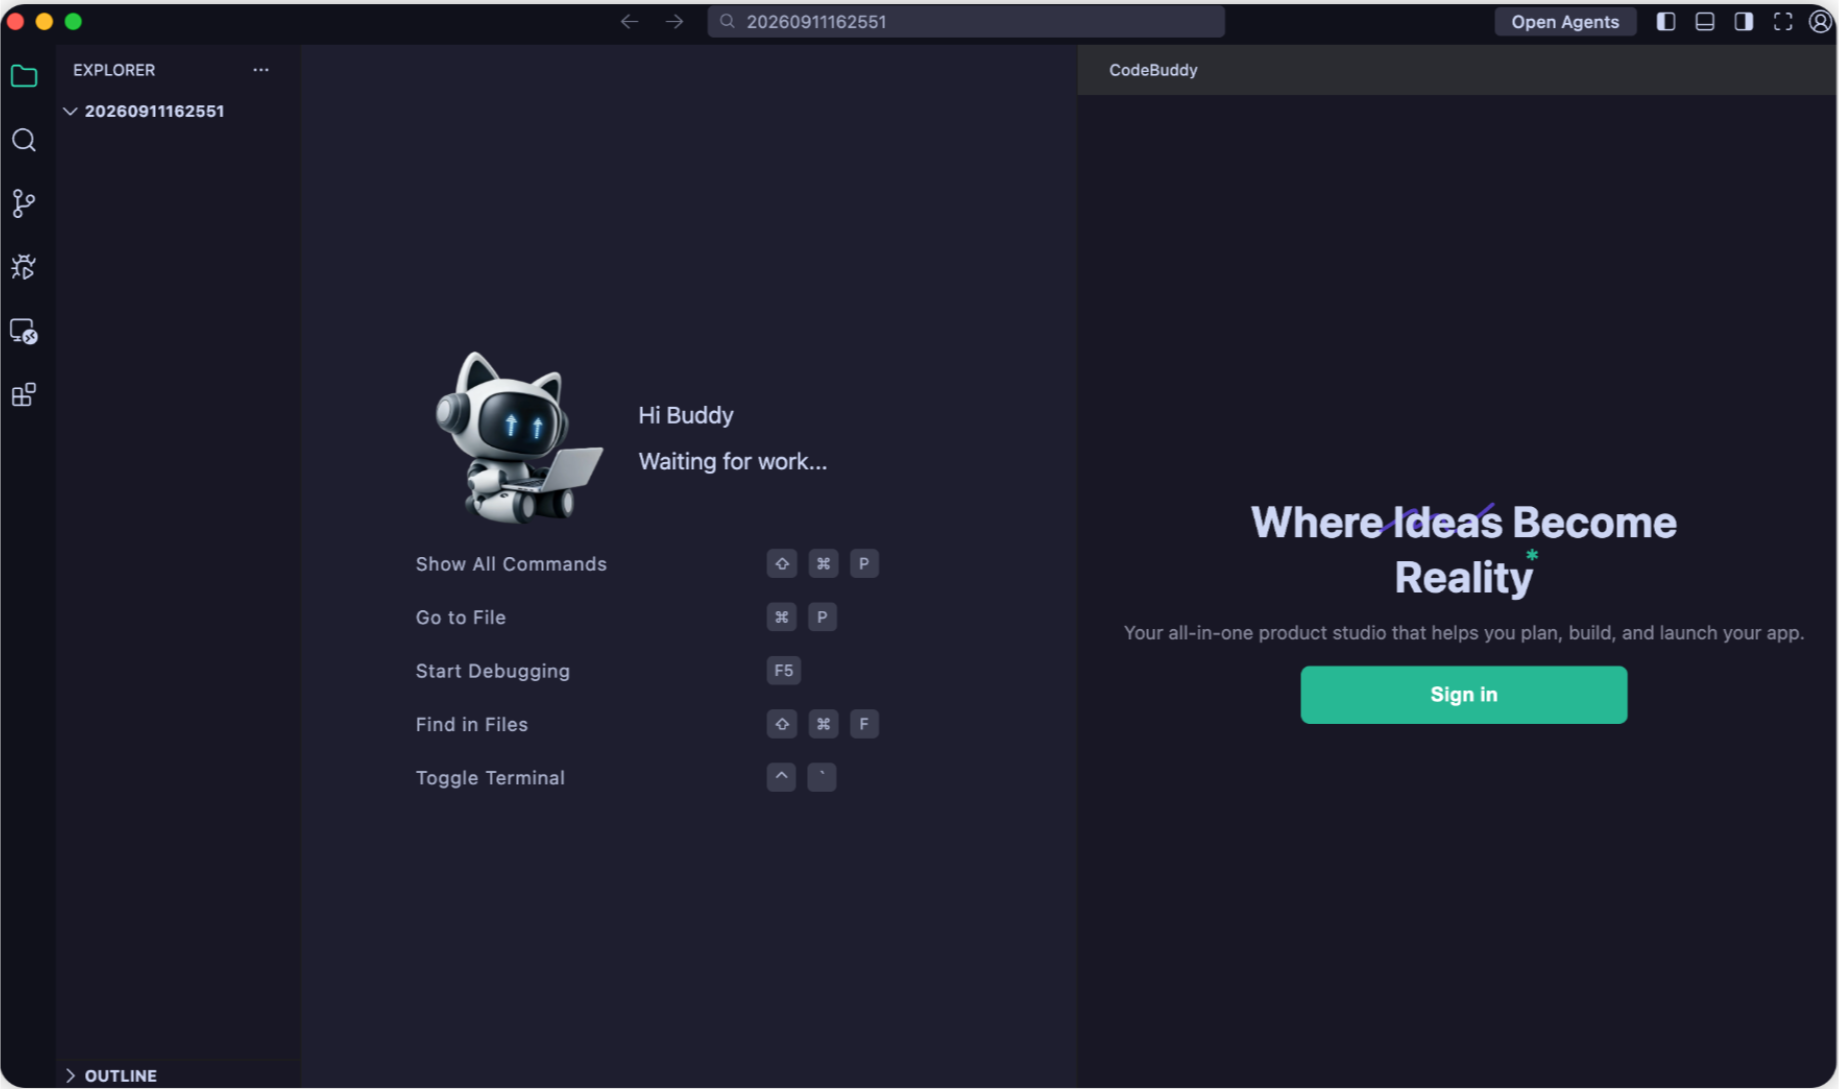
Launch CodeBuddy IDE. The CodeBuddy panel on the right displays the welcome message Where Ideas Become Reality. Click the green Sign in button to initiate login.
Step 2: Wait for the Browser to Launch Automatically
After you click Sign in, the IDE opens the CodeBuddy login page in the system's default browser, and the button changes to Cancel. To cancel the login, click Cancel.
Note:
If the browser does not open automatically after a long time, click Cancel and then click Sign in again. Alternatively, contact your enterprise administrator to confirm that client authorization has been completed for the account.
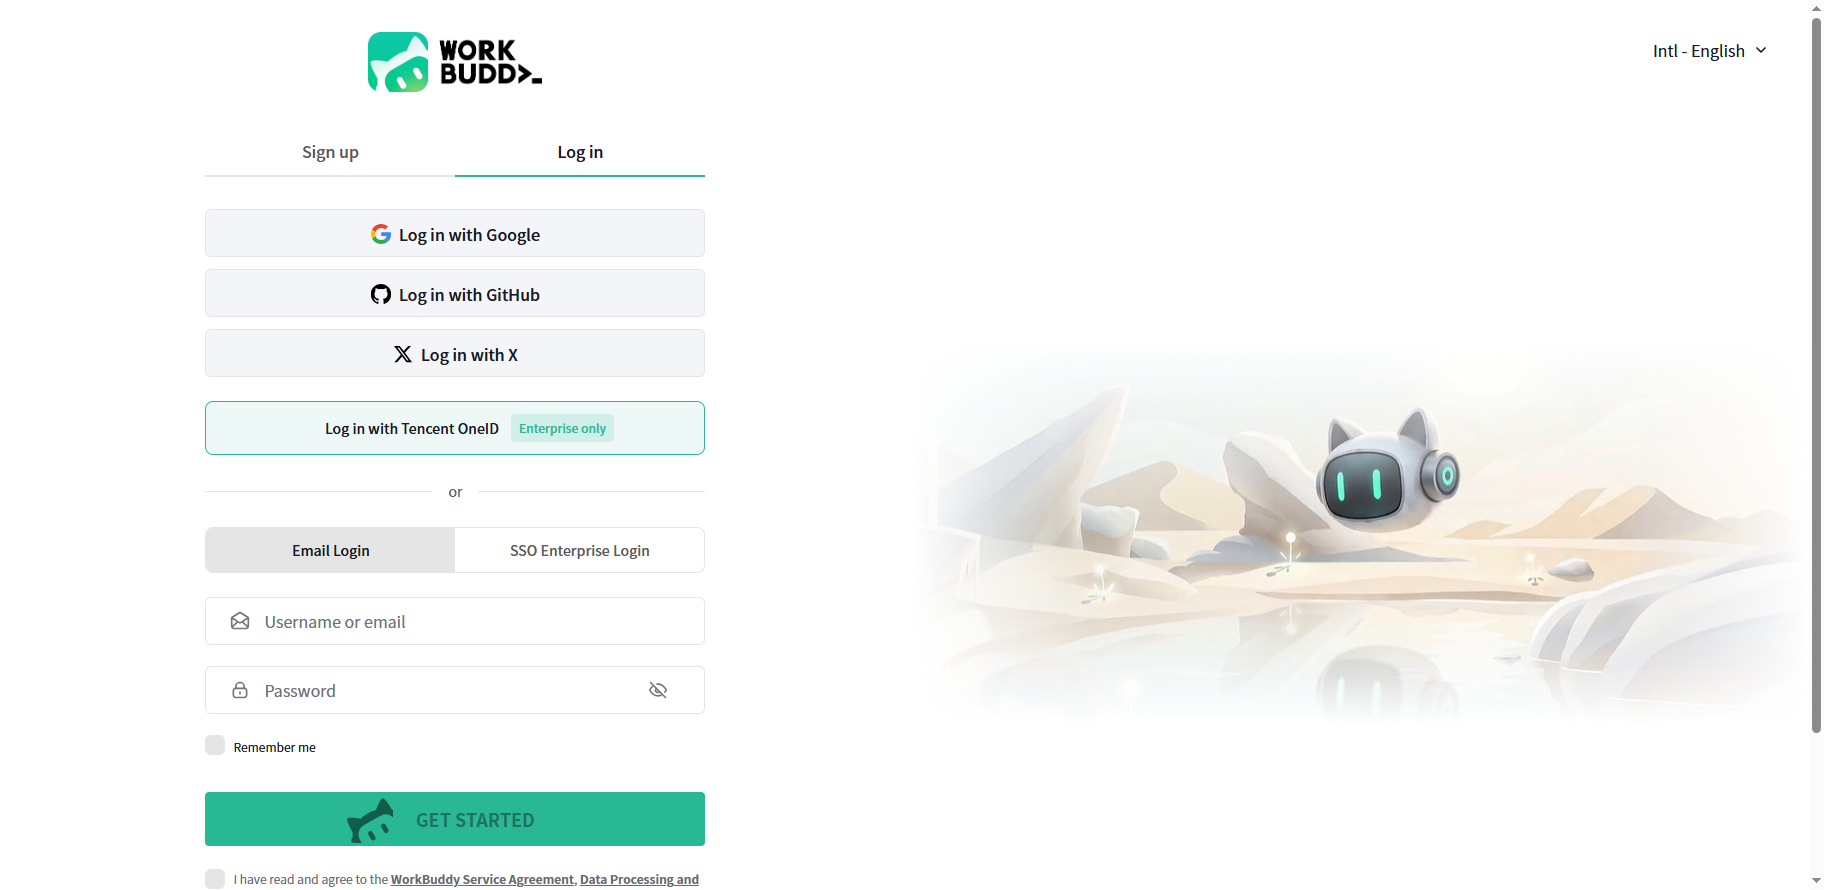
Step 3: Select a Login Method on the Web Page
After the browser opens the CodeBuddy login page, it stays on the Log In tab by default. The available login methods are the same as those on the WorkBuddy web client:
Third-party account login: Google, GitHub, and X.
Log in with Tencent OneID (enterprise users only): Recommended for enterprise users and integrated with admin console members.
Email login: Use your username or email + password. Select Remember me to keep your login session active.
SSO Enterprise Login: Use this method when your enterprise has configured an SSO authentication source.
Step 4: Complete Account Authentication (Using Tencent OneID as an Example)
After you click Log in with Tencent OneID, the page redirects to the Tencent Unified Identity login page. Enter your email and click Get Captcha. Enter the captcha you receive in your email and click Log In.
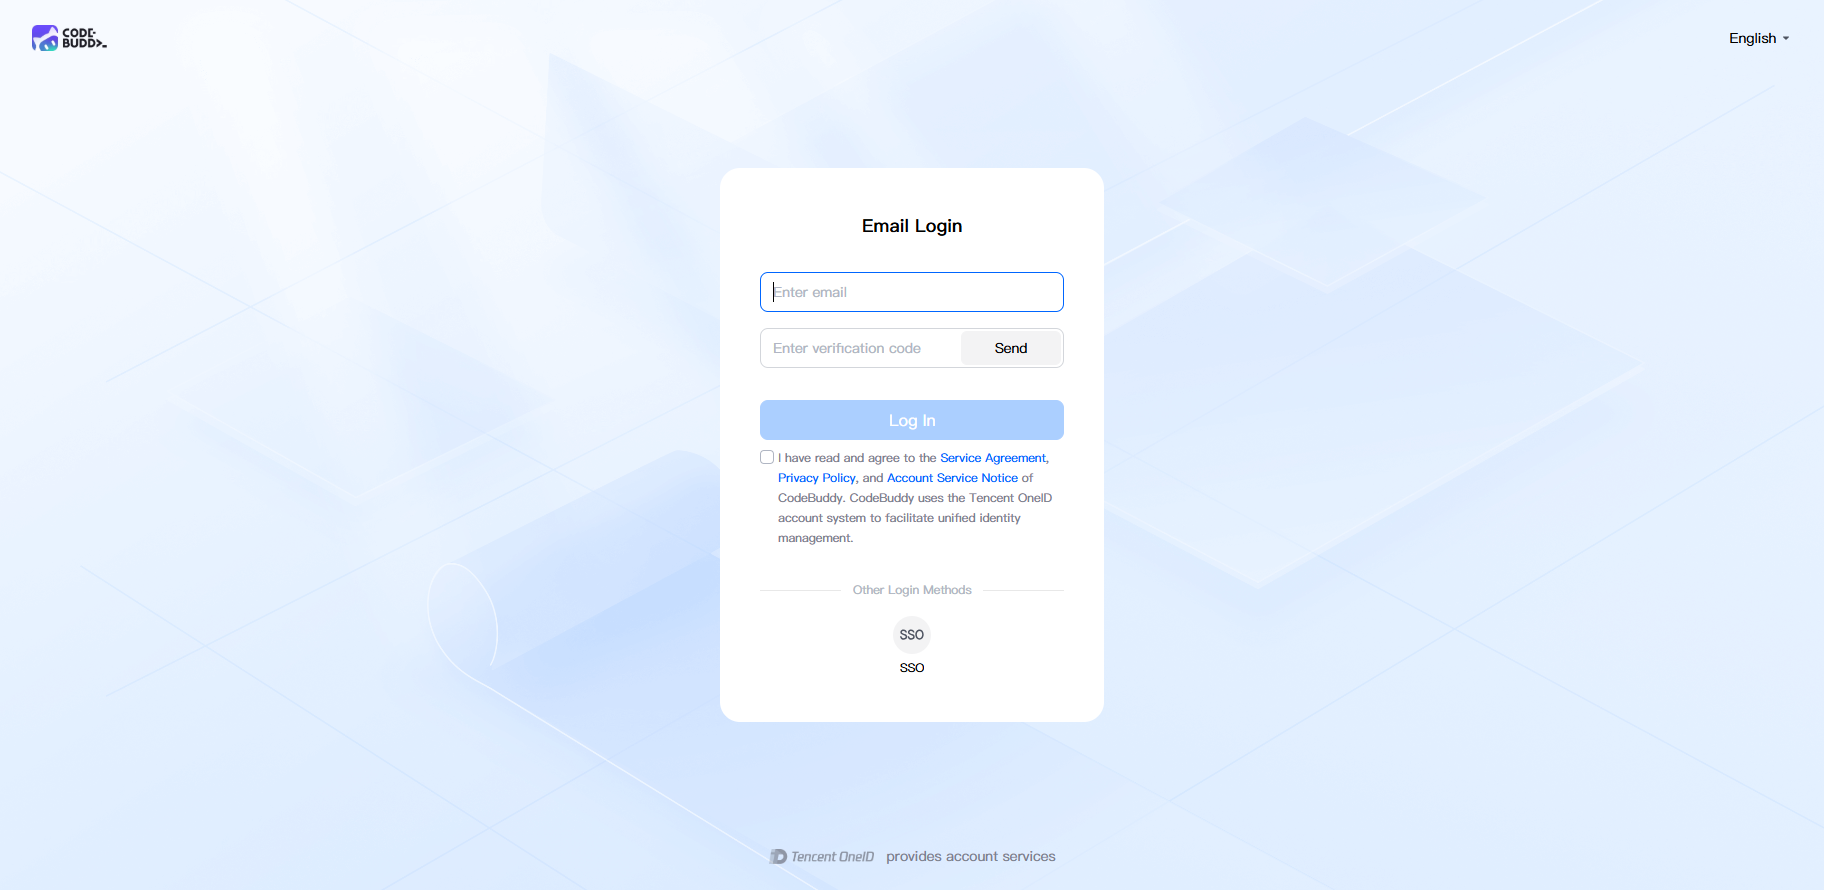
Step 5: Launch the Browser and Open CodeBuddy
After authentication is successful, the browser displays a confirmation dialog asking "Open CodeBuddy?". Click Open CodeBuddy. When you return to the browser page, you can see the login successful! status. Click the dark Open CodeBuddy AI button to launch the IDE again.
To switch accounts, click logout below the button to log out and then log in again.
Note:
It is recommended to select Always allow www.codebuddy.ai to open links of this type in associated apps. The browser will no longer display this confirmation dialog during subsequent logins and will redirect you directly to the IDE.
Step 6: Enter the IDE Workspace
After the IDE redirects back, the CodeBuddy panel on the right automatically switches to the New Chat page, where you can start using features such as AI Chat, Craft, and Skills:
The top tab New Chat starts a new conversation. The adjacent + / History / Settings / More icons are used for conversation management and personalized configuration.
The central information card Welcome to the world of vibe coding lists typical scenarios, such as rapid prototyping, Figma-to-code conversion, and building websites without a backend.
In the bottom input area, you can switch between and invoke Craft mode, the Auto model, and Skills.
3. Logging in to the CodeBuddy Plugin
The CodeBuddy plugin can be used directly in mainstream IDEs such as VS Code and JetBrains. The login process follows this flow: trigger from within the plugin → complete authentication in the browser → redirect back to the IDE. The following example uses VS Code, and the steps for JetBrains IDEs are essentially the same.
Step 1: Install the CodeBuddy Plugin
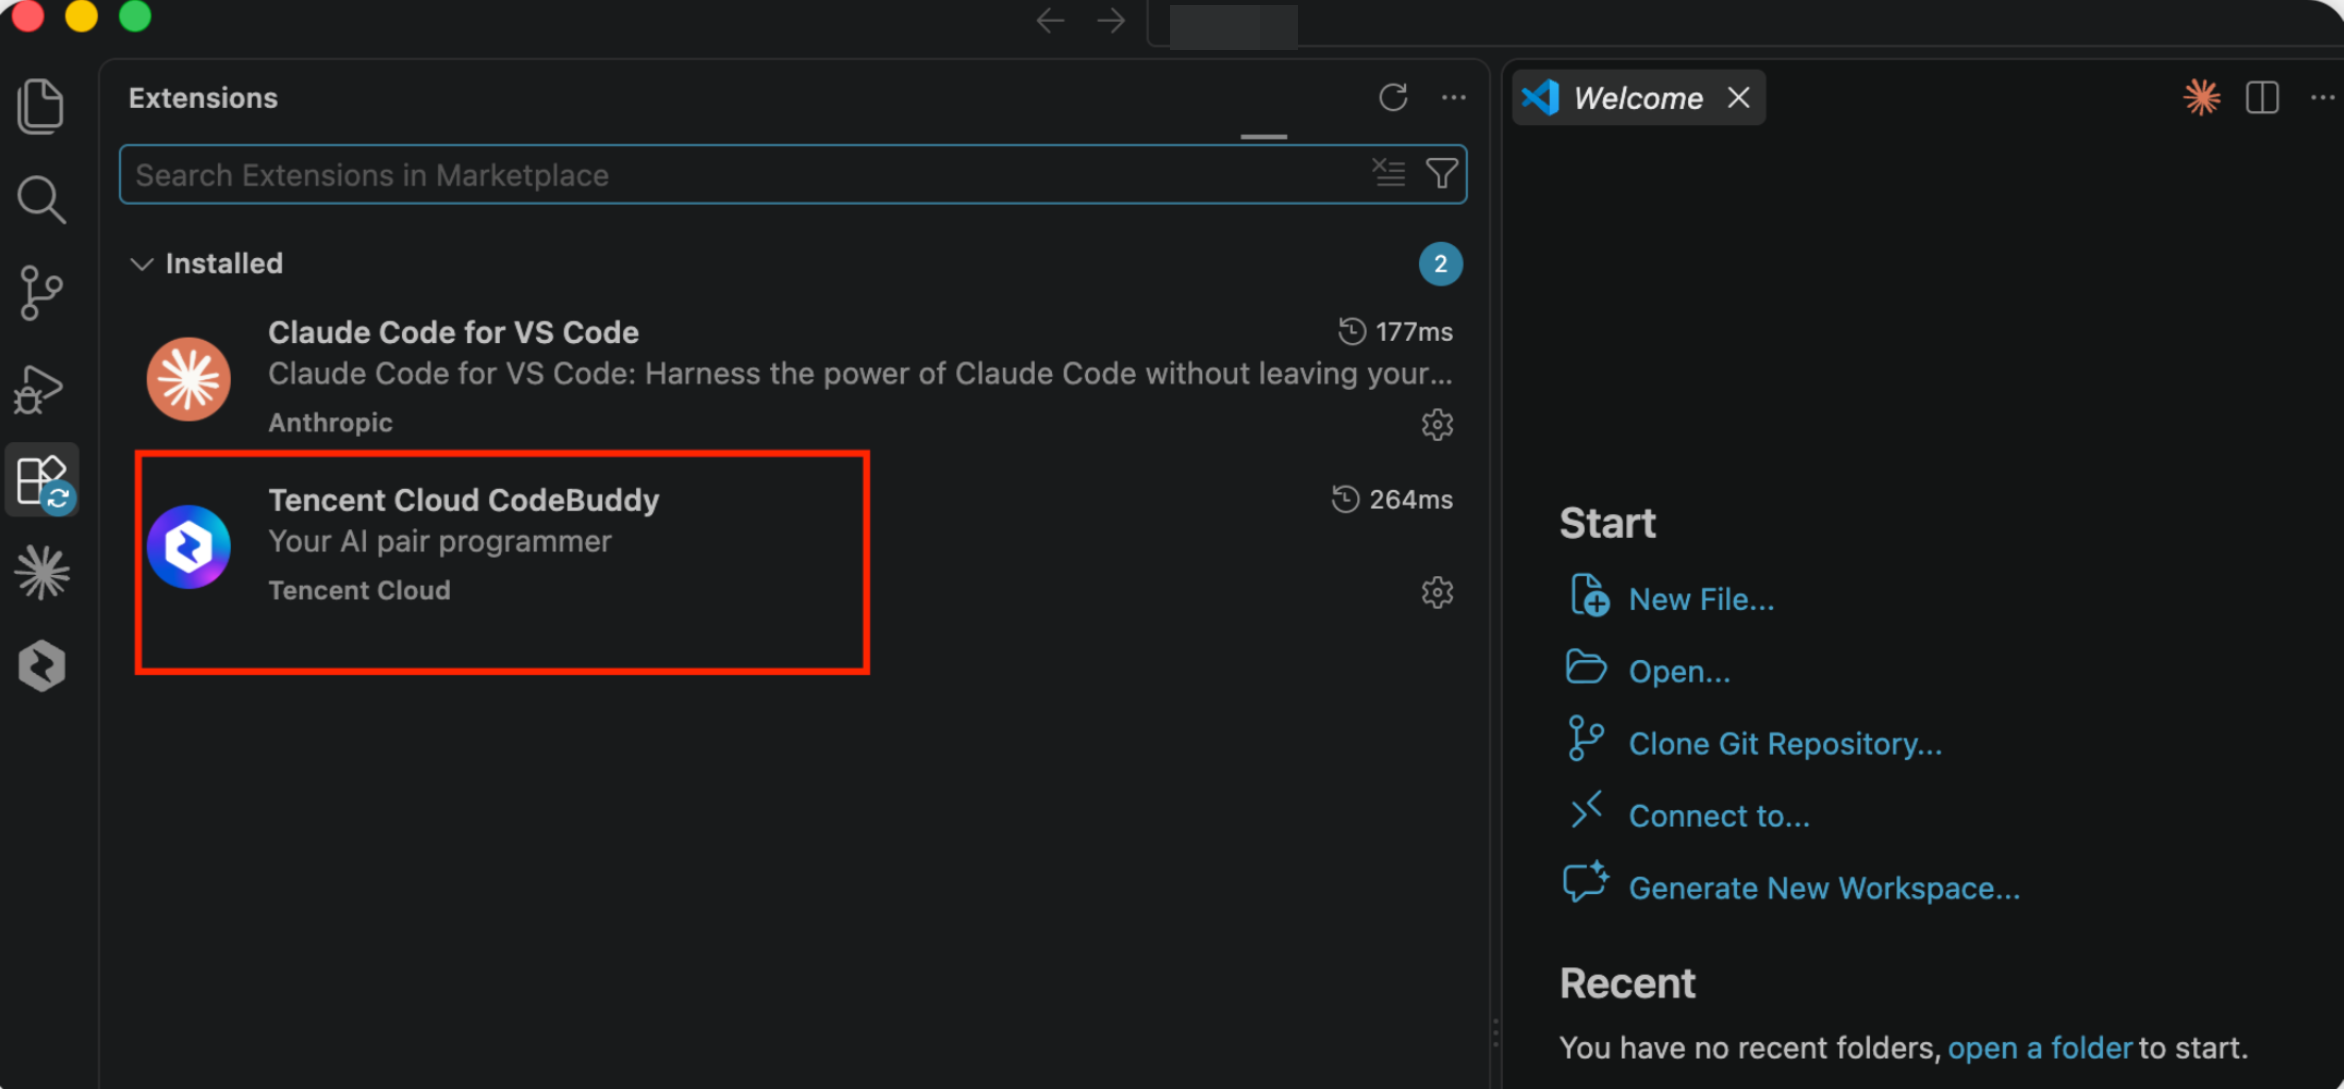
Open VS Code and go to the Extensions panel on the left. Search for Tencent Cloud CodeBuddy in the marketplace and click Install to complete the installation. After installation, you can see Tencent Cloud CodeBuddy - Your AI pair programmer in the Installed list.
Step 2: Open the CodeBuddy Panel and Select "International Site Login"
Click the CodeBuddy icon in the left sidebar of VS Code to open the plugin panel. Below the welcome message Where Ideas Become Reality, two login options are provided. Select the second one:
CodeBuddy China Site Account Sign In: Sign in with a China site account.
CodeBuddy International Site Account Sign In (recommended for overseas enterprise users): Sign in with an international site account, which is integrated with WorkBuddy Enterprise admin console members.
Note:
Overseas enterprise members must select International Site Account Sign In. If they mistakenly select China Site, they will be unable to integrate with the enterprise Team Plan.
Step 3: Allow VS Code to Open External Login Links
After you click the international site sign-in, VS Code displays a confirmation dialog "Do you want Code to open the external website?" and shows the login URL
https://www.codebuddy.ai/login?.... Click Open to open the URL in your default browser.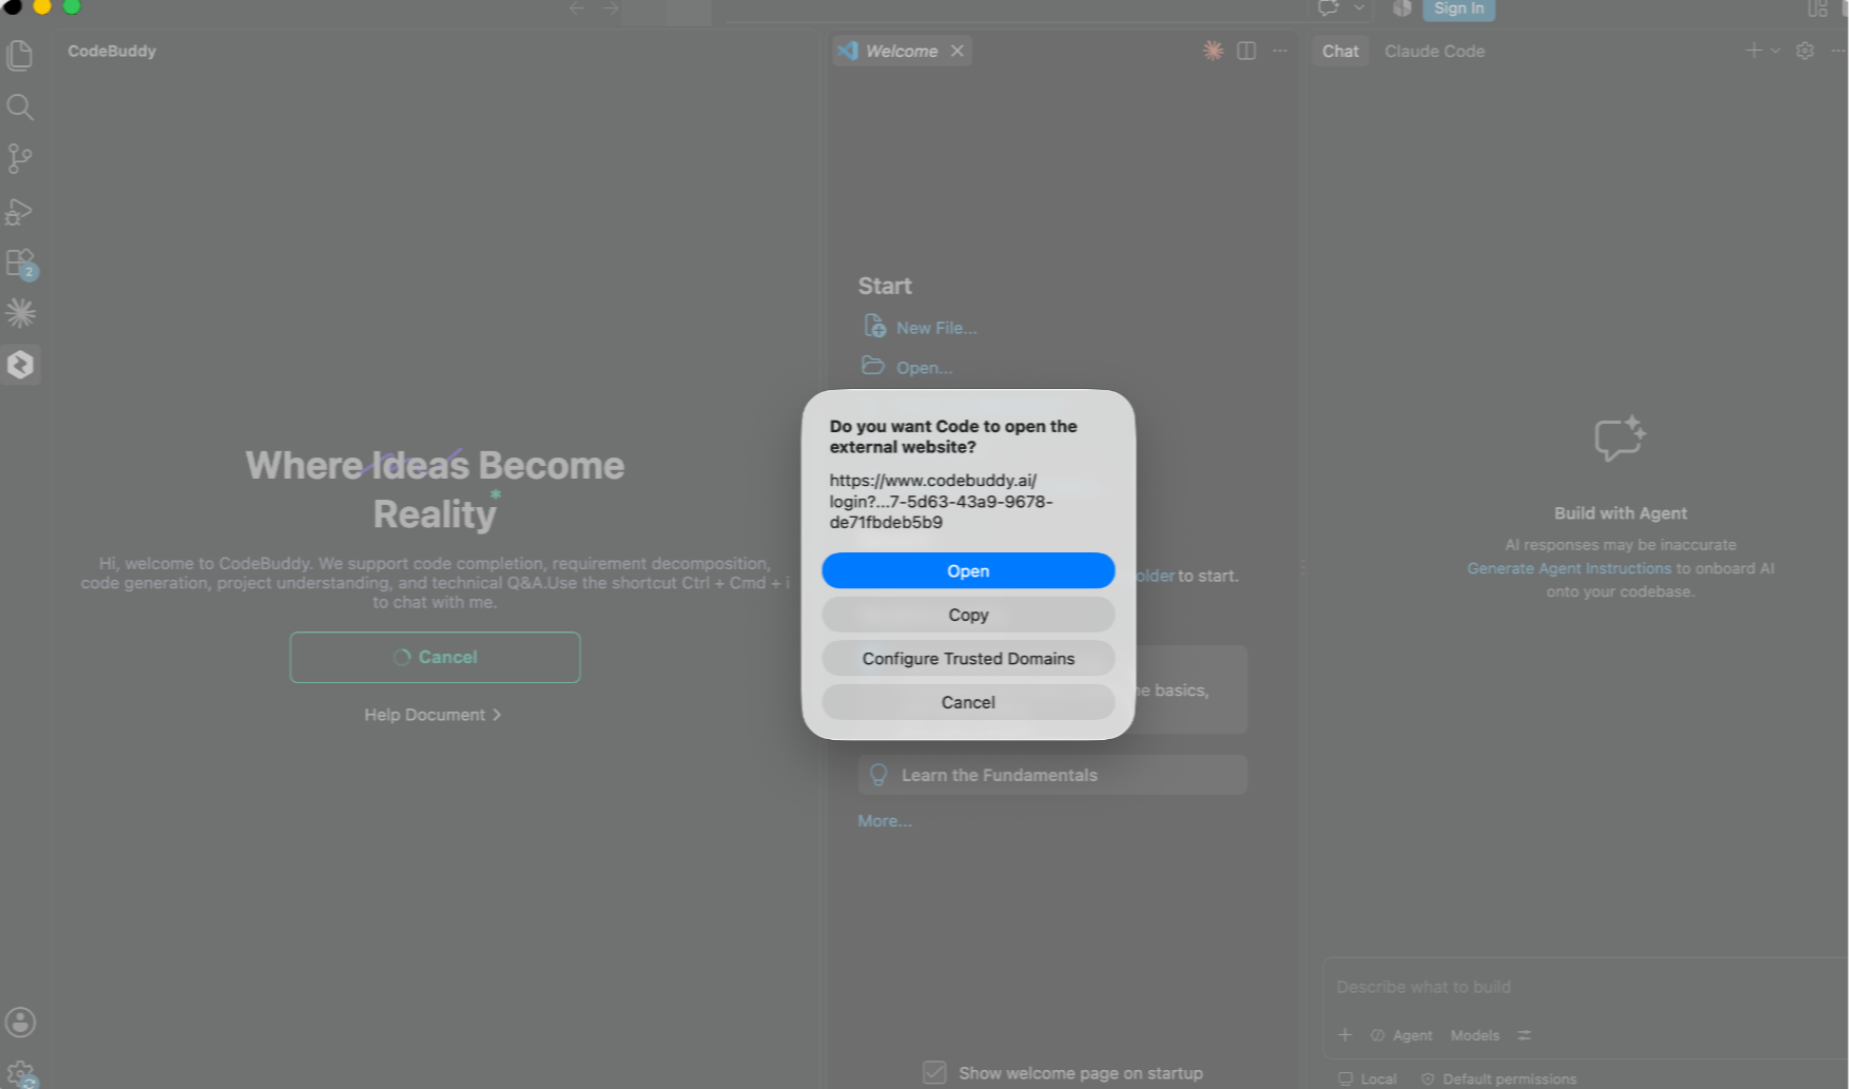
Note:
Purpose of other buttons in the dialog:
Copy: Copy the link only without opening the browser. This is suitable when the browser is already on another device.
Configure Trusted Domains: Add
codebuddy.ai to the trusted domains in VS Code to prevent future pop-ups.Cancel: Cancel this sign-in.
Step 4: Complete Login on the Web and Launch VS Code
After the browser opens the CodeBuddy web login page, select an appropriate login method to complete authentication. For details, see steps 3-4 in 2. CodeBuddy IDE Login earlier in this document. After authentication is successful, the browser displays a confirmation dialog asking "Open Visual Studio Code?". Click Open Visual Studio Code.
When you return to the browser page, you can see the login successful! status. Click the Open CodeBuddy AI button to launch VS Code again.
Note:
It is recommended to select Always allow www.codebuddy.ai to open links of this type in associated apps. The browser will no longer display this confirmation dialog during subsequent logins.
Step 5: Return to VS Code to Confirm Login Status
After returning to VS Code, you can verify whether the login was successful in the following locations:
Status bar in the lower-right corner: A Successfully signed in. message appears, indicating that login is complete.
Gear icon in the lower-right corner: Click it to open the feature menu, where you can view items such as Auto Completions, Check for updates, and Product feedback. At the bottom is Sign out, which you can use to log out of the current account.
CodeBuddy panel: The welcome message changes to Build with CodeBuddy, indicating that you can start interactions such as New Chat, Craft, and Skills.
Note:
If the status bar shows "Your enterprise license has expired. Please contact your administrator.", the enterprise license for the current account has expired. Contact your enterprise administrator to renew or reassign the license in "Subscription & Usage > Subscription Management" in the admin console.
4. Logging in to CodeBuddy CLI
CodeBuddy Code (CLI) is a command-line AI coding assistant. Overseas enterprise users complete authentication through the International Site. The following steps are condensed from the CodeBuddy CLI Quick Start, focusing on the login process.
Step 1: Prepare the Environment
Before installing the CLI, confirm that your machine meets the following requirements:
Node.js: 18.20 or later (not required for the native installer).
Operating system: macOS, Linux, or Windows.
Verification environment:
node --version # Should display v18.0.0 or laternpm --version
Step 2: Install CodeBuddy CLI
Choose one of the following installation methods:
Method 1: Global installation via npm (Recommended)
npm install -g @tencent-ai/codebuddy-code
Method 2: Native installer (Beta, no Node.js required)
# macOS / Linuxcurl -fsSL https://copilot.tencent.com/cli/install.sh | bash# Windows(PowerShell)irm https://copilot.tencent.com/cli/install.ps1 | iex
Verify the installation:
codebuddy --version
Step 3: Start and Go to Login Method Selection
Run the following command from any terminal directory:
codebuddy
On first launch, a panel for selecting a login method is displayed:
Select login method:Log in via Chinese Site› Log in via International SiteLog in via Enterprise DomainLog in via iOA (Tencent only)
Login method description:
Login Method | Scenario |
Chinese Site | Domestic users authenticate through the Tencent Cloud China site ( copilot.tencent.com), which supports mainstream domestic models. |
International Site (Recommended for Overseas Enterprises) | Overseas users authenticate through the Tencent Cloud International site ( codebuddy.ai), which supports mainstream overseas models and integrates with WorkBuddy Enterprise admin console members. |
Enterprise Domain | Dedicated / private deployment, connect to the enterprise dedicated or self-hosted CodeBuddy service; enter the service address provided by the enterprise. |
iOA (Tencent only) | Tencent internal employees authenticate through the iOA zero trust system. This method is available to Tencent internal employees only. |
Step 4: Select "International Site" to Complete Authentication
Use the
↑↓ keys to select Log in via International Site. After you press Enter to confirm, the CLI automatically opens your default browser and redirects to codebuddy.ai/login for account authentication.The web login methods are the same as described earlier (Google / GitHub / X / Tencent OneID (enterprise users only) / Email / SSO Enterprise Login). Enterprise users outside China are recommended to use Tencent OneID or SSO Enterprise Login. After authentication succeeds, the browser returns a login success page, and the CLI automatically writes the token back.
Note:
If the browser does not open automatically, the CLI outputs a login link in the terminal, which you can manually copy to your browser to complete authentication.
The CLI saves the credentials in the local user directory. You do not need to log in again when running
codebuddy on the same machine.Step 5: Confirm Successful Login and Start a Conversation
Return to the terminal. When the CLI displays the welcome page, you can start using it:
CodeBuddy Code v1.0.0Enter /help to view available commands.Start a conversation and let AI become your coding partner.>
Common follow-up operations:
/init: initializes the project context. Strongly recommended to run this when you first enter a project, as it can significantly reduce subsequent Token consumption and improve response accuracy./help: View all available commands./config: Set preferences such as the default response language.Note:
In one-shot command mode (
codebuddy -p "..."), you must add -y (or --dangerously-skip-permissions) to perform authorized operations such as accessing files or running commands. To skip all confirmations in CI or sandbox environments, see the sandbox full pass instructions in the official documentation.References
Members and Departments: How Administrators Grant Members Client Access Permissions
Organization Structure Sync: Sync organization data from OneID.
Organization Overview: Quick Start 03 "Log in to an Enterprise Account"
If you encounter any issues during use, contact your dedicated enterprise service manager or submit a ticket to obtain technical support.
피드백