Plan Mode
Download
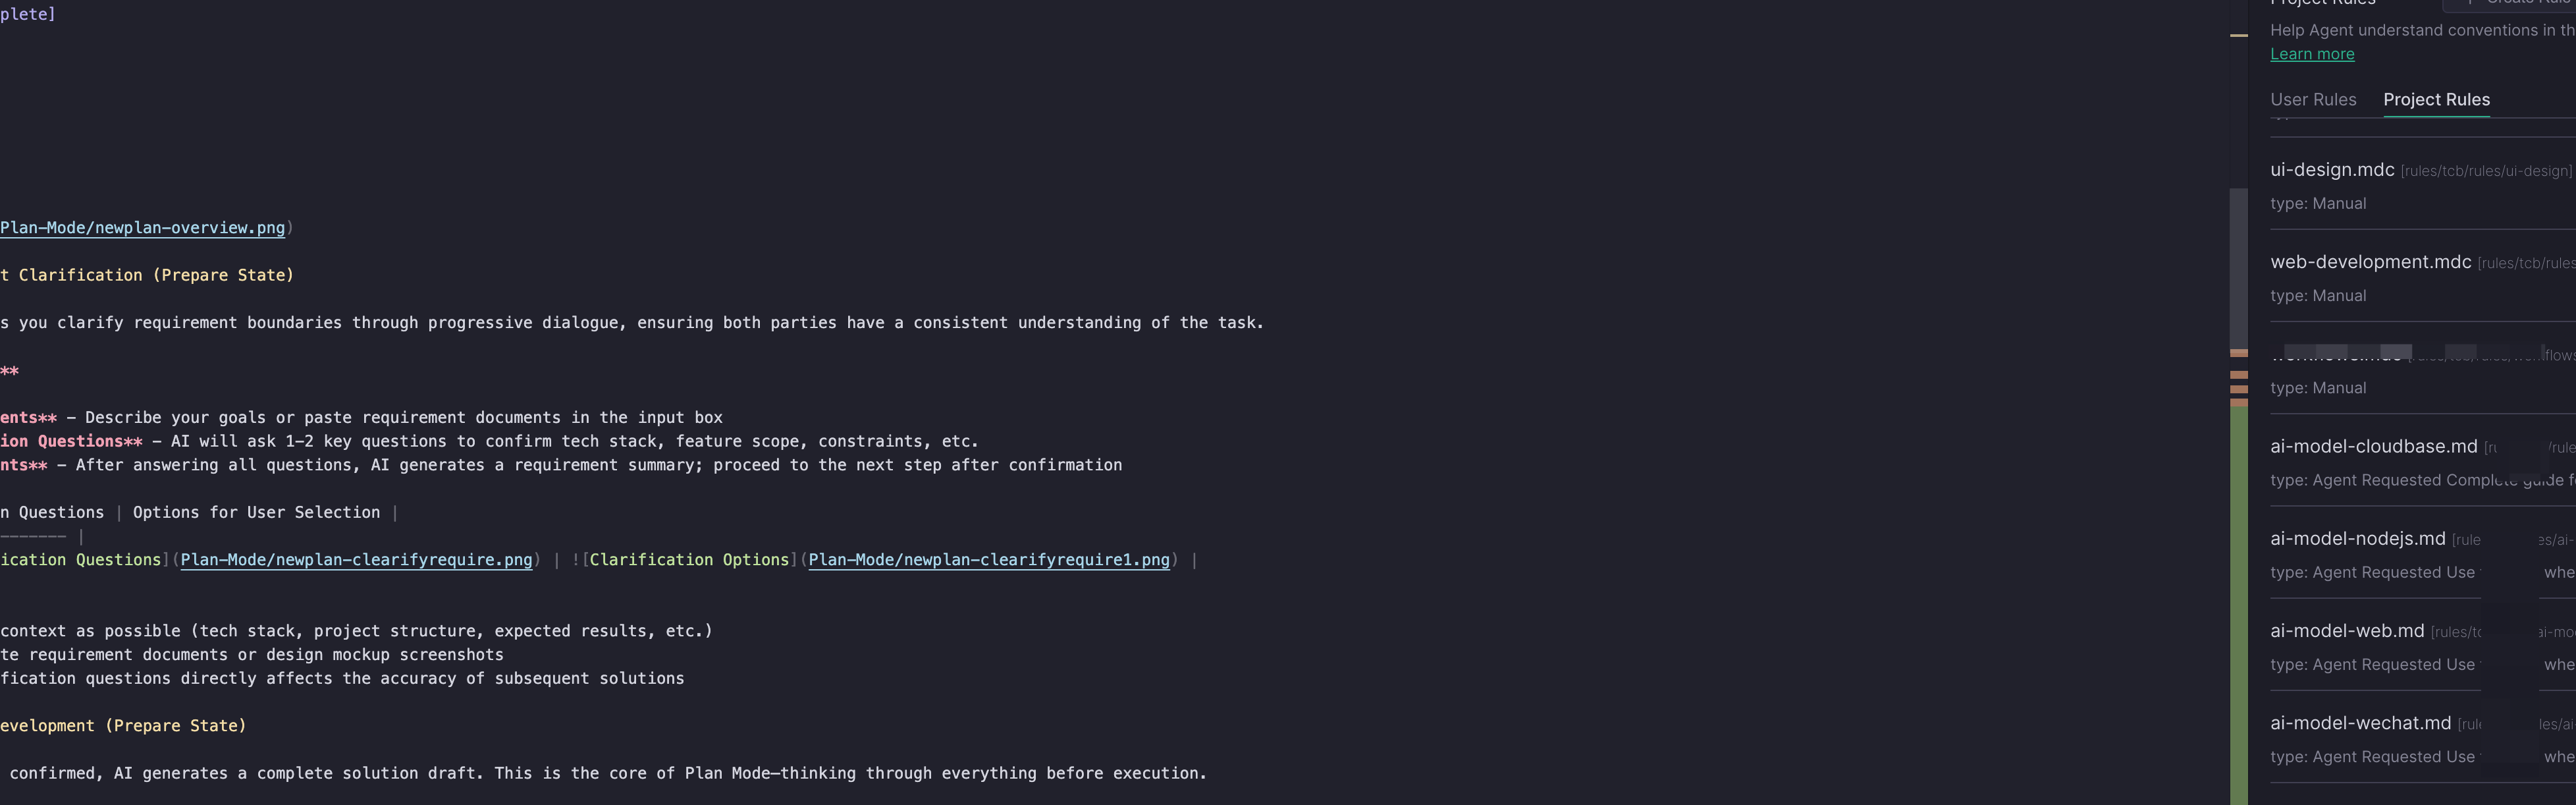
Focus Mode
Font Size
Introduction
Plan Mode is committed to making the "plan" itself a first-class citizen in the development workflow: complete requirement clarification, solution design, task decomposition, and execution collaboration within the IDE without switching between multiple tools. Plan weaves capabilities such as MCP, Skill, and SubAgent into a pluggable matrix through a lightweight, interactive AI collaboration approach, supporting both agile collaboration for small teams and customized governance for large-scale projects.
Why Choose Plan
Challenges of Traditional AI Assistants
Imagine a familiar scenario:
You are developing a feature and say to the AI assistant, "Help me implement a shopping cart that supports create, read, update, delete, and checkout." The AI starts working-it creates a file, writes some code, and then... it creates another file and writes some more code.
Ten minutes later, you find:
The data structure is designed strangely and does not align with your existing user system.
State management uses a library you have never used before.
Three files have completely inconsistent naming styles.
Your own MCP, Skill, SubAgent, and other components are not used as you expected.
Most critically, it missed the voucher feature.
What is the root cause of the problem? AI starts working immediately upon receiving instructions, without first aligning on requirements, breaking down tasks, or confirming the direction-a critical step is missing: planning.
Plan Mode Solution
CodeBuddy inserts a "planning" step between "understanding" and "execution"-before executing, it first clarifies what to do, how to do it, and how many steps to break it into.
Challenges | Traditional Mode | Plan Mode |
Execution Deviation | The implementation direction of AI does not match user expectations. | Align expectations during requirement clarification |
Uncontrollability | Users cannot predict what AI will do. | Plan preview for review before execution |
High Correction Cost | Each modification may introduce new issues. | Complete planning to avoid repeated modifications |
Context loss | In long conversations, AI gradually "forgets" its original intent. | Persistent plans with traceable states |
Plan Mode vs. Craft Mode: When to Use Which?
Plan and Craft are not an either-or choice, but two collaboration modes for different scenarios. Understanding their differences can double your development efficiency.
Dimension | Plan Mode | Craft Mode |
Working Mode | Plan first and execute later, with the approach defined before coding. | Execute directly and respond to commands quickly. |
Use Cases | Complex features, architectural design, and multi-file collaboration | Local modifications, single-file optimization, and Bug fixes |
Output Format | Complete plan (requirements + technology + design + tasks) | Direct code result |
Controllability | High - plan can be reviewed and adjusted before execution. | Medium - adjust while executing. |
Extensibility | Intelligent orchestration of MCP/Skill/SubAgent | Call extensions on demand. |
Typical scenarios for choosing Plan Mode:
New features are implemented from scratch - technical selection, architecture design, and implementation paths need to be clarified.
Multi-file collaborative modification - involves multiple modules and requires unified technical solution guidance.
UI/UX design and implementation - visual style and interaction logic need to be designed before coding.
Legacy project modernization - requires understanding the existing architecture to ensure new features comply with project standards.
Complex task breakdown - large requirements need to be decomposed into executable steps.
Typical scenarios for choosing Craft Mode:
Quick Bug fixes - the problem is clear and needs to be quickly located and fixed.
Single-file local adjustments - when the scope of changes is small, direct execution is more efficient.
Code refactoring and optimization - improve existing code.
Code explanation and understanding - requires understanding the purpose of a piece of code.
Core values of Plan Mode:
1. Planning Accuracy - Ensure that AI truly understands your needs through progressive clarification conversations.
2. Solution Comprehensiveness - Output a complete solution that includes requirements analysis, technical architecture, visual design, and task breakdown.
3. Execution Controllability - You can review and adjust the plan before code generation to avoid later refactoring.
4. Extensibility and Collaboration - Intelligently orchestrate extension capabilities such as MCP, Skill, and SubAgent to generate tailored solutions.
5. Knowledge Reusability - The completed Plan is saved as Markdown and can be reused as a project knowledge base.
Entering and Selecting Plan Mode
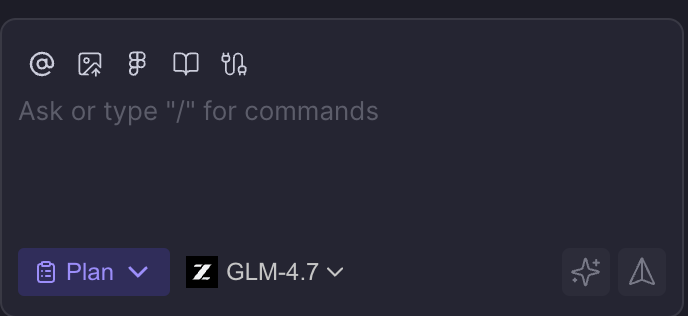
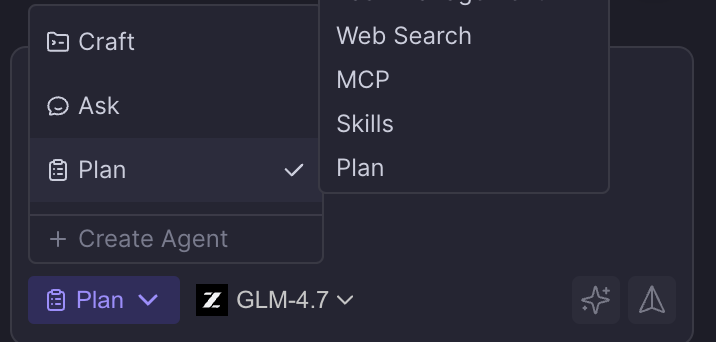
1. Open the sidebar and select Plan Mode.
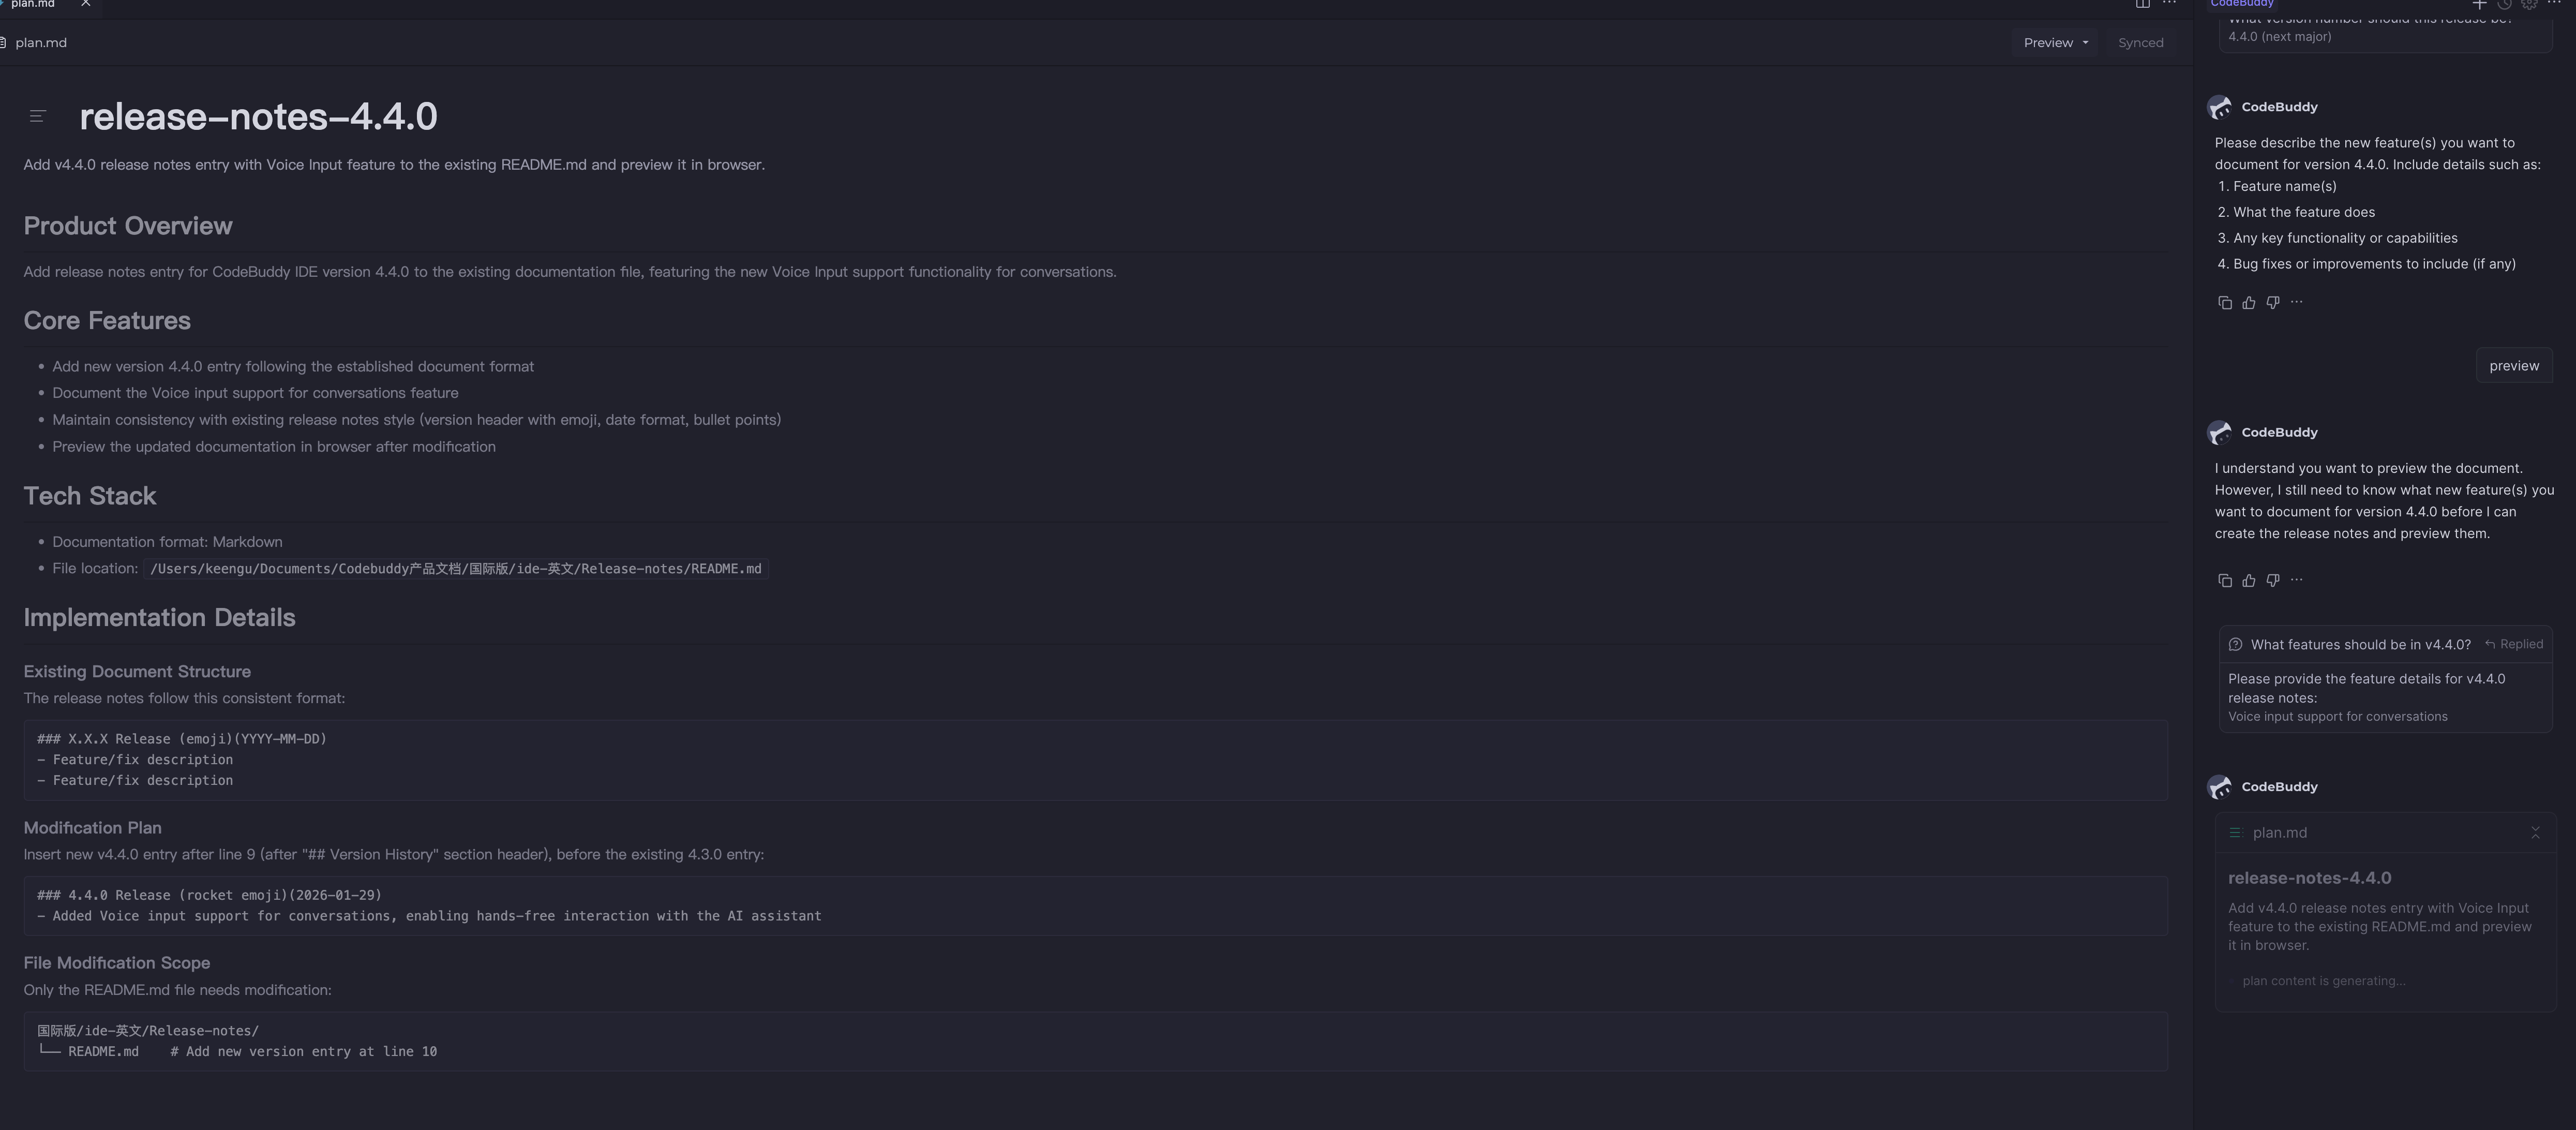
2. You can view the list of saved plans or create a new plan from the entry point.
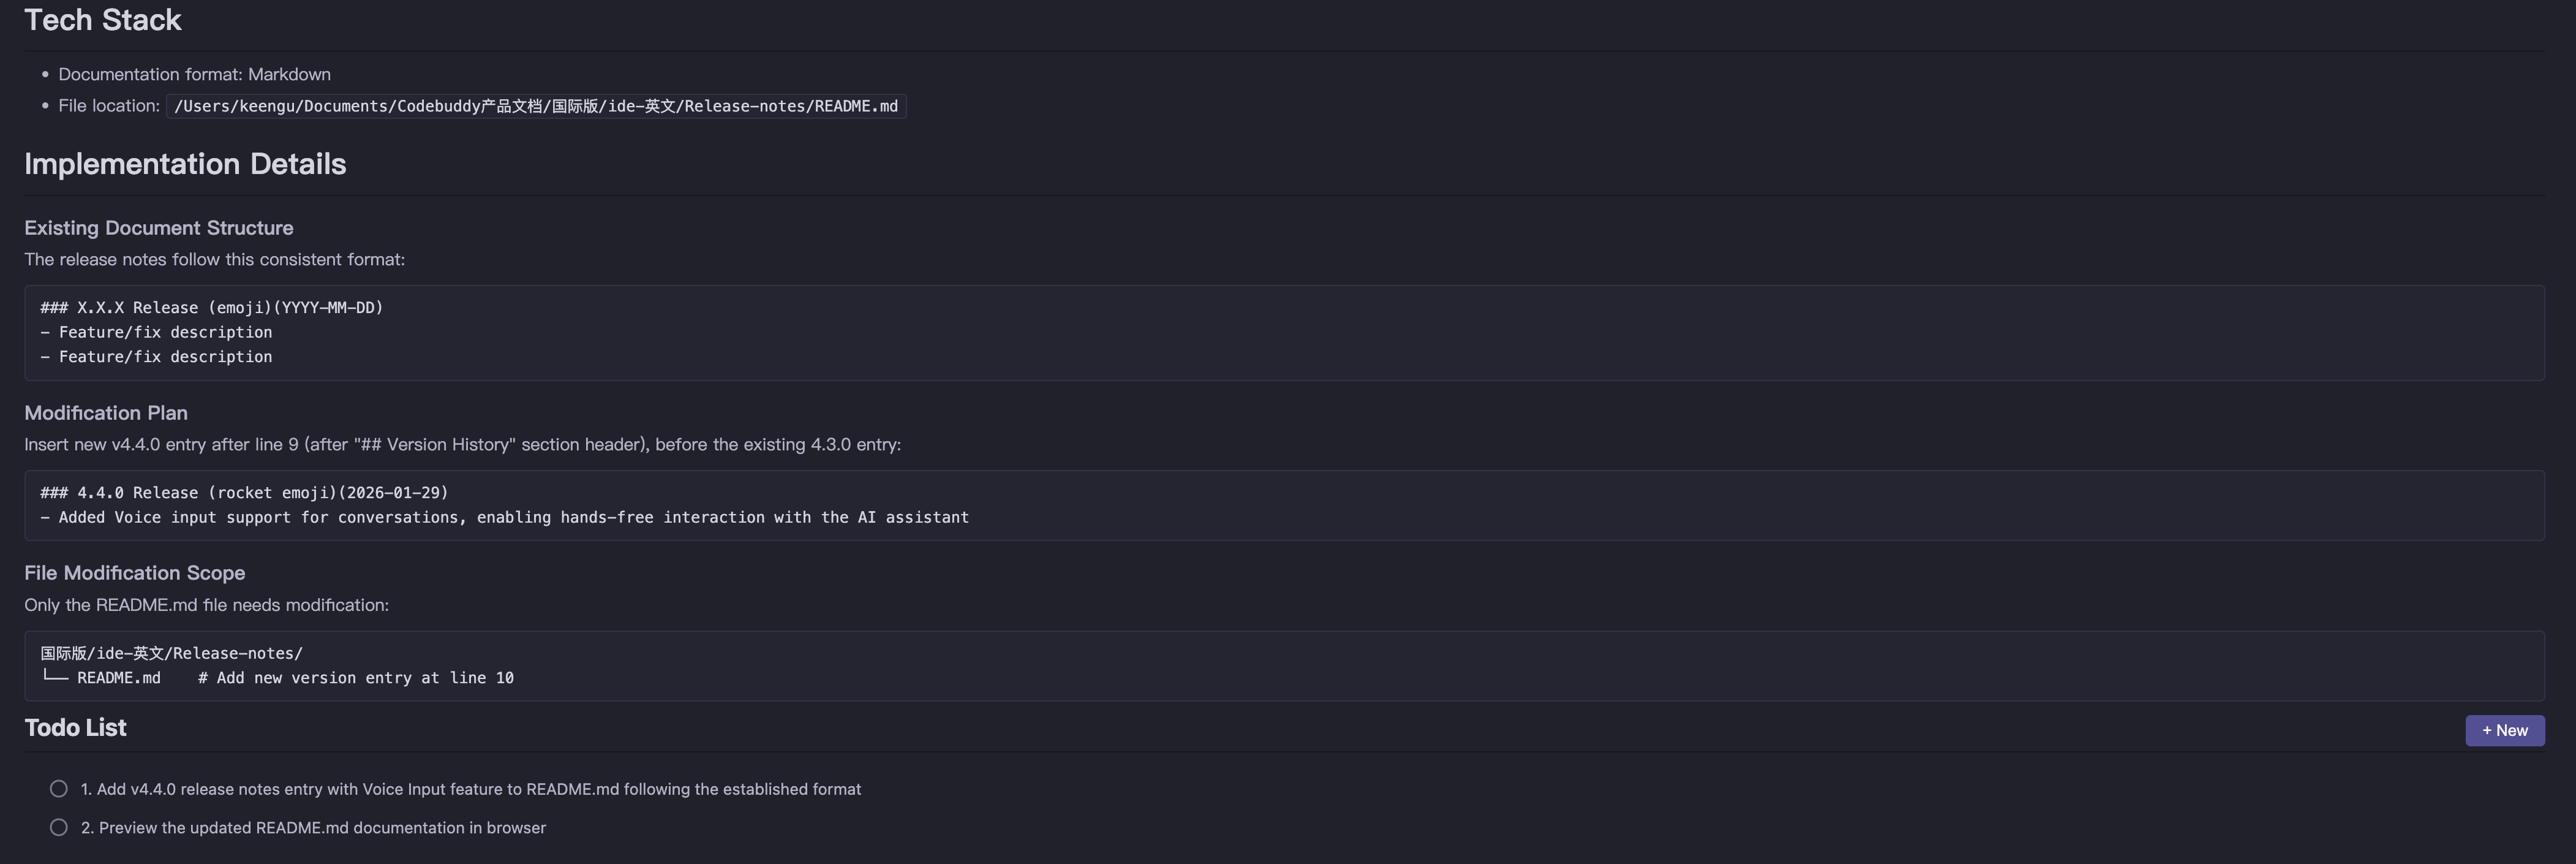
3. If a project plan already exists, you can open it directly. Unfinished plans retain context and execution progress.
Select Plan Mode | New Plan Entry |
 |  |
Plan Overview |
 |
Usage: The Five-Step Lifecycle of Plan
Plan breaks down a collaborative process into five stages, each supporting human-AI collaboration and image prompts to help you complete the full loop from idea to implementation within the IDE.
flowchart LRA[Requirement Clarification] --> B[Solution Design]B --> C[Plan Editing/Confirmation]C --> D[Plan Implementation]D --> E[Plan Completion]style A fill:#e6f3ffstyle B fill:#fff3e6style C fill:#e6ffe6style D fill:#ffe6e6style E fill:#f3e6ff
Step 1: Requirement Clarification (Prepare Status)
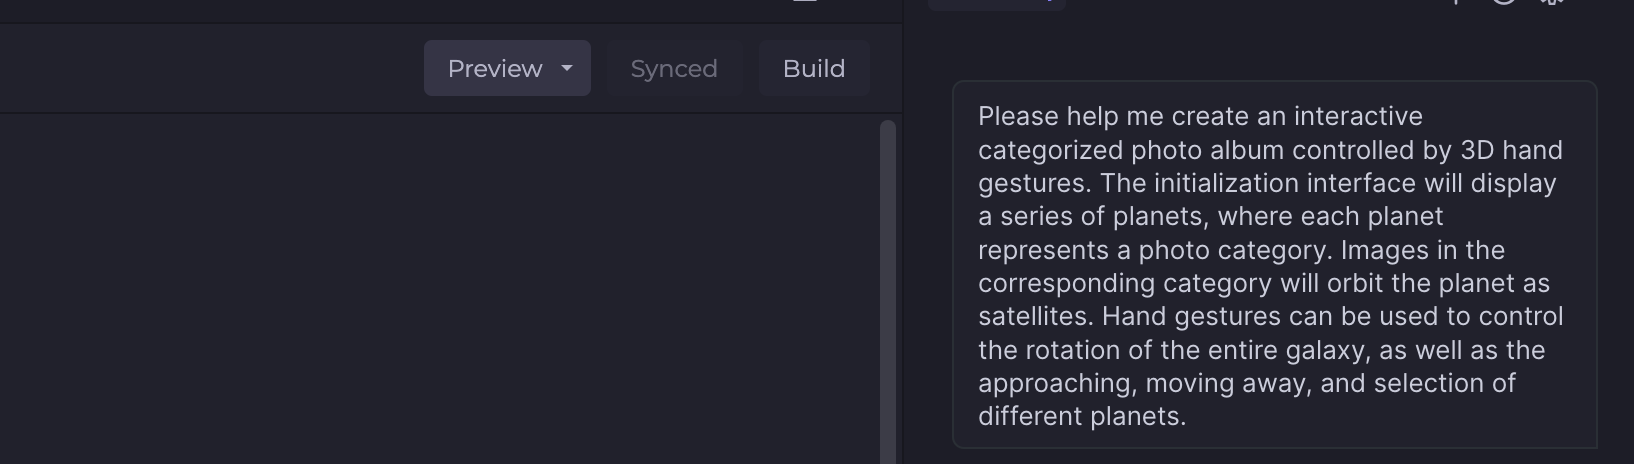
At this stage, AI helps you clarify requirement boundaries through progressive conversations, ensuring that both parties have a consistent understanding of the task.
Specific operations:
1. Describe requirements - Describe your goals or paste a requirements document in the input box.
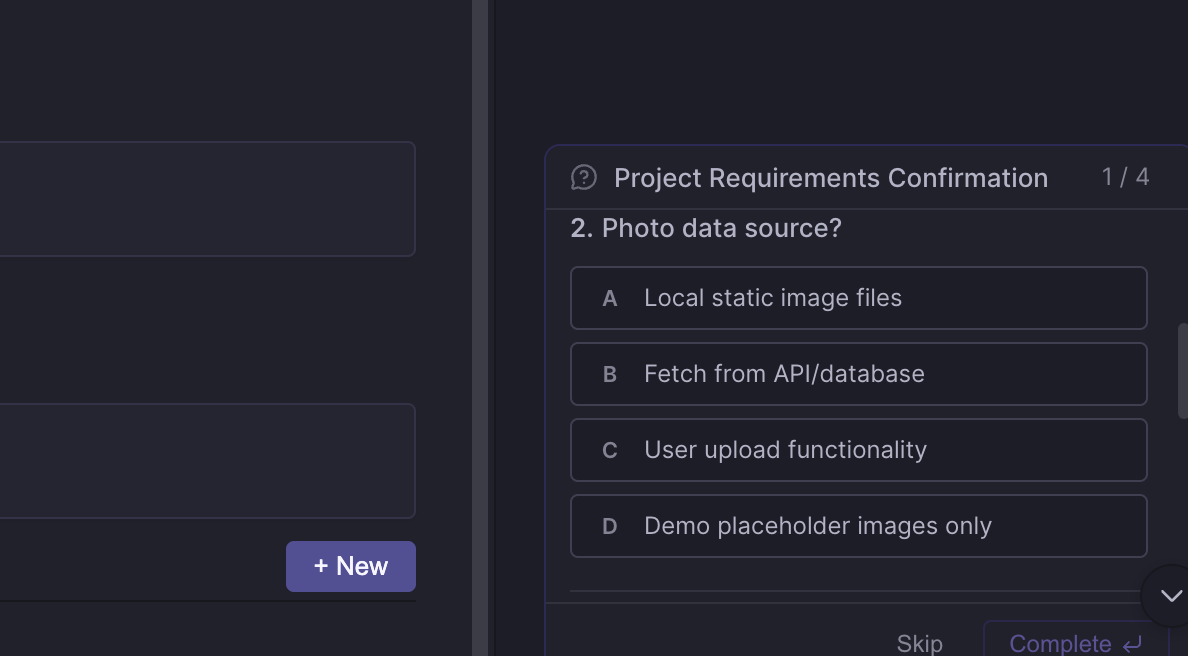
2. Answer clarification questions - The AI will ask 1-2 key questions to confirm the technology stack, feature scope, limitations, and other details.
3. Confirm requirements - After you answer all questions, the AI generates a requirements summary. After confirmation, proceed to the next step.
AI Raises Clarifying Questions | Provide Options for User Selection |
 |  |
Tip:
Provide as much specific context as possible, such as the technology stack, project structure, and expected outcomes.
You can directly paste a requirements document or a design draft screenshot.
The quality of clarifying questions directly affects the accuracy of the subsequent plan.
Step 2: Solution Design (Prepare Status)
After requirements are confirmed, the AI generates a complete draft plan. This is the core of Plan Mode: think everything through before execution.
Plan generation process:
Based on the task requirements you provide, Plan first gives an implementation outline, then searches the existing project for relevant code, designs, and documents to generate a draft plan.
What the plan includes:
Module | Description |
Requirements analysis | Extract core values, feature boundaries, and expected outputs. |
Technical scheme | Technology selection, architecture design, key components, and data flows |
Visual design | UI style, interaction logic, and color scheme (if applicable) |
Task list | Executable step list with dependencies and priorities indicated |
Extensibility | Recommended MCP/Skill/SubAgent and their purposes |
The AI intelligently orchestrates your extended capabilities:
Analyze task requirements and automatically match appropriate MCPs, Skills, and SubAgents.
In the plan, describe the purpose and expected output of each extension.
Avoid hallucinated calls and use only the extensions you have configured.
Step 3: Solution Editing/Confirmation (Ready Status)
After the plan is generated, you can review, edit, and confirm it. This is a key step for "predictability before execution": correct the direction before code generation to avoid later refactoring.
Editable content:
Edit Type | Operation |
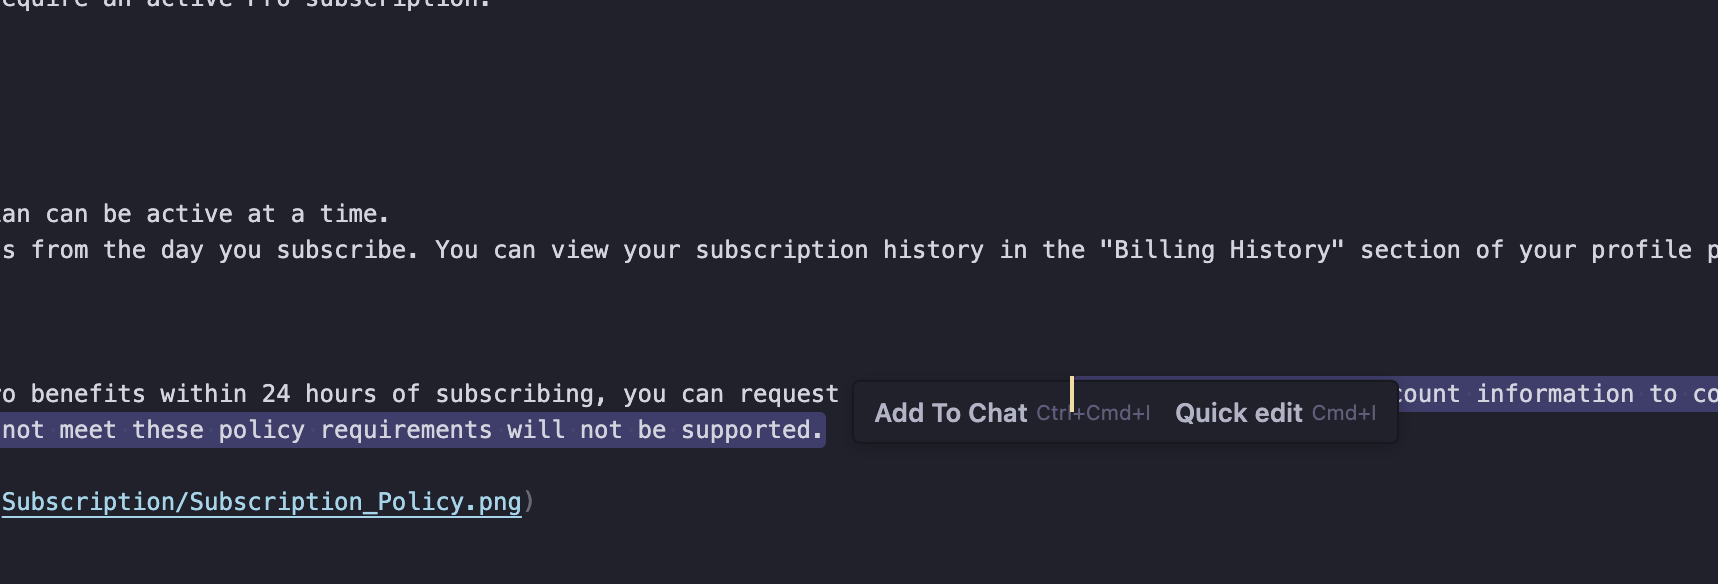
Body content | Adjust descriptions, supplement constraints, and add reference links. |
Technical scheme | Modify technology selection and adjust architecture design. |
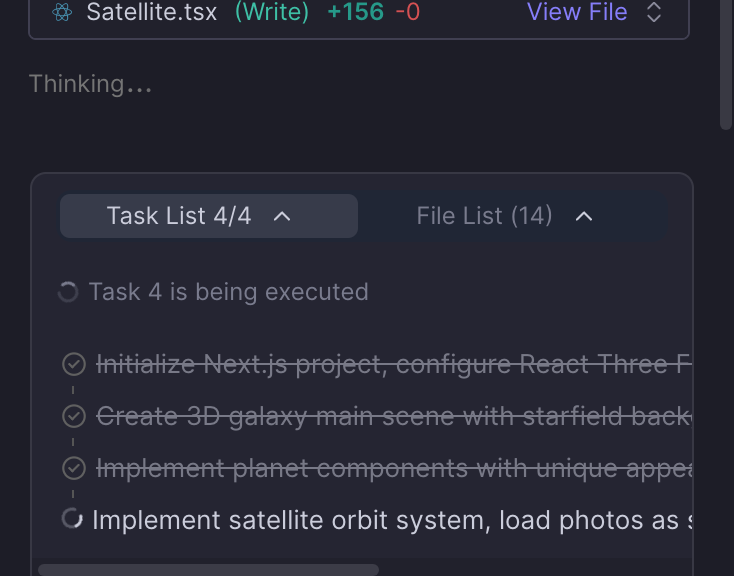
Task list | Insert/delete/reorder tasks, and supplement execution details. |
Extensibility | Add or remove plugins or agents to adapt to new scenarios. |
Markdown Editing | Update Task List |
 |  |
Design Configuration Editing | Solution Extension Configuration |
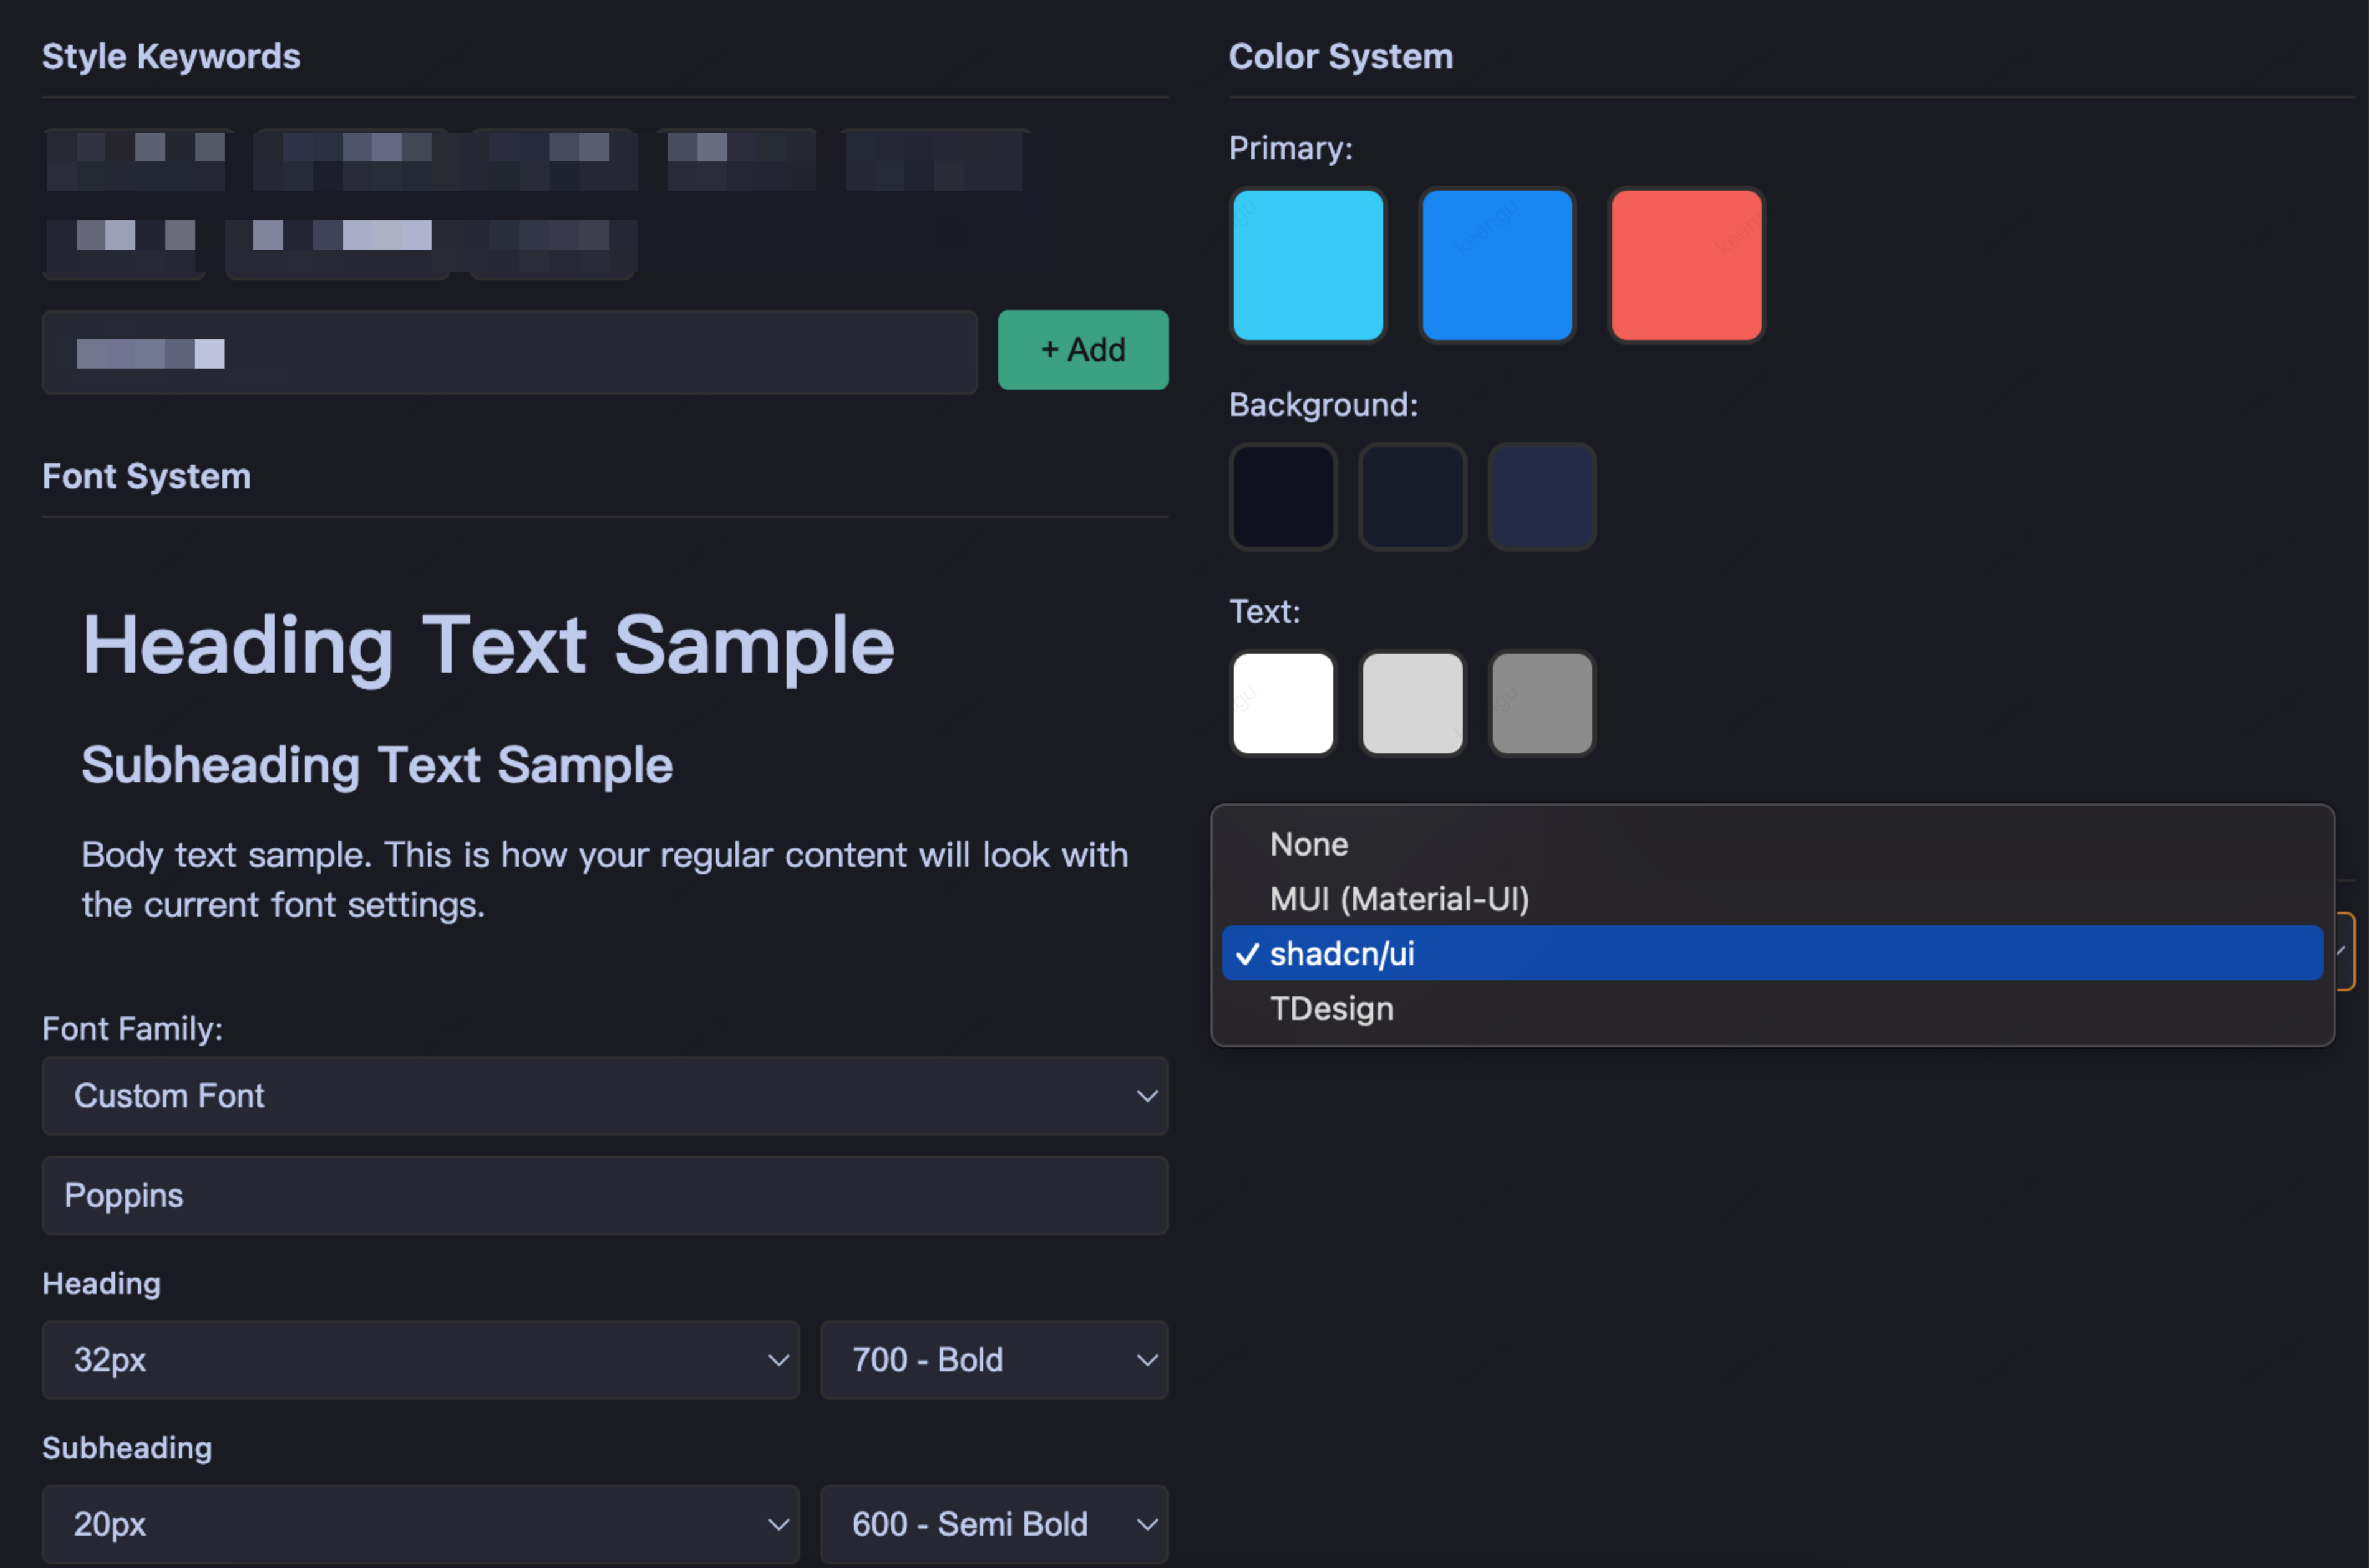 |  |
Pre-execution checks to confirm:
Does the technical plan align with the project's existing architecture?
Is the task breakdown complete, and is the dependency order correct?
Is the design specification consistent with the existing UI style?
Is the choice of extended capabilities reasonable?
Step 4: Solution Implementation (Building Status)
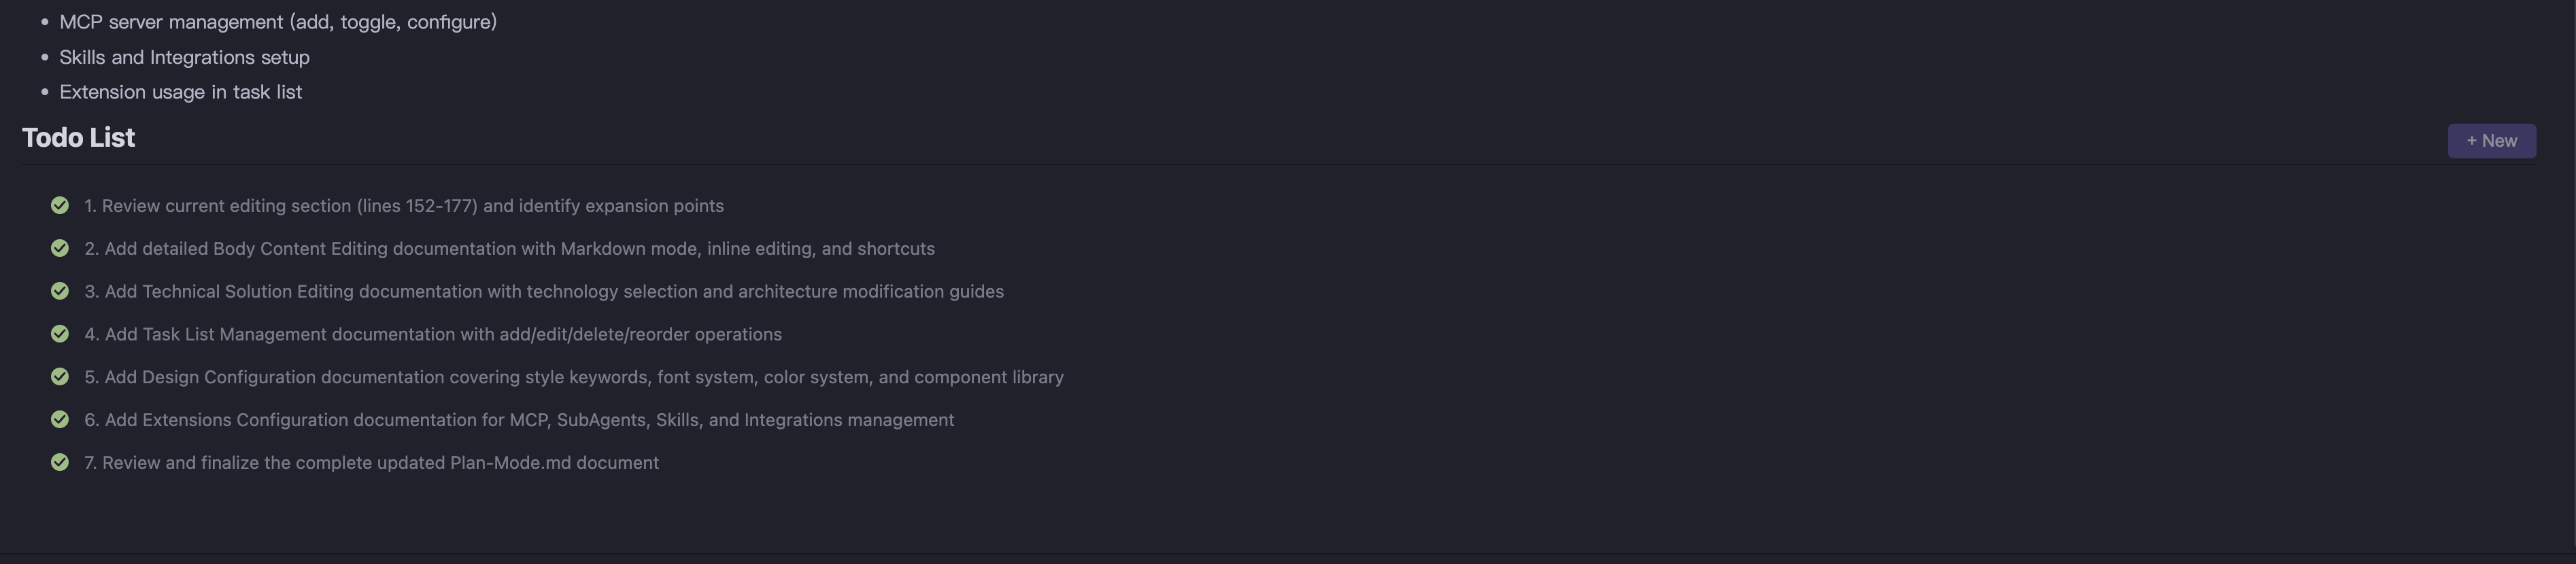
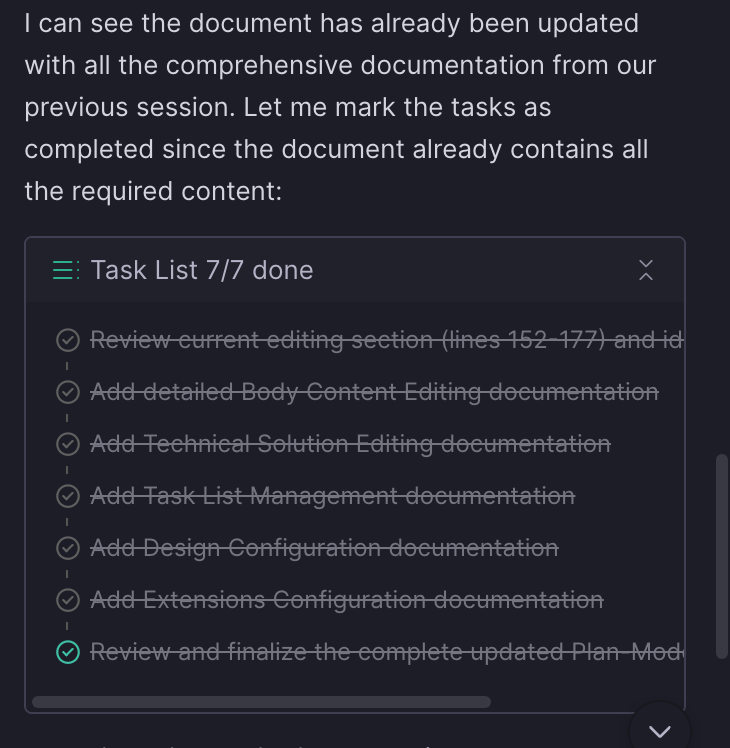
After you click "Start Execution", the plan enters the execution phase. The AI executes the task list step by step and provides real-time progress updates.
Execution process:
1. Status transition - The plan status changes to
Building, and tasks are executed in order.2. Progress feedback - The AI marks the status of each task upon completion, allowing you to monitor progress in real time.
3. Interruption handling - You can pause at any time during execution to raise new requirements or adjust the direction.
4. Deep invocation of extensions - The AI deeply invokes extended capabilities such as MCP and Skill according to the plan.
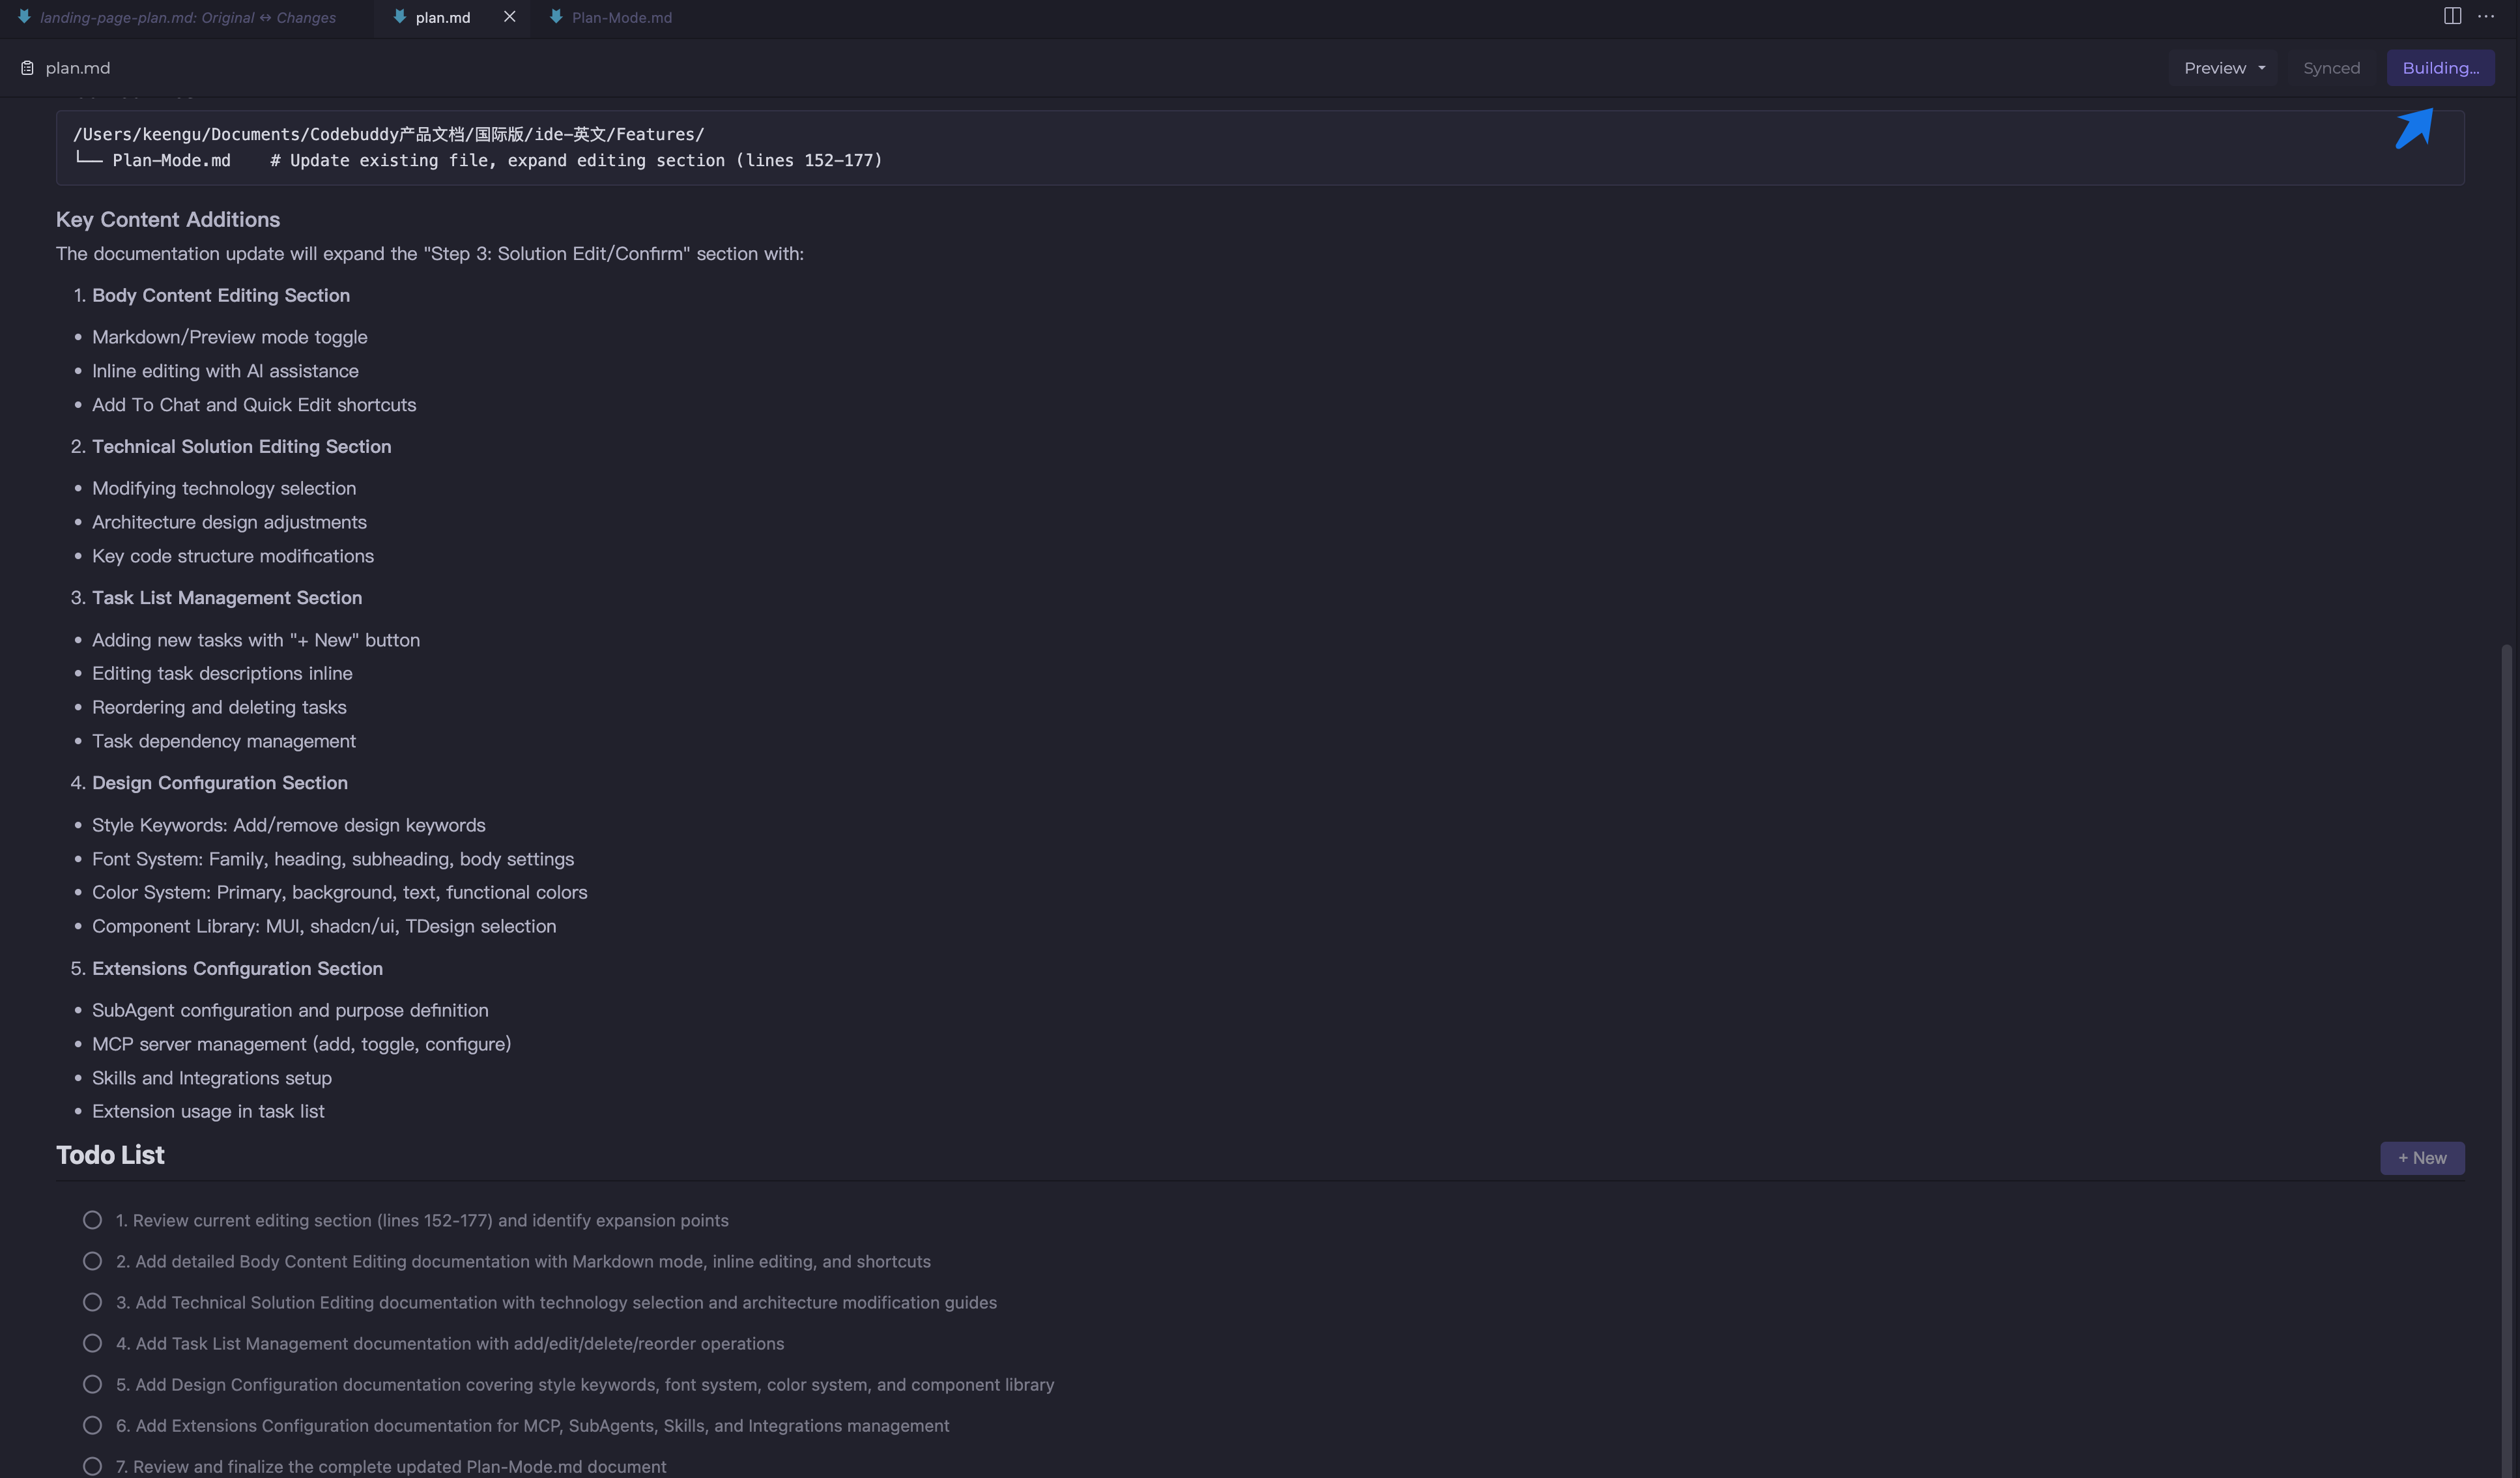
Execution Status | Process Result |
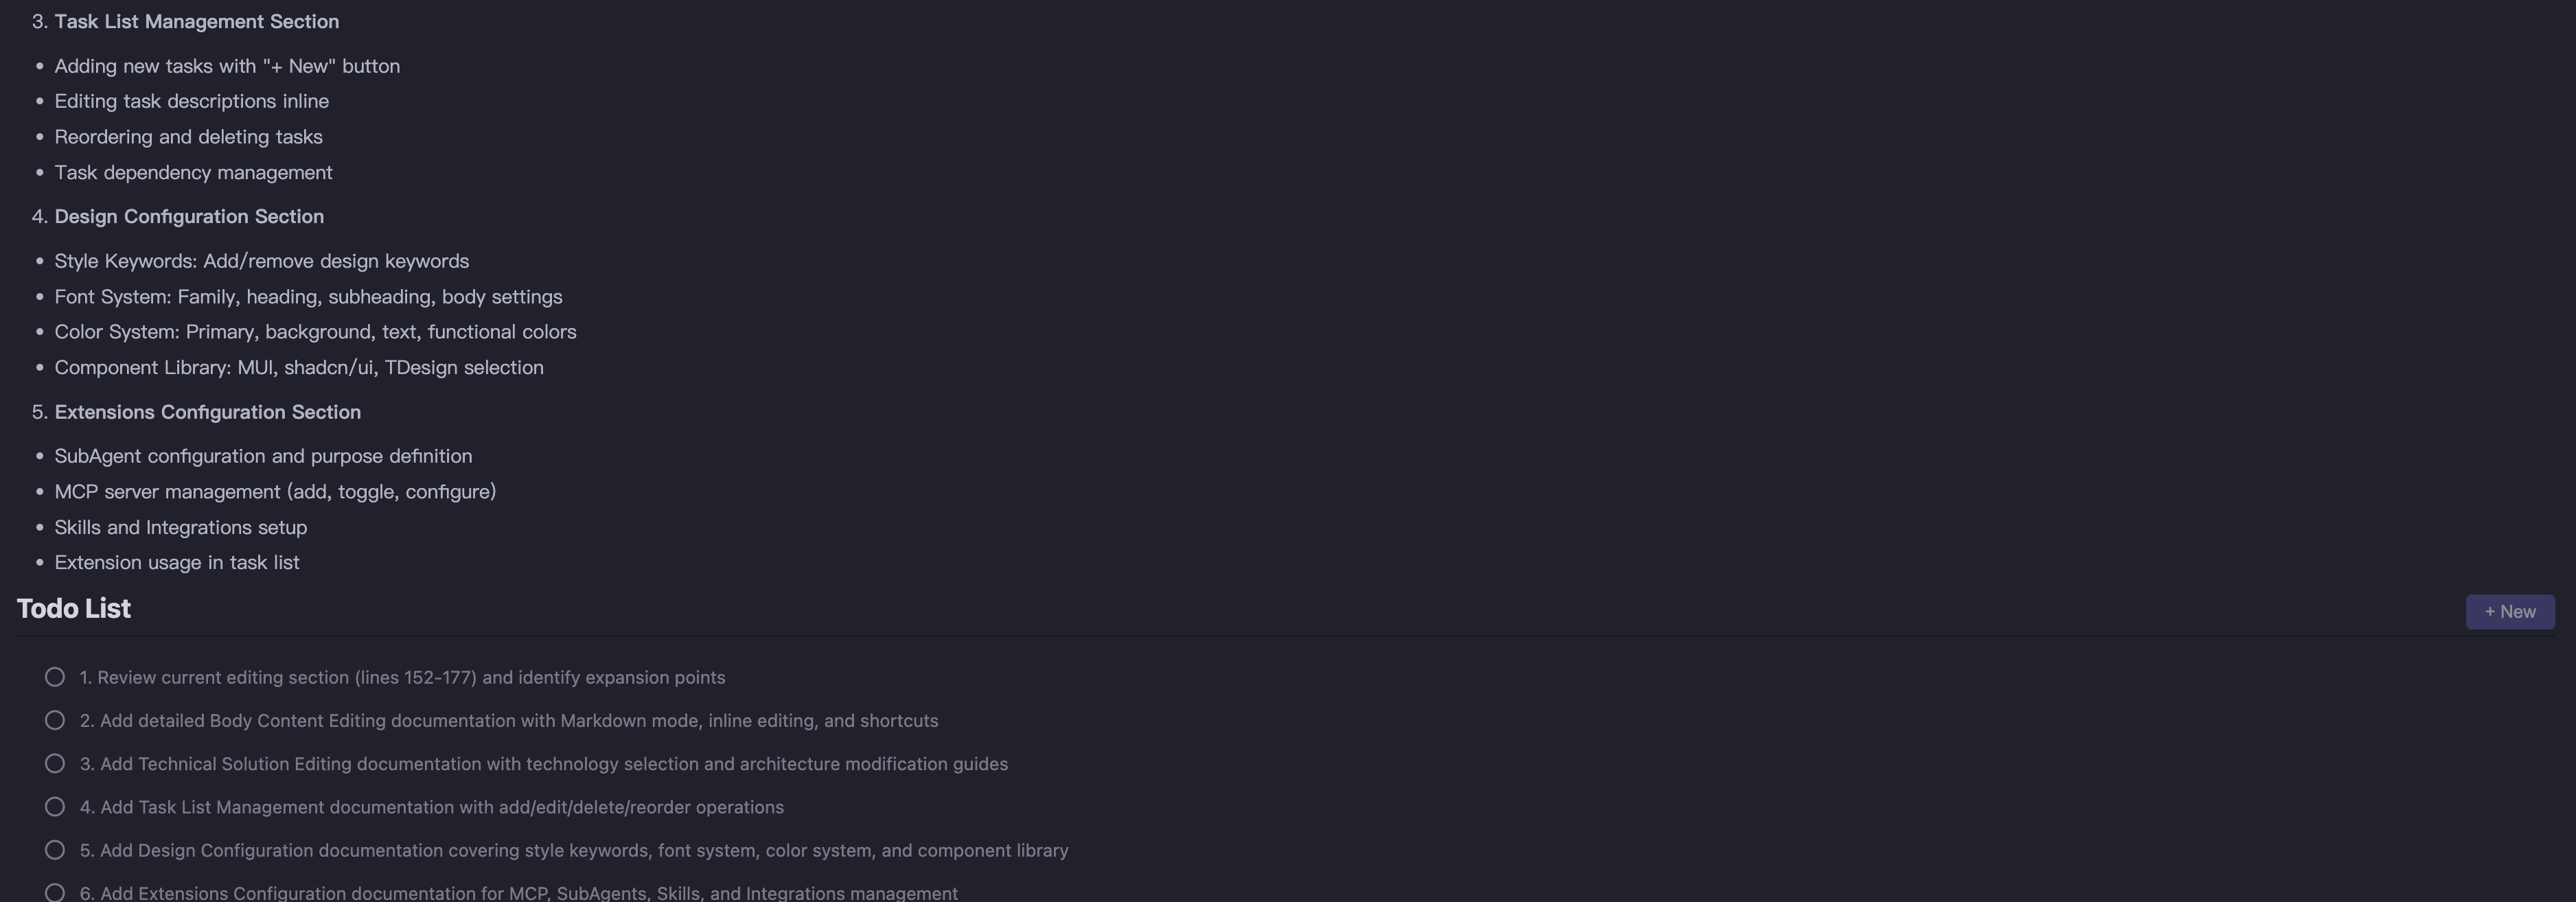 |  |
Adjustments during execution:
Fine-tuning the plan - You can modify the content in the editing area, and the diff will highlight the changes.
Switch to Craft - For localized issues, switching to Craft Mode is more efficient for quick fixes.
Interruption recovery - When a new requirement arises, the AI pauses the current plan and resumes it after handling the requirement.
Step 5: Solution Completion (Finished Status)
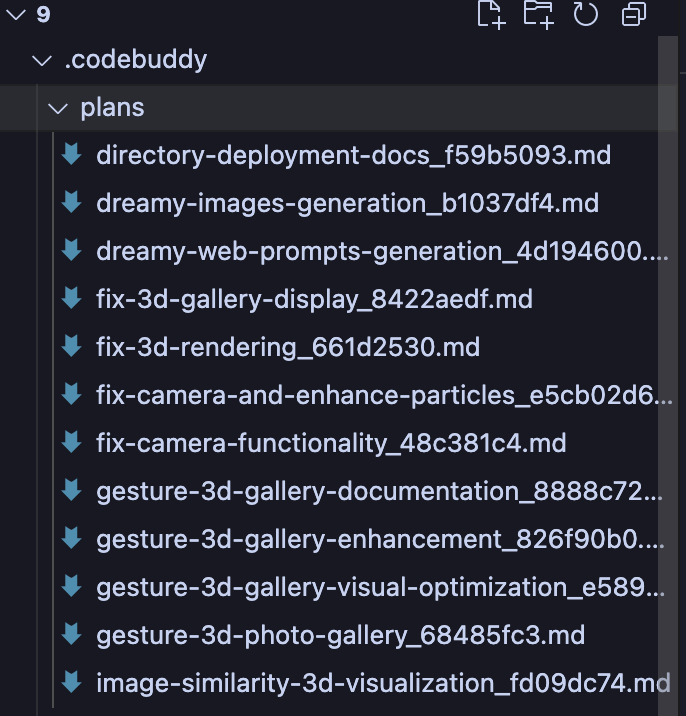
After all tasks are completed, the plan enters the completed state.
Post-completion operations:
Operation | Description |
View Results. | View the generated code and modified files in the editor. |
Archive Plan | The plan is automatically saved as a Markdown file in .codebuddy/plans/. |
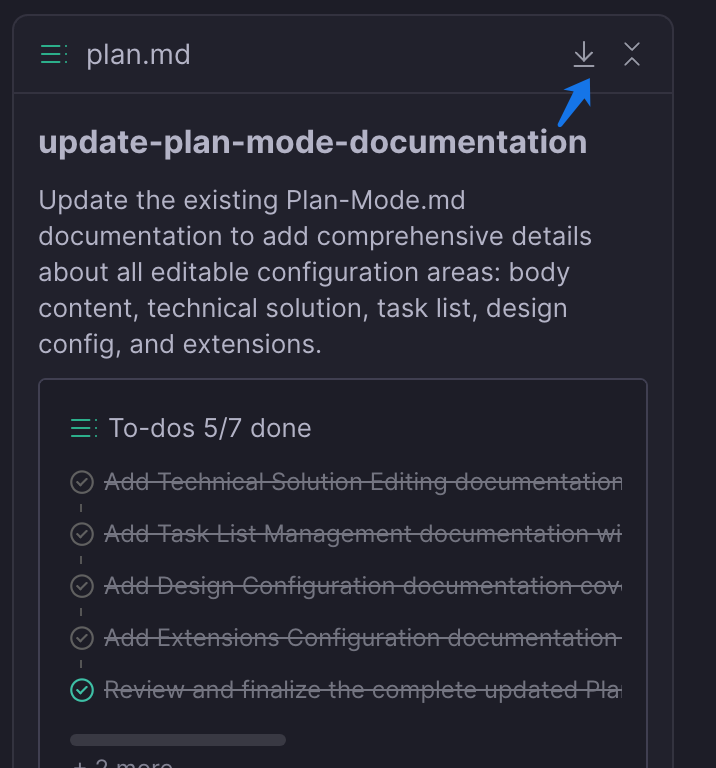
Export and Share | Download the plan file to share with your team or continue iterating. |
Reuse Knowledge | Historical plans can be referenced as context to help AI quickly understand the project background. |
Completion and Saving | Download Plan |
 |  |
Usage Principles
Task Granularity Control
Approach | Reason | Risk |
Focus a single Plan on a single feature module. | AI maintains stronger consistency within a limited context. | An oversized Plan can lead to inconsistent naming, chaotic interface styles, and state management conflicts. |
Start the next feature module only after the current one is complete. | Verifiable intermediate artifacts facilitate problem localization. | Running multiple unfinished Plans in parallel can increase context confusion. |
Complex requirements are split by AI autonomously. | AI can reasonably divide boundaries based on technical dependencies. | Manual forced splitting may disrupt the natural coupling between modules. |
Review Value of the Preview Stage
Carefully reviewing the plan after it is generated and before execution is a key step in avoiding later refactoring.
Review Dimension | Checkpoint | Correction Cost Comparison |
Technical scheme | Whether it aligns with the existing project architecture and whether the technology stack selection is reasonable | Preview modification: almost zero / Modification after code completion: may require refactoring |
Task breakdown | Whether key steps are omitted and whether the dependency order is correct | Preview modification: adjust text / Discovery during execution: interruption and replanning required |
Design specifications | Whether it is consistent with the existing UI style and whether the naming complies with specifications | Preview modification: add constraints / After code completion: batch rename |
Core principle: Correct the direction before code generation to avoid later refactoring.
Synergy of Extension Capabilities
Extended capabilities (Skills, MCP, SubAgents, and Integration) are not standalone tools. Instead, they form a collaborative matrix with Plan Mode:
Extension Type | Mechanism | Typical Application |
Skills | Inject domain knowledge and best practices into the planning context. | frontend-design improves UI design quality. |
MCP | Connect to external services to obtain real-time data and the latest documentation. | Context7 obtains the latest API documentation for frameworks. |
SubAgents | Handle specific types of complex subtasks. | debug-with-logger systematic problem diagnosis |
Integration | Connect to infrastructure such as deployment and database services. | CloudBase/CloudStudio one-click deployment |
Extended capabilities are injected into the context during Plan generation. The AI intelligently selects them based on task requirements and explicitly references them in the todolist.
Reuse Value of Plan
The completed Plan is saved in the
.codebuddy/plans directory and offers the following reuse value:Context passing: A new task can reference historical Plans to quickly build an understanding of the project background.
Token saving: Avoid repeatedly describing existing architecture and specifications.
Knowledge accumulation: Form a project-level decision record and technical solution library.
Usage Recommendations
Reference historical Plans in a new conversation to help the AI quickly understand the project background.
Save successful architecture designs and technology selections as templates for reuse in similar features.
Flexible Switching Between Plan and Craft
Plan and Craft are not an either-or choice, but partners that can be switched flexibly. Use Plan first to think through the architecture, and then use Craft to quickly handle detailed issues during execution.
Scenario | Recommended Mode | Reason |
Macro architecture design | Plan | Requires complete requirement analysis and task breakdown. |
Collaborative Modification of Multiple Files | Plan | Requires unified technical solution guidance. |
Implementing a new feature from scratch | Plan | Requires a clear implementation path. |
Local detail adjustment | Craft | Small change scope, no need for complete planning. |
Single-function optimization | Craft | With clear context, direct execution is more efficient. |
Quick Bug fix | Craft | Problem localization is clear, and no task breakdown is required. |
Rule of thumb
Help and Support
Was this page helpful?
You can also Contact sales or Submit a Ticket for help.
Help us improve! Rate your documentation experience in 5 mins.
Feedback