Discord Integration Guide
Download
Focus Mode
Font Size
After connecting WorkBuddy AI to Discord, you can send tasks and receive execution results through the Discord bot, allowing you to remotely control WorkBuddy AI on your computer from Discord private chats or server channels.
I. Prerequisites
Before you begin, make sure you have met the following prerequisites:
WorkBuddy AI is installed and logged in on your computer, and it remains running.
Have a Discord account.
Have a Discord server with the Manage Server permission, or create a new server yourself.
Note:
During remote control, the computer must remain powered on and WorkBuddy AI must remain running. If the computer enters sleep mode or the application exits, messages from Discord cannot be executed.
II. Creating a Discord Bot
The Discord bot is created through the official developer portal, and the entire process is completed in the browser.
Step 1: Creating an App and Obtaining the Bot Token
1. Open Discord Developer Portal and log in.
2. Click New Application in the upper-right corner, enter an application name (for example,
WorkBuddy AI), select the checkbox to agree to the developer terms, and then click Create.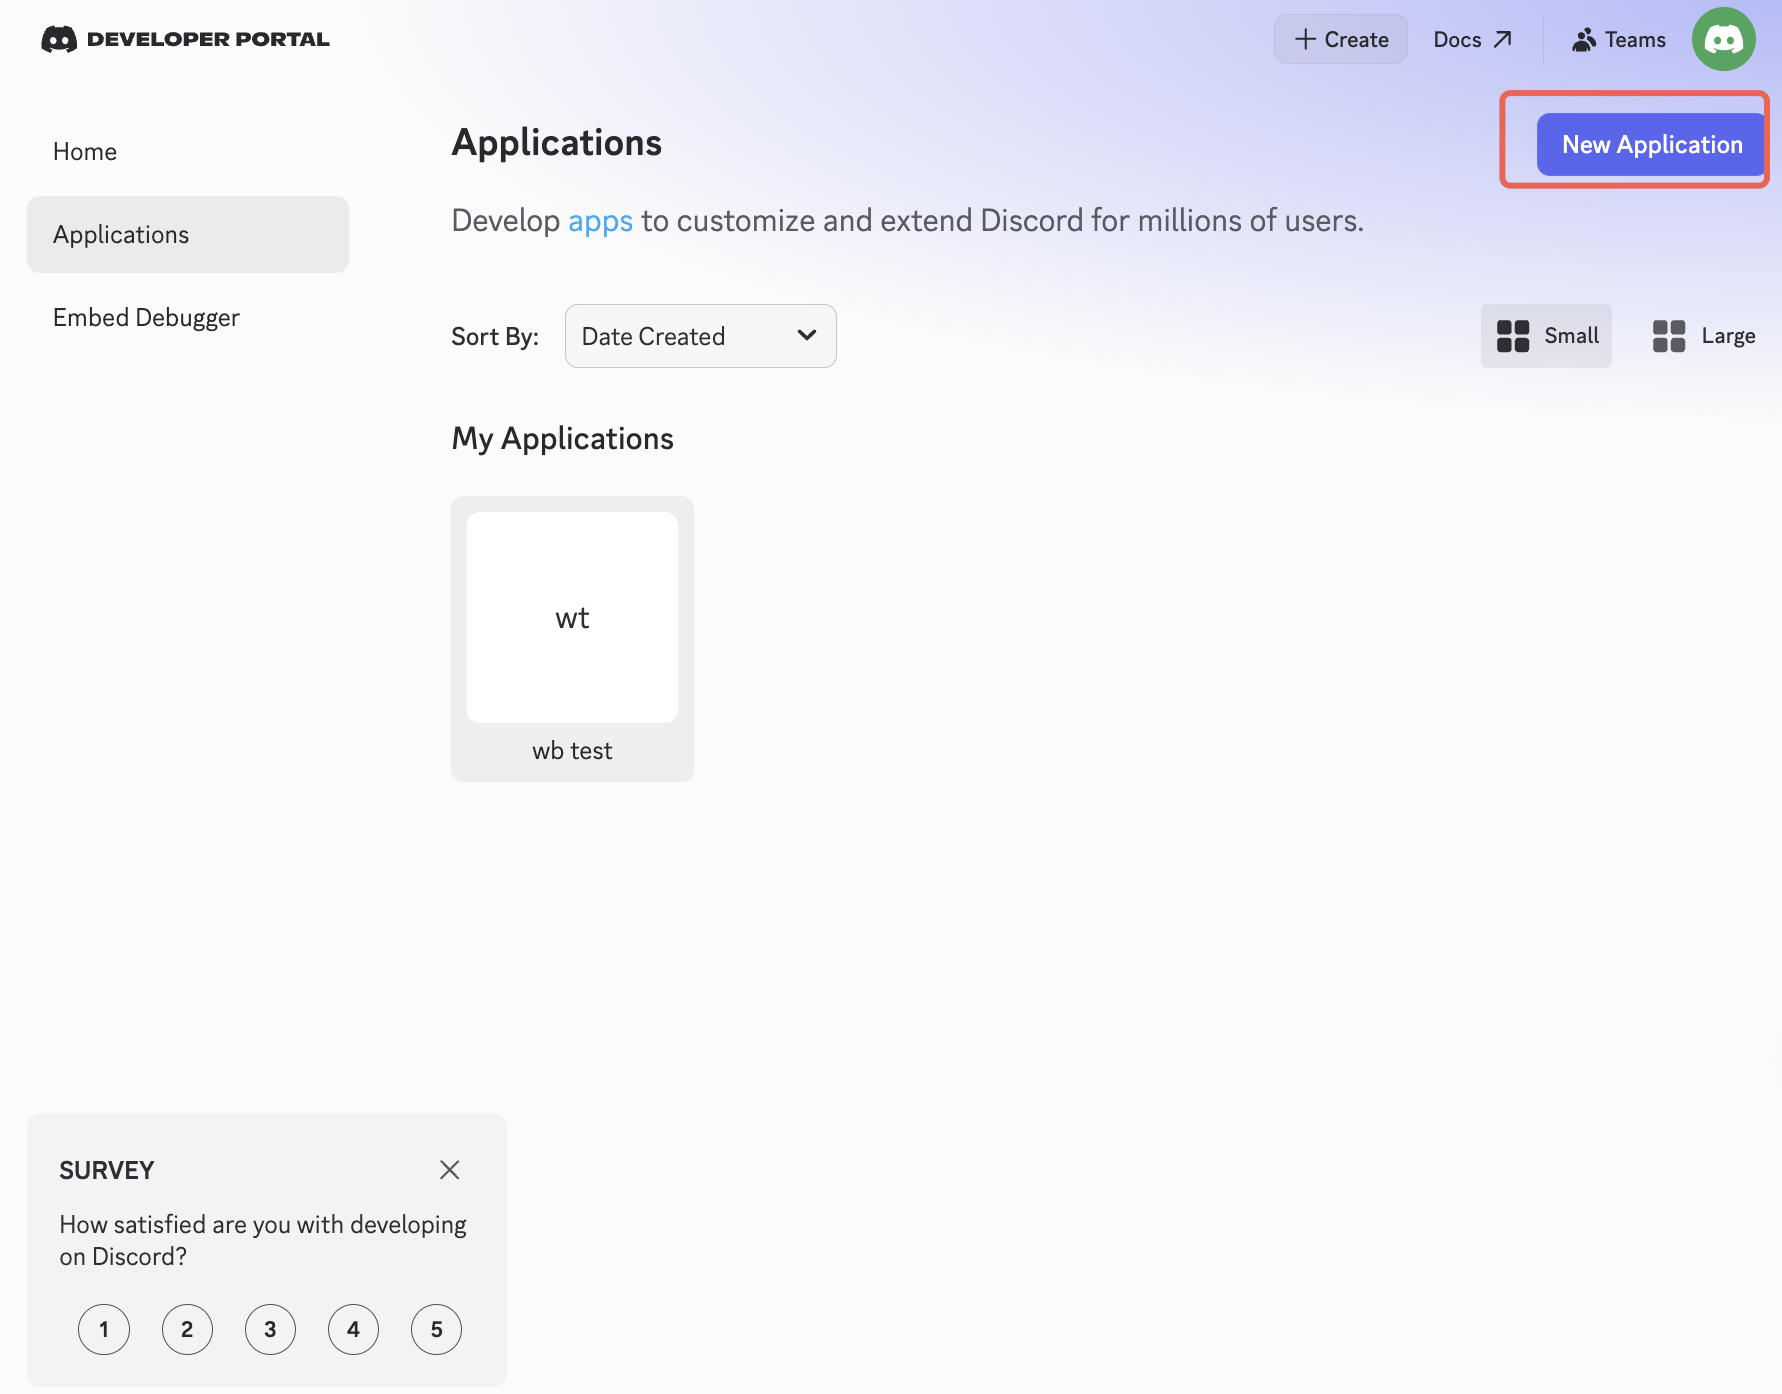
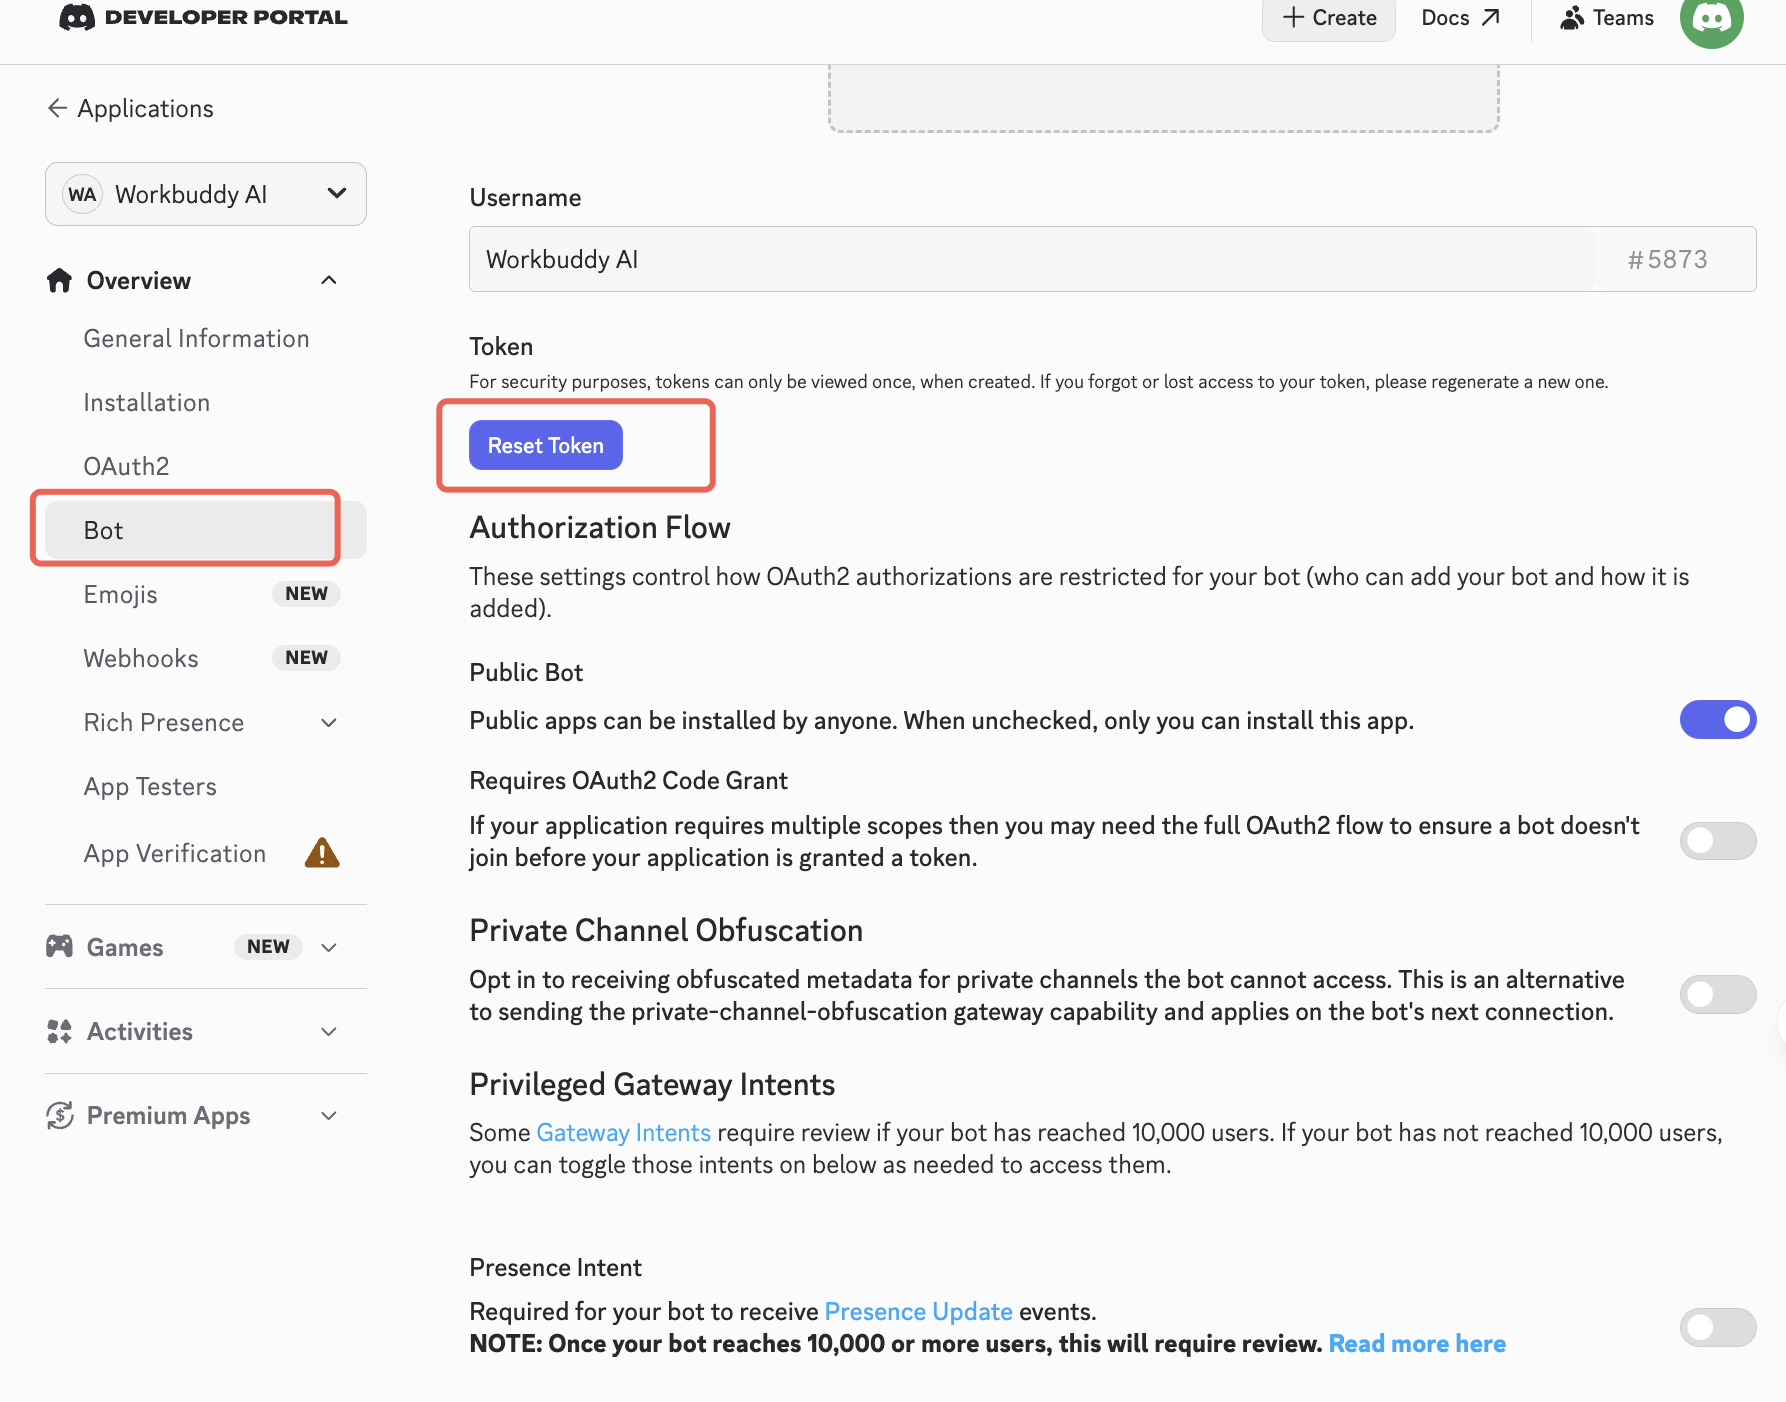
3. In the left menu, click Bot.
4. Click Reset Token and confirm as prompted. If two-factor authentication is enabled for your account, enter the verification code.
5. Copy the displayed Bot Token, which has a format similar to
MTEyMzQ1Njc4OTAxMjM0NTY3.GHxyz.abc123....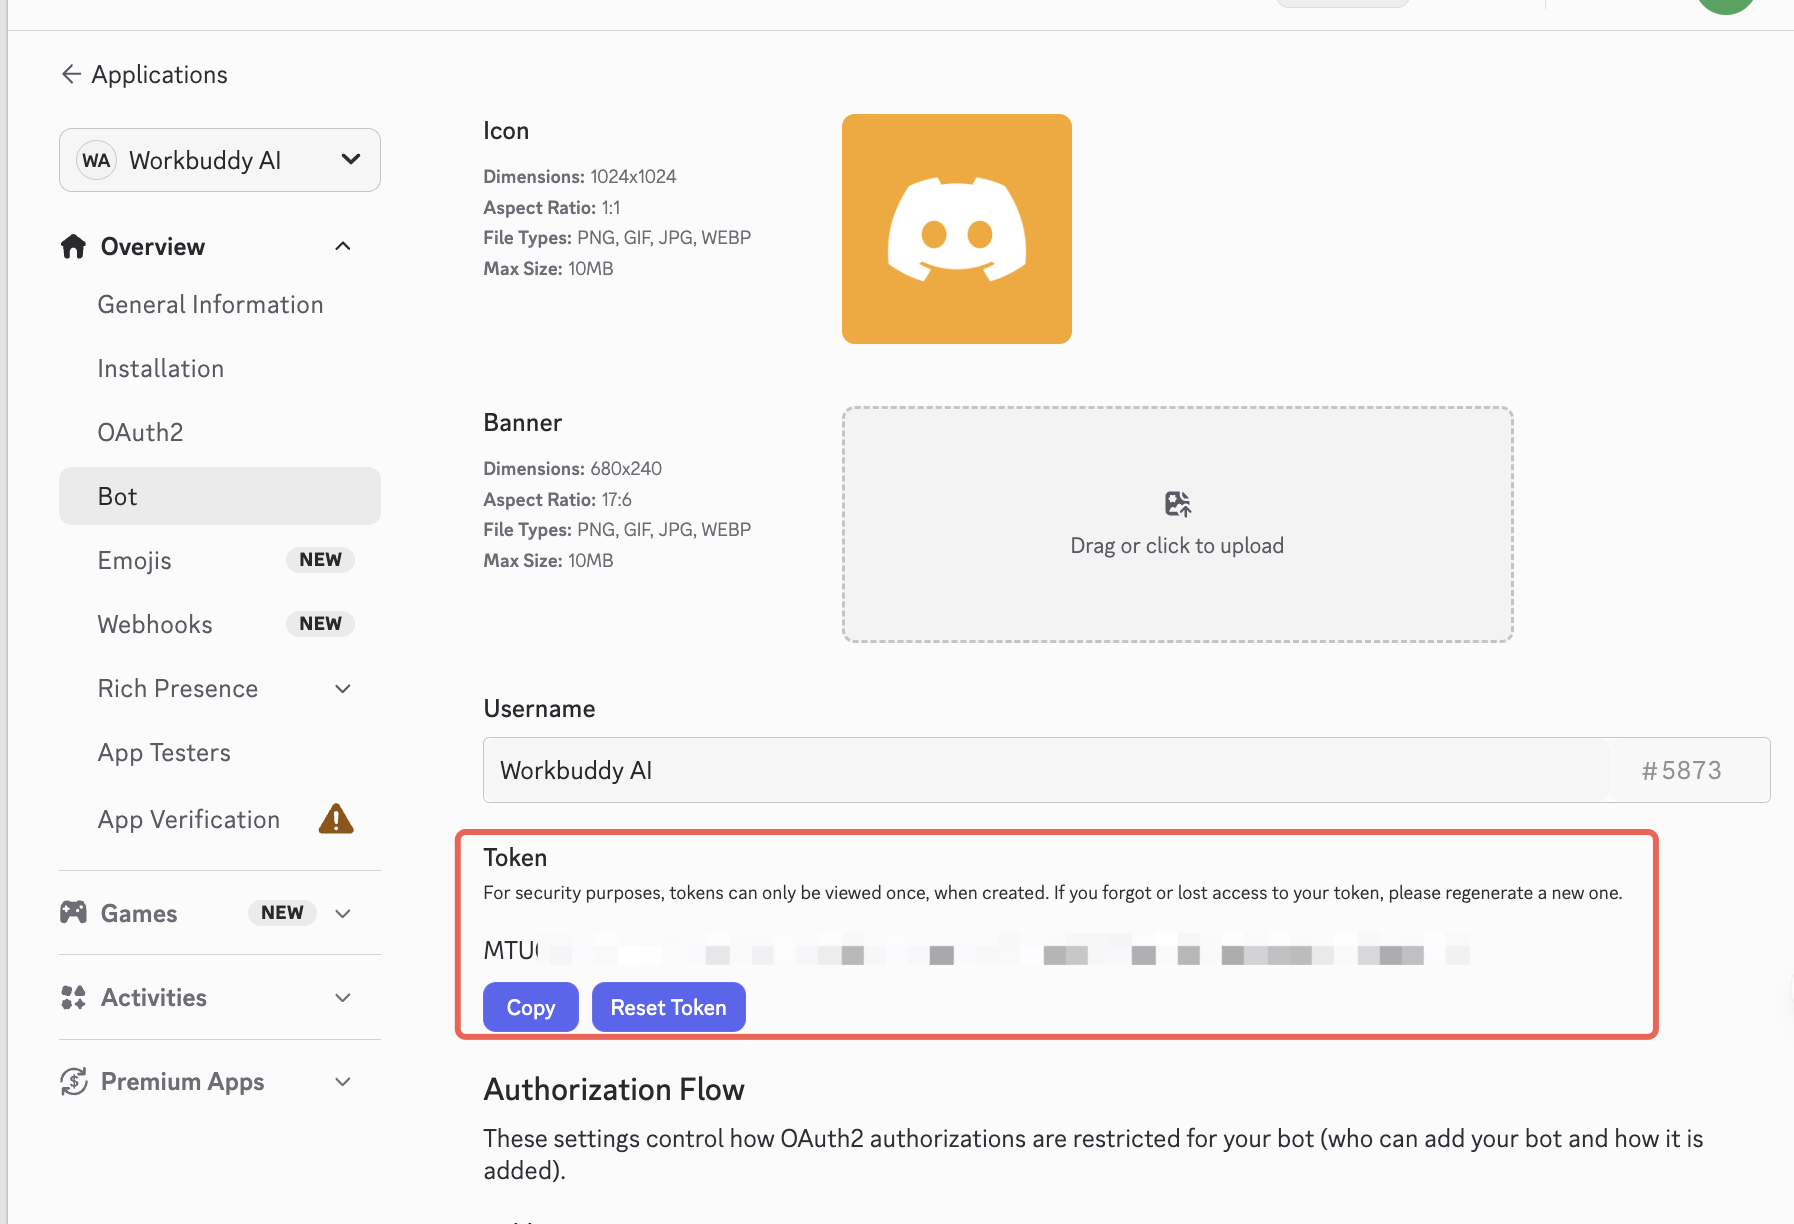
Note:
The Discord Bot Token is fully displayed only once after being reset, and it cannot be viewed again after you leave the page. Copy and store it securely immediately. If the token is lost, you must perform Reset Token again, which invalidates the old token.
Step 2: Enabling Message Content Intent
This is the most easily overlooked and most critical step in the configuration. When it is not enabled, the bot can receive message events but cannot read the text content of messages, resulting in no replies at all.
1. While still on the Bot page, scroll down to find Privileged Gateway Intents.
2. Enable MESSAGE CONTENT INTENT.
3. Click Save Changes.
Note:
The other two intents, PRESENCE INTENT and SERVER MEMBERS INTENT, are not required and can be enabled as needed.
Step 3: Inviting the Bot to a Server
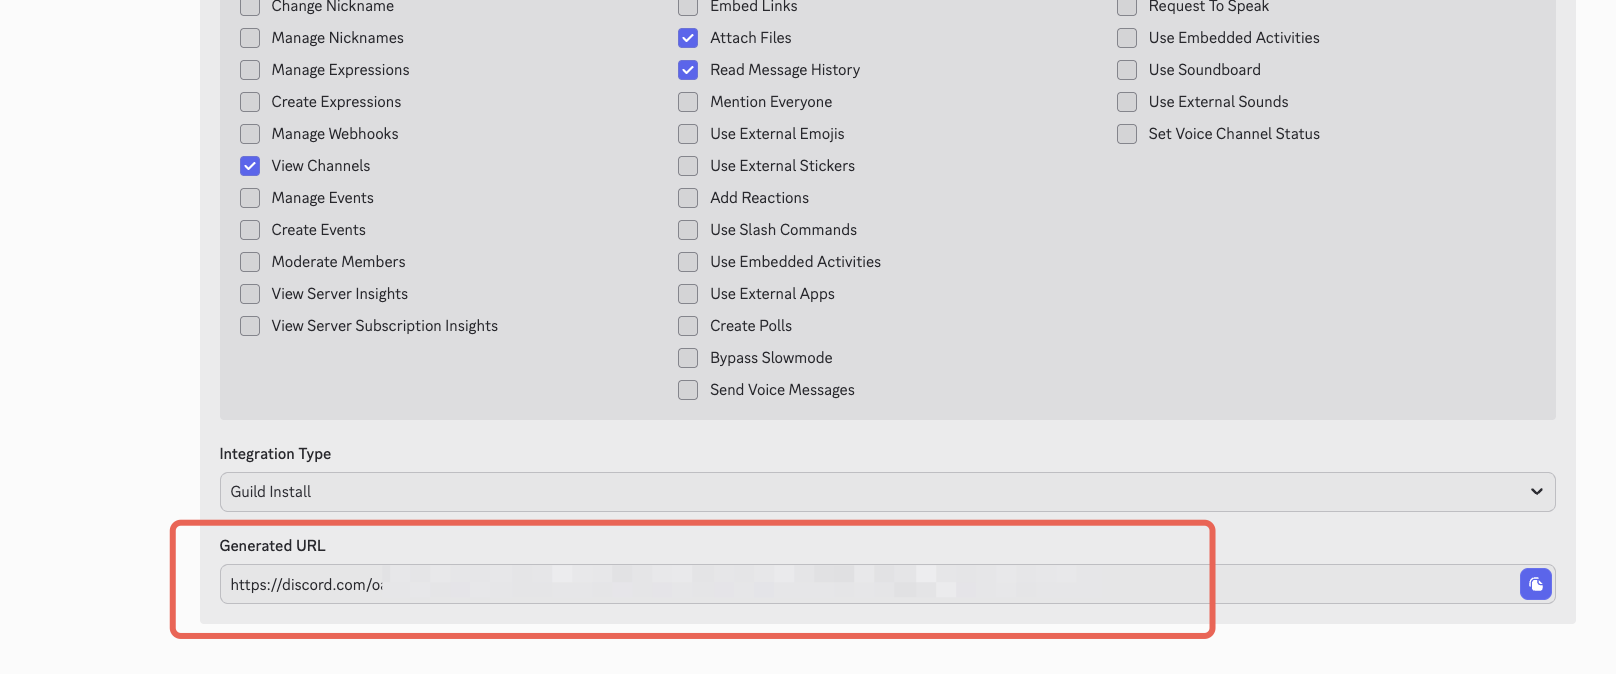
1. In the left menu, click OAuth2 and select URL Generator.
2. In Scopes, select
bot. If you need to use slash commands, also select applications.commands.3. In Bot Permissions, select the following:
View ChannelsSend MessageRead Message HistoryAttach Files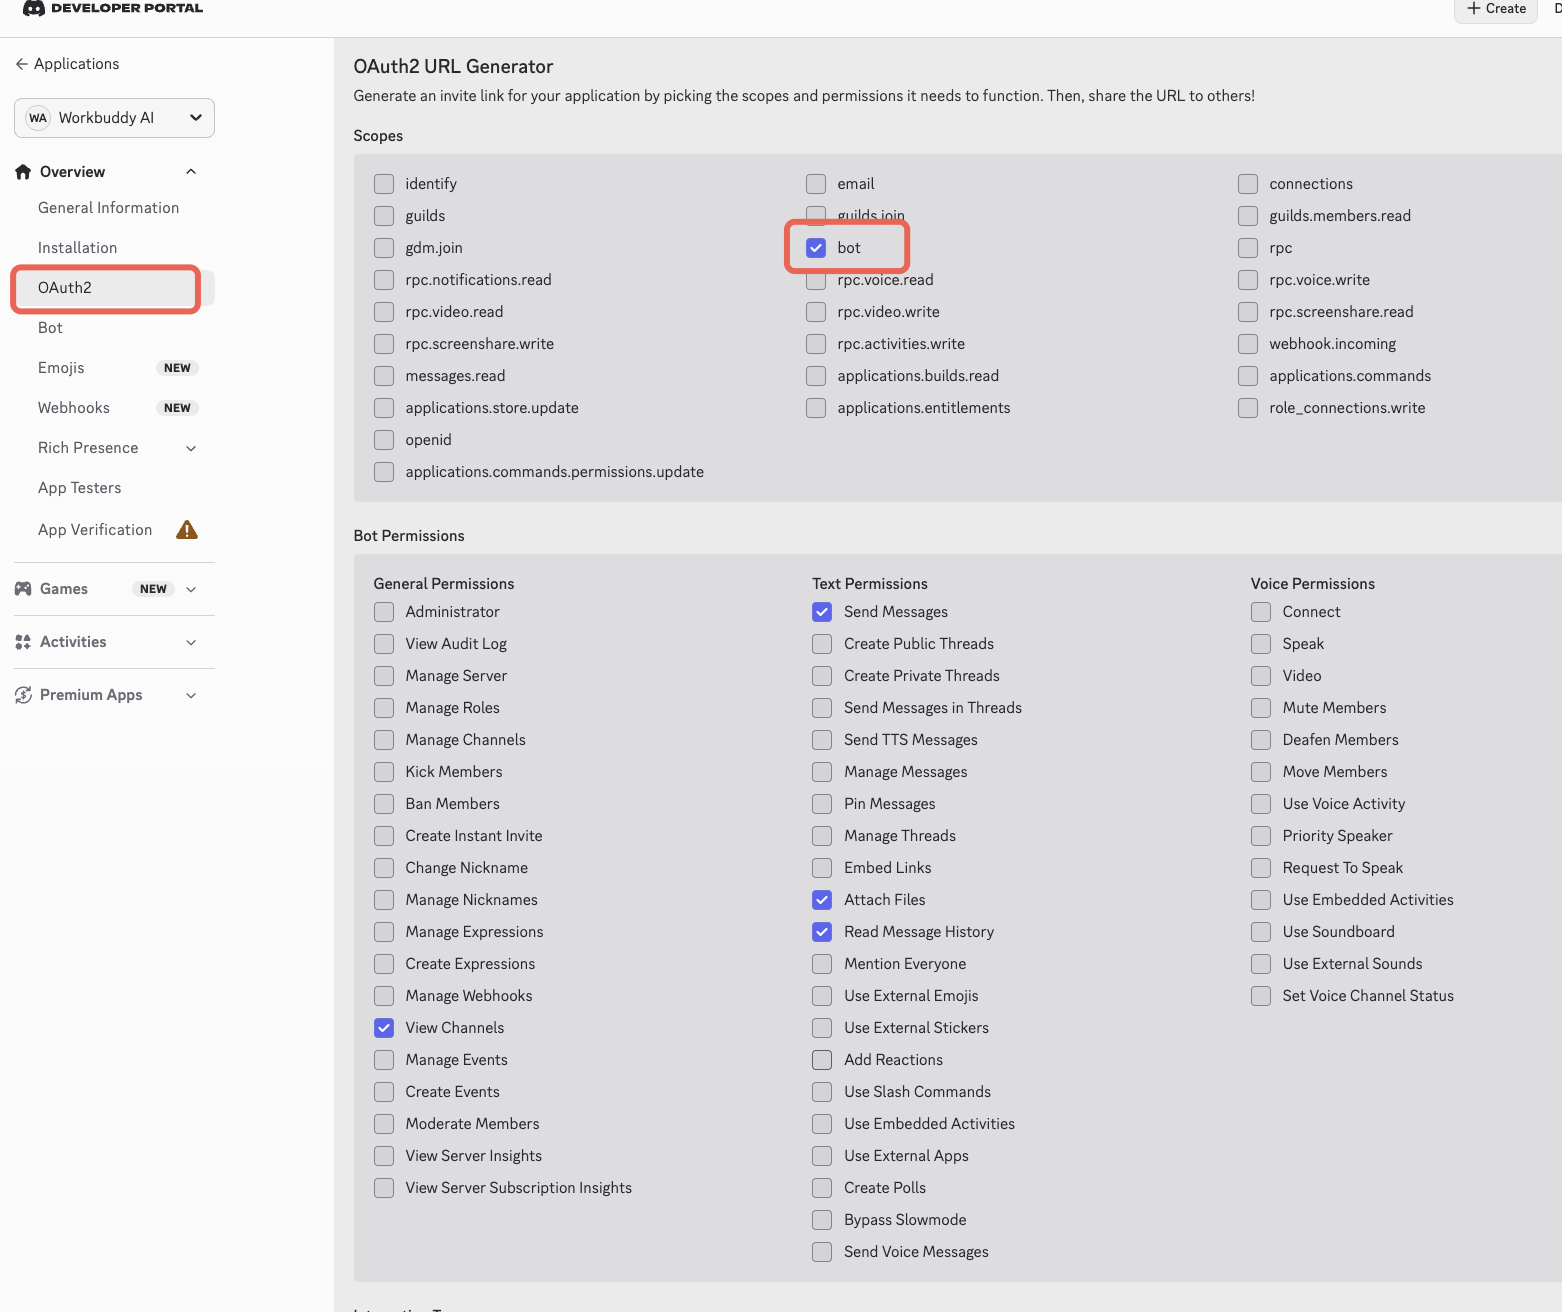
4. Copy the automatically generated invite link at the bottom of the page.
5. Open the link in a browser, select the target server, and click Authorize to complete the invitation.
Note:
The inviter must have the Manage Server permission on the target server. Otherwise, the server will not appear in the selectable list.
III. Connecting in WorkBuddy AI
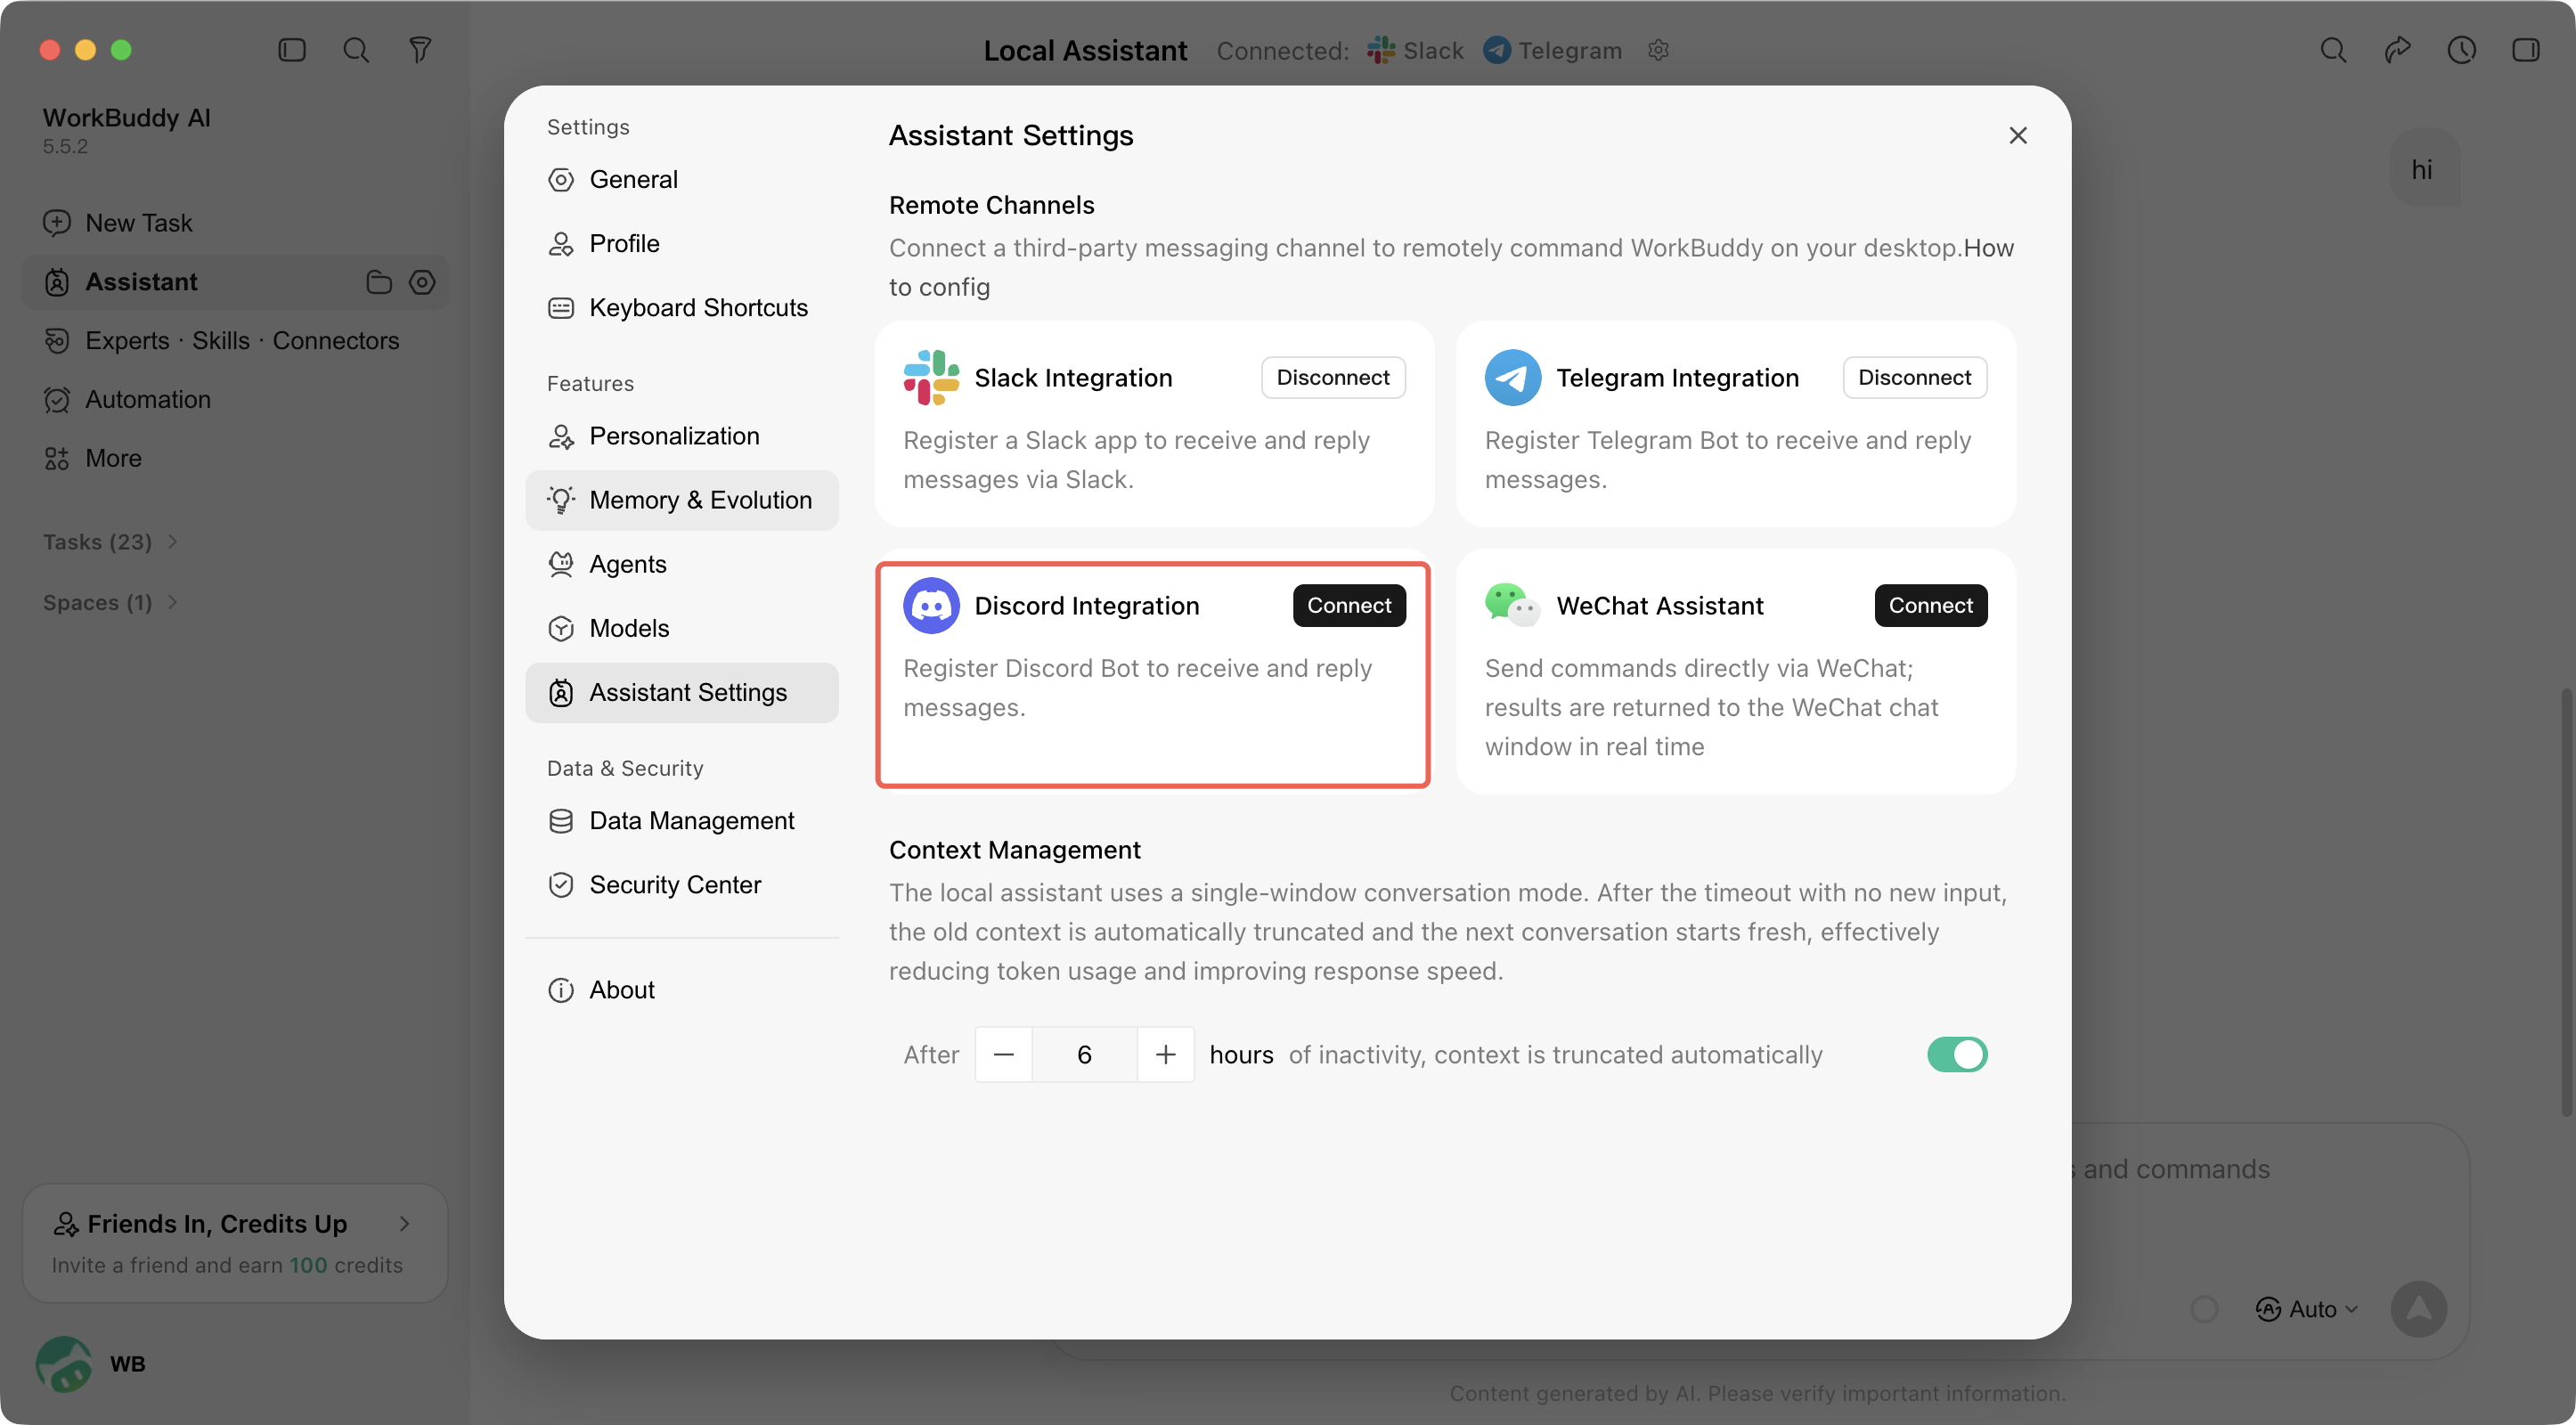
1. Open WorkBuddy AI and click Assistant in the left sidebar.
2. Go to Assistant Settings.
3. In the Remote Channels section, locate Discord Integration and click Connect.
4. In the Register Discord Channel window that appears, fill in the following:
Bot Token: Enter the Token obtained from the Developer Portal in the previous chapter.
Proxy (optional): Leave it blank. For details, see the description below.
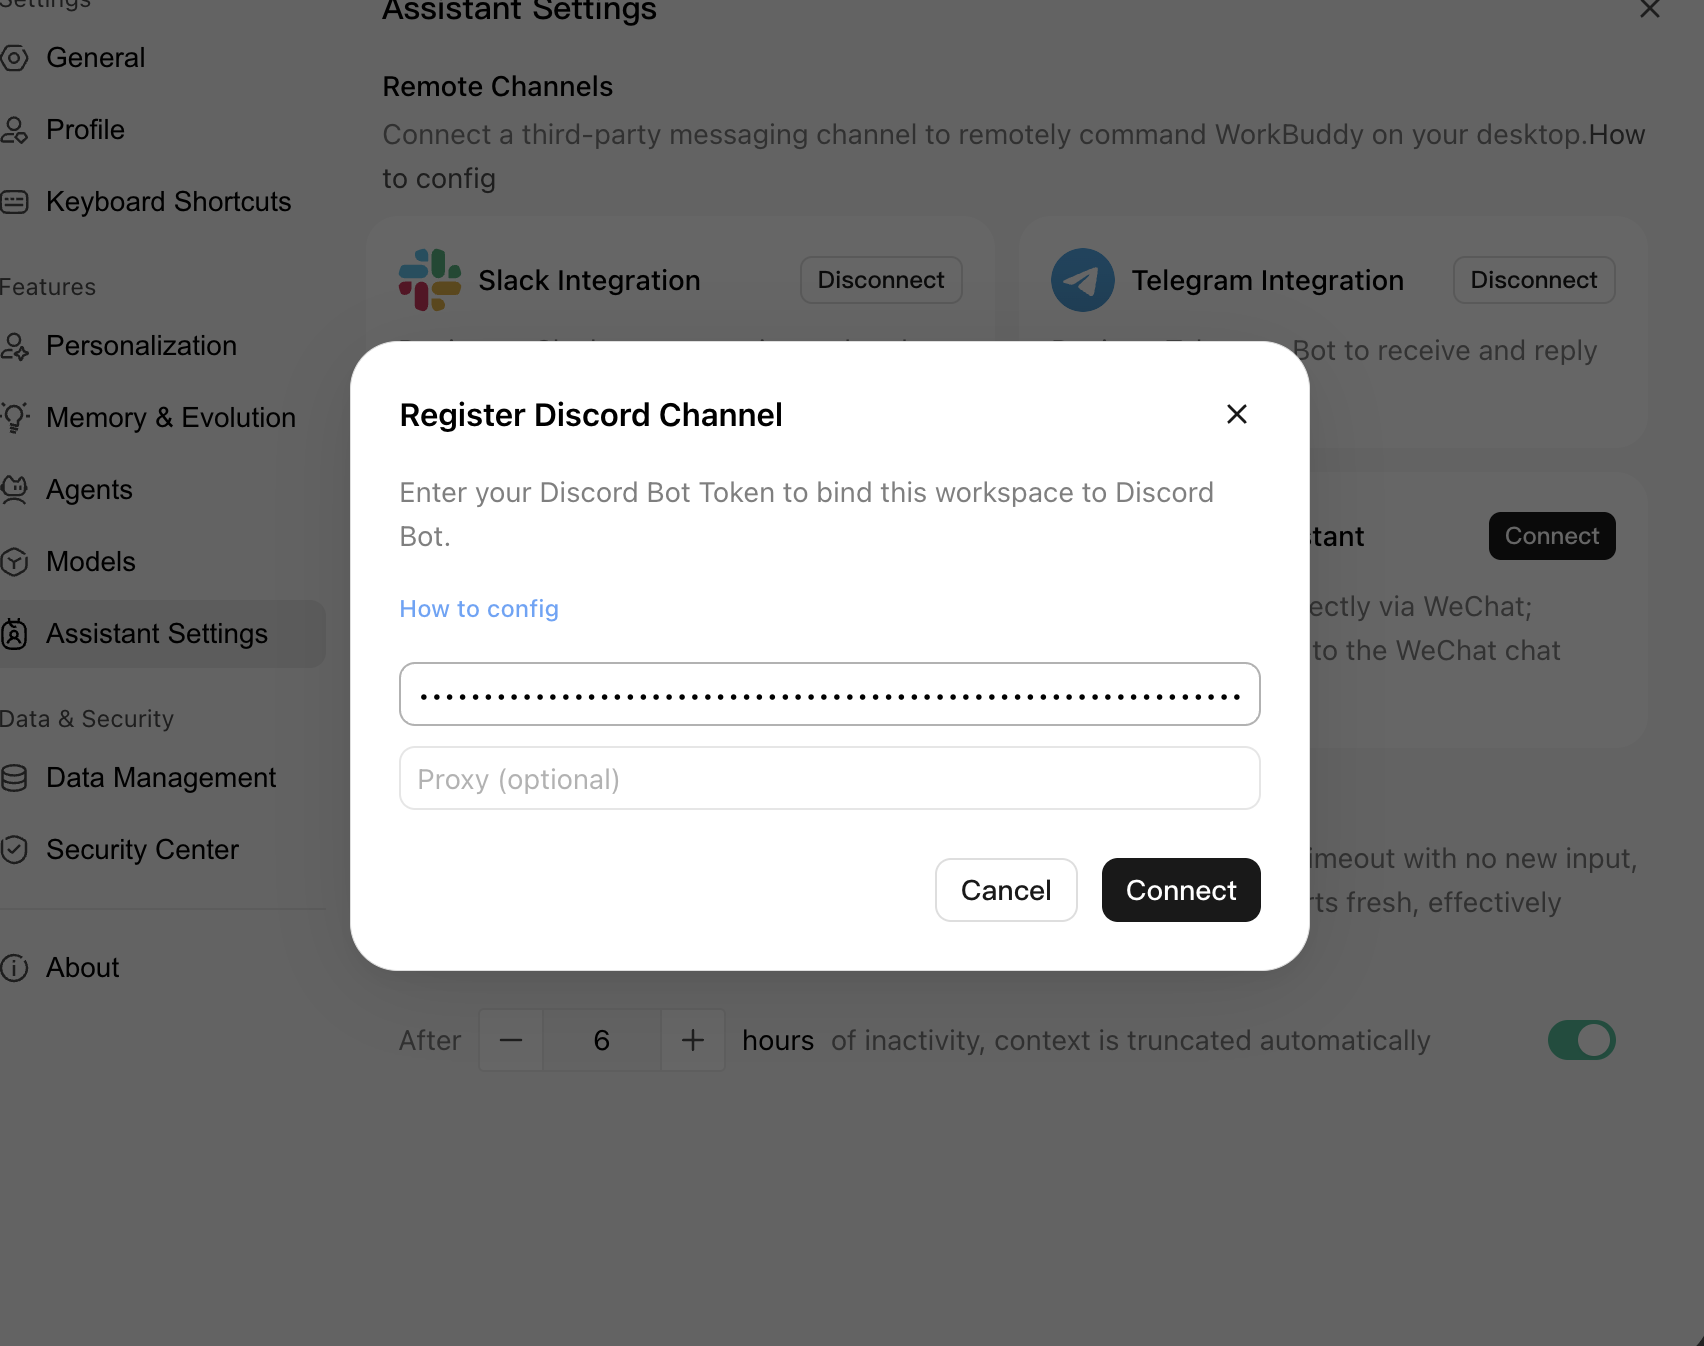
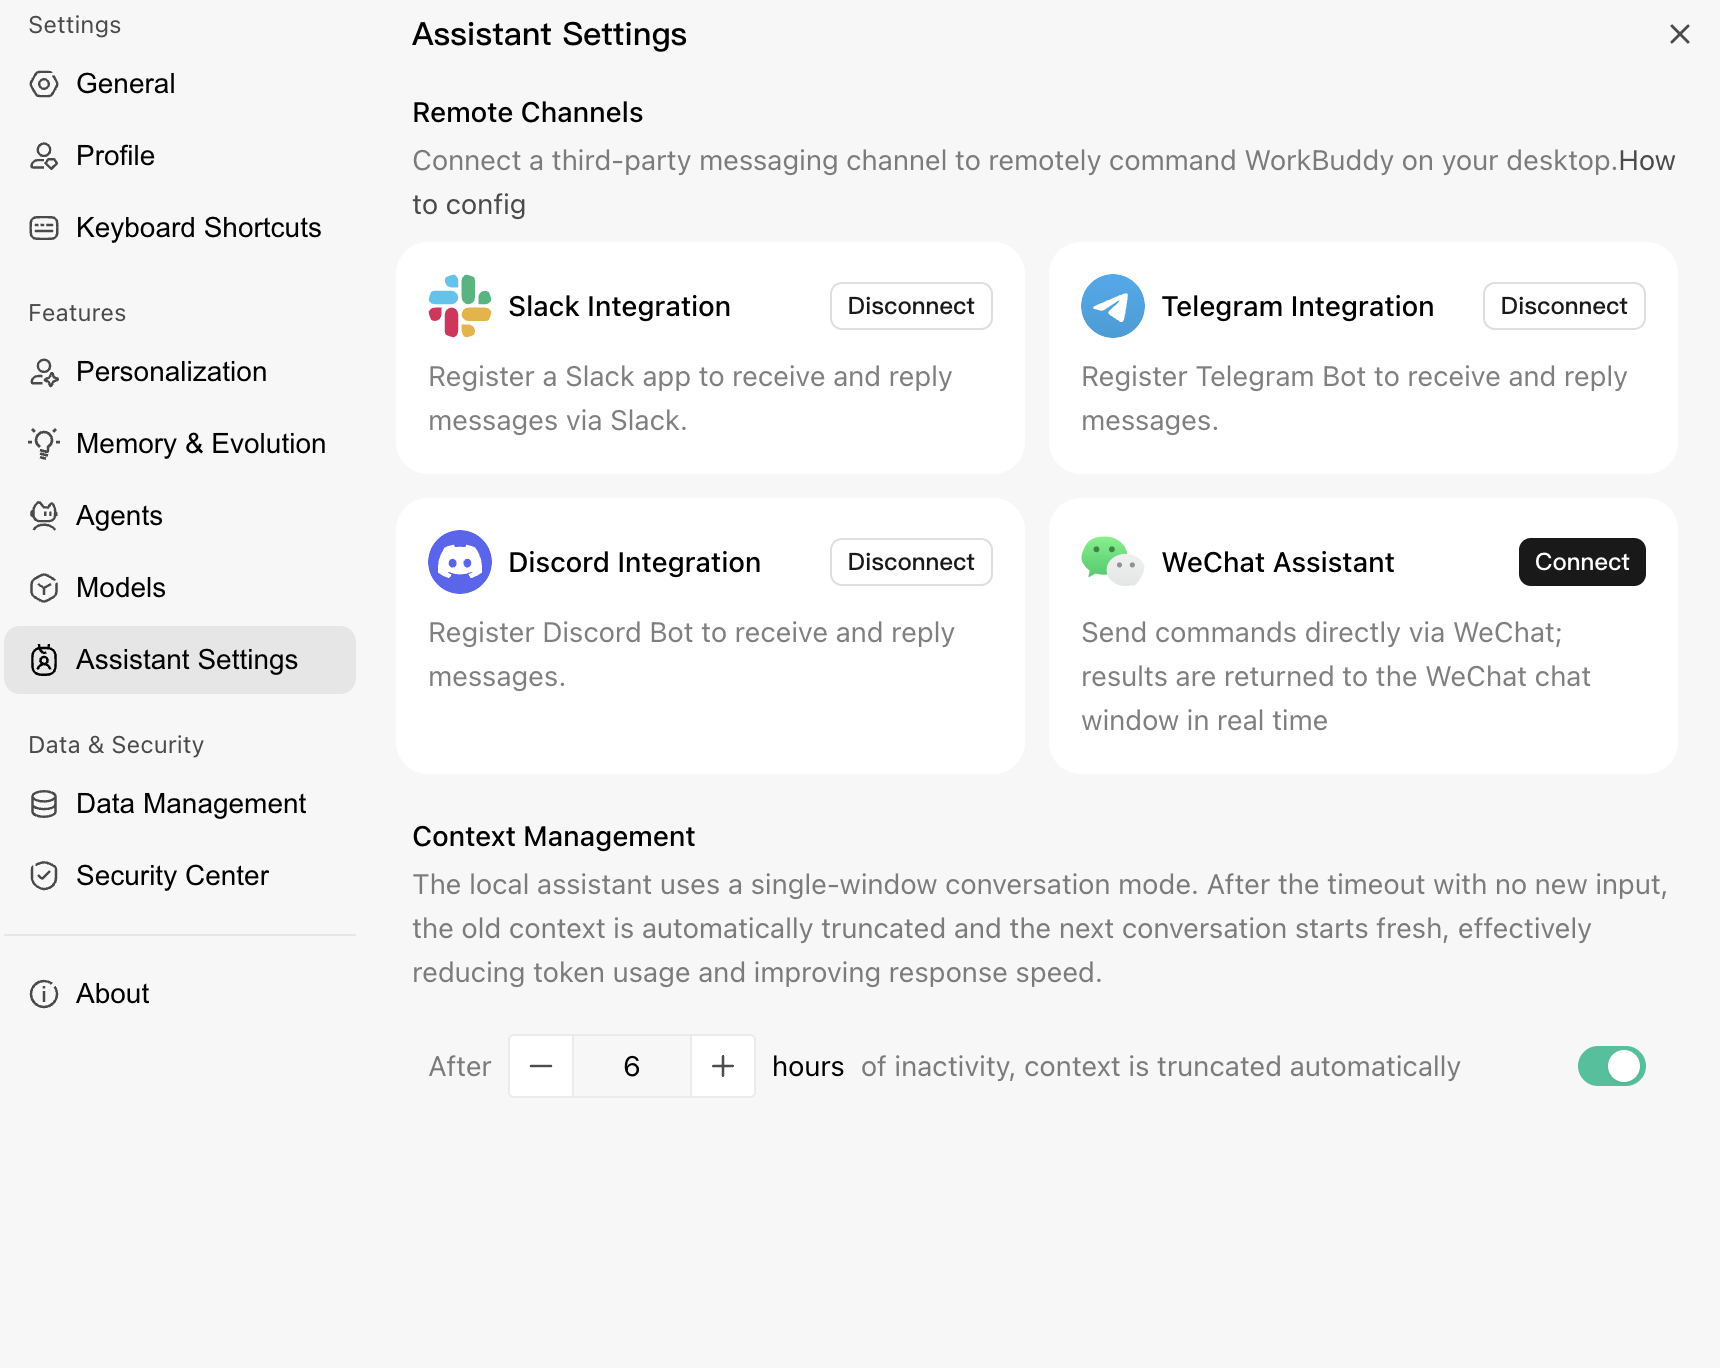
5. Click Connect. After a successful connection, the button on the Discord Integration card changes to Disconnect.
Note:
When do I need to fill in the Proxy field?
This field specifies the network proxy used to access Discord. In most cases, leave it blank to connect directly.
Fill in the proxy address here only when your network environment cannot directly access the Discord service.
IV. Getting Started with the Bot
1. Open your Discord server. The WorkBuddy AI bot should appear online.
2. You can send a direct message to the bot, or mention the bot in a channel with
@WorkBuddy AI.3. Send a message, and WorkBuddy AI will reply in real time.
Note:
The bot can only receive messages in channels to which it belongs. If the bot does not respond when mentioned in a channel, make sure that the channel allows the bot to access it.
V. Usage
1. Send a private task to the bot via direct message.
2. Assign tasks in a server channel via
@WorkBuddy AI.3. Upload files and images as task context.
4. Receive execution results with code blocks and rich text formatting.
VI. Security Recommendations
1. A Bot Token is equivalent to a password. Keep it secure.
2. Do not share the Token publicly or commit it to a code repository.
3. If the Token has been leaked, click Reset Token on the Bot page in the Developer Portal to regenerate it, and then update it in WorkBuddy AI.
Note:
A Bot Token grants remote operation permissions for WorkBuddy AI on your computer. Anyone with the Token can send tasks to your computer, so keep it secure.
VII. FAQ
Issue | Solution |
Bot Shows as Offline. | Confirm that WorkBuddy AI is running on the computer and the channel status is connected. |
Bot Online but Not Replying to Messages. | Confirm that MESSAGE CONTENT INTENT is enabled in Developer Portal and saved. |
Invalid Bot Token. | Reset the Token on the Bot page in Developer Portal and update it in WorkBuddy AI. |
Forgot to Copy Token. | The Token cannot be viewed again. Run Reset Token again to generate a new one. |
Missing Permissions Occurred. | Use URL Generator to regenerate the invite link, select the correct permissions, and then re-invite the bot. |
bot Not Visible in Server. | Confirm that the OAuth2 invite process is complete and that the correct server was selected during the invitation. |
Target Server Not Found During Invitation. | You must have the Manage Server permission on this server. |
Connection Interrupted. | Check the network connection. WorkBuddy AI will automatically attempt to reconnect. |
Help and Support
Was this page helpful?
You can also Contact sales or Submit a Ticket for help.
Help us improve! Rate your documentation experience in 5 mins.
Feedback