Telegram Integration Guide
Download
Focus Mode
Font Size
After connecting WorkBuddy AI to Telegram, you can send tasks and receive execution results through the Telegram bot, allowing you to remotely control WorkBuddy AI on your computer from any Telegram client.
I. Prerequisites
Before you begin, make sure you have met the following prerequisites:
WorkBuddy AI is installed and logged in on your computer, and it remains running.
Have a Telegram account.
Note:
During remote control, the computer must remain powered on and WorkBuddy AI must remain running. If the computer enters sleep mode or the application exits, messages from Telegram cannot be executed.
II. Creating a Bot via BotFather
All Telegram bots are created through the official @BotFather. This guide uses Telegram Web as an example, allowing you to complete the entire configuration without installing any client.
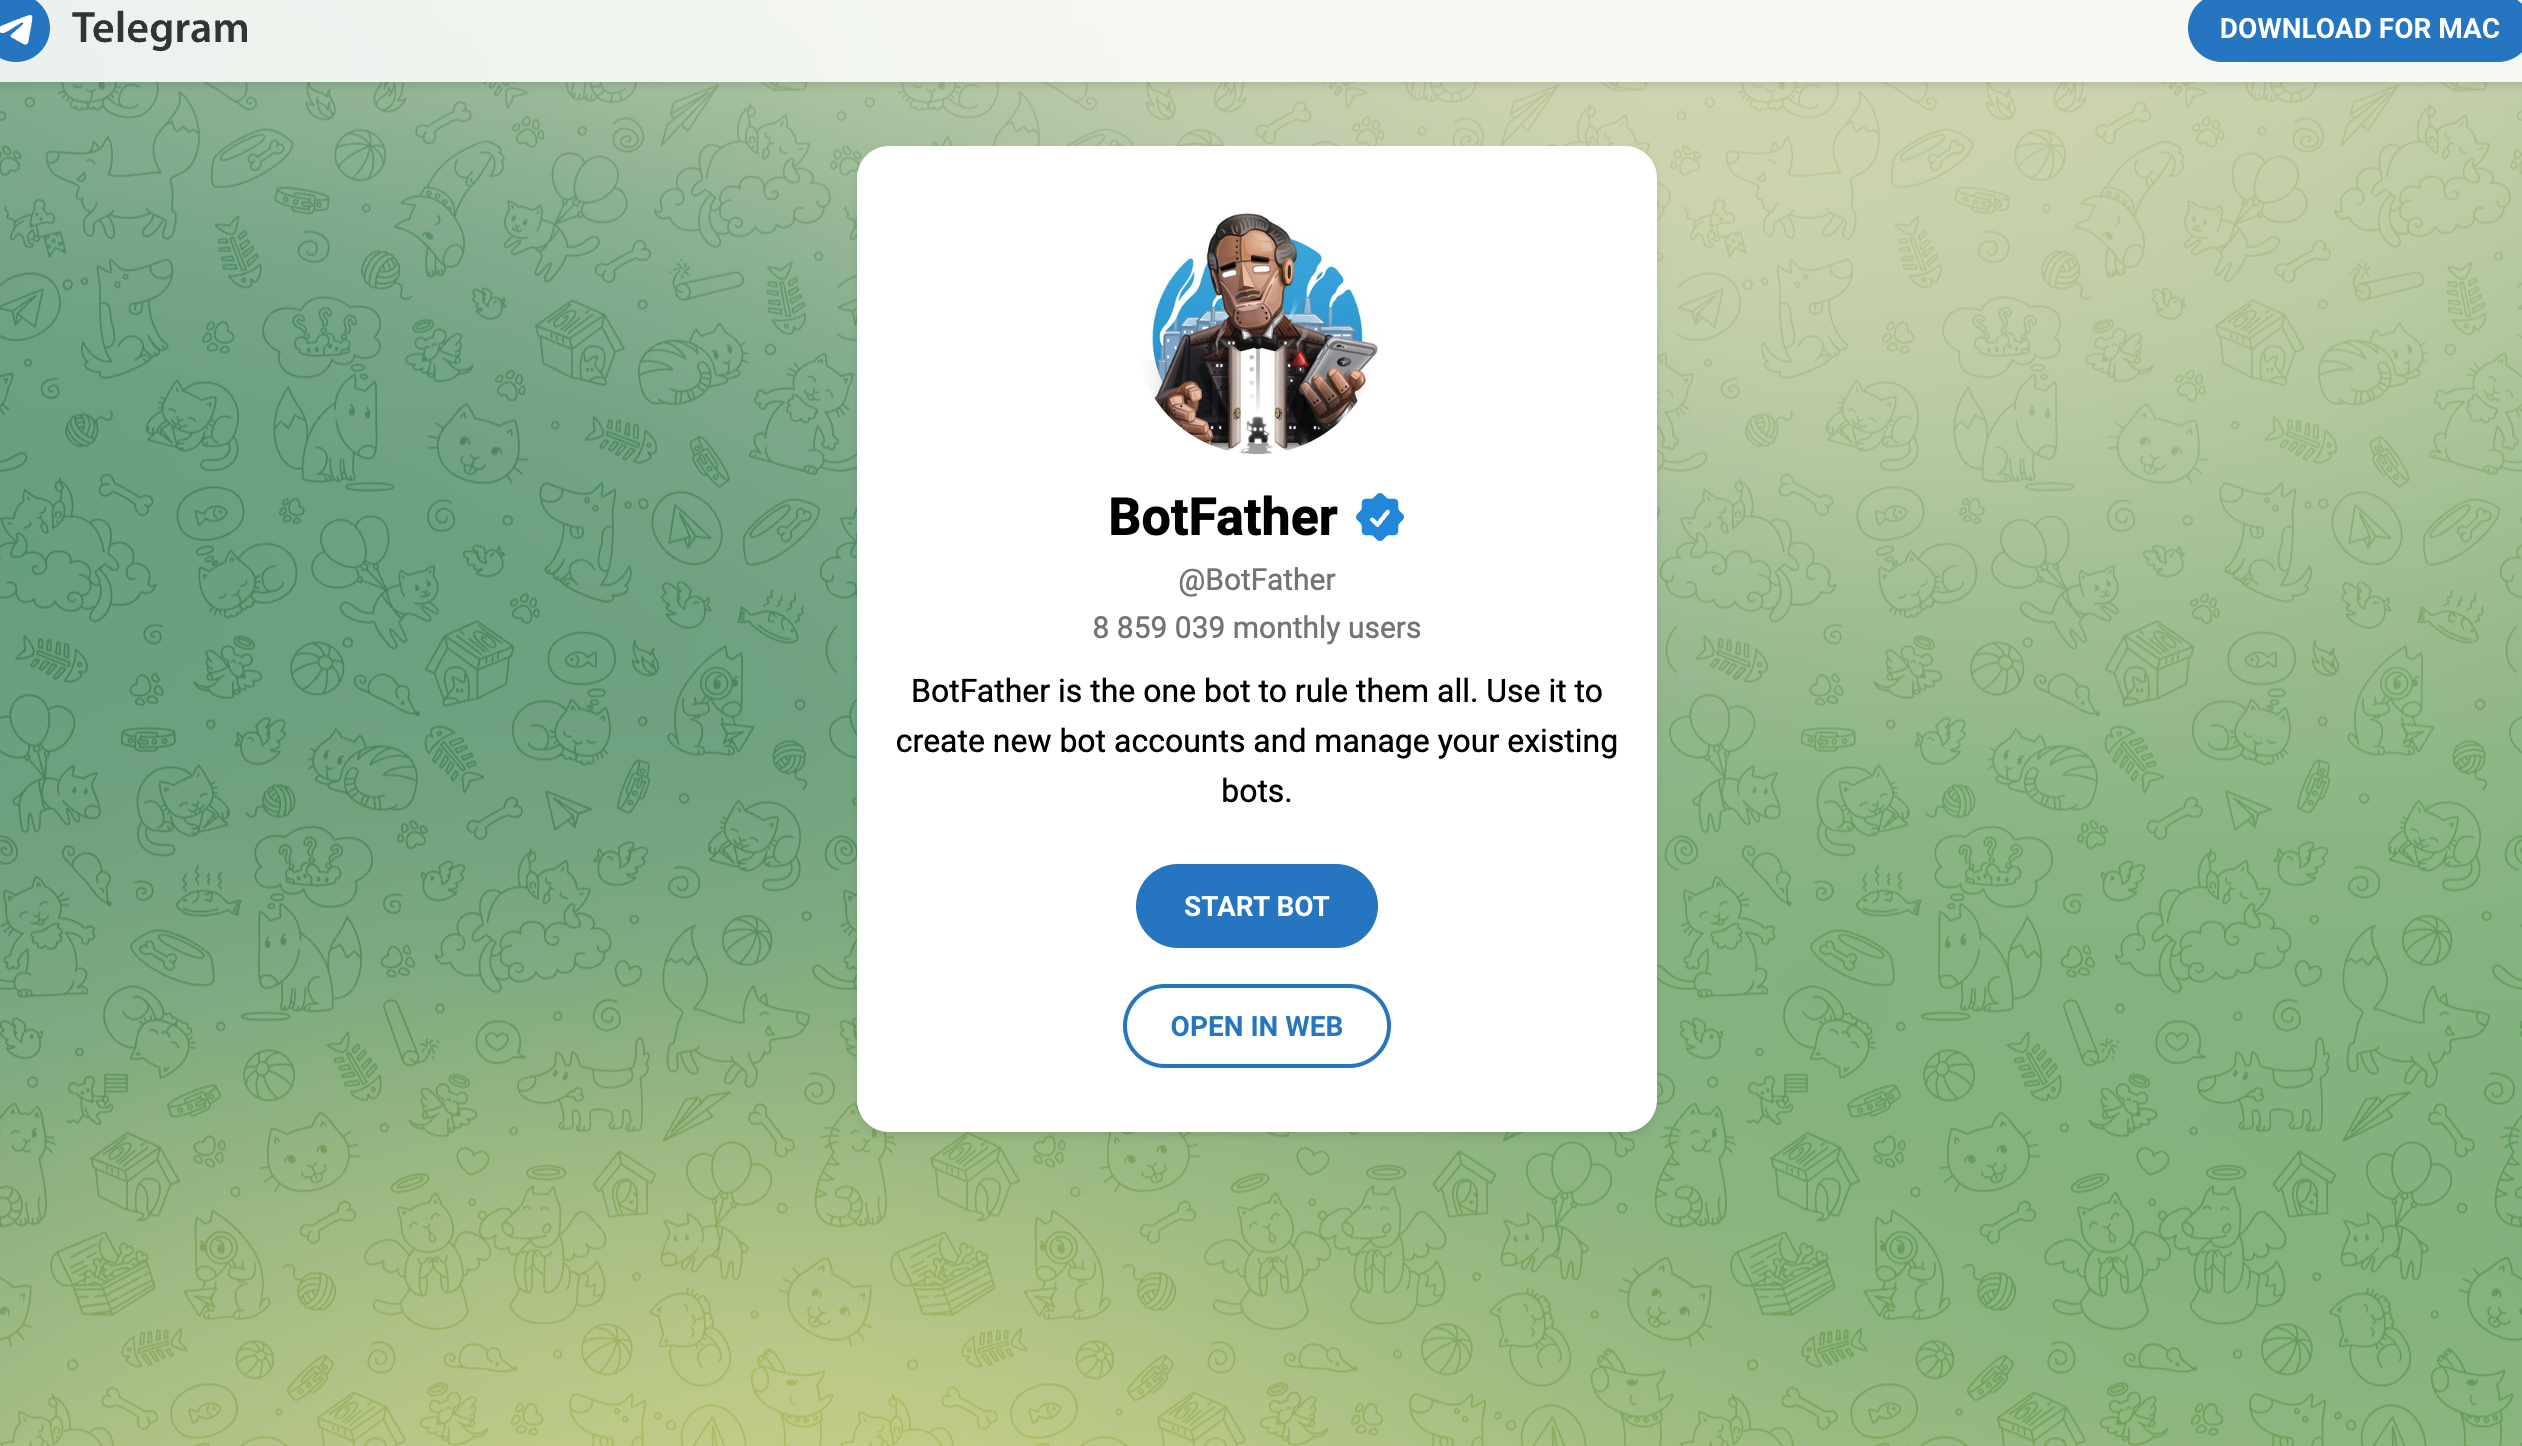
1. Open Telegram and search for @BotFather, or click the BotFather direct link to start a chat.
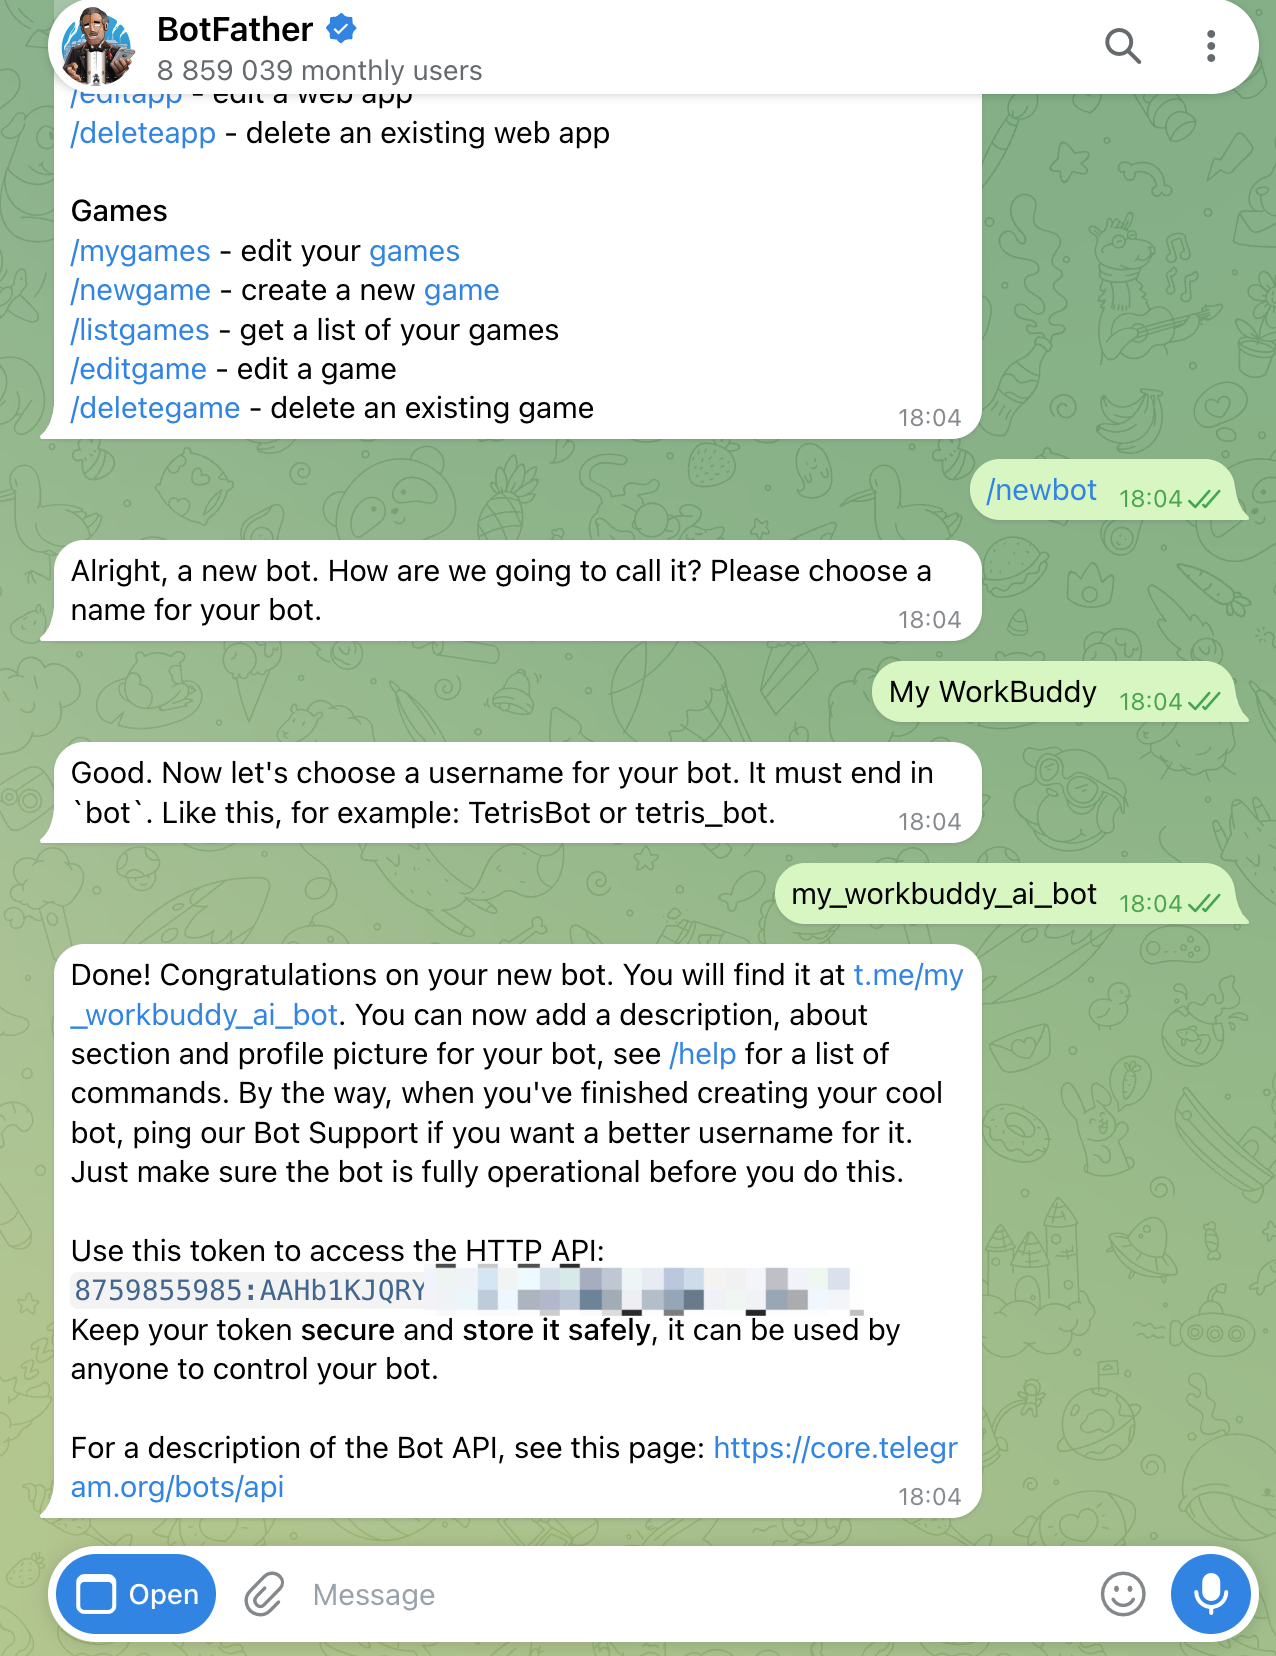
2. Send
/newbot.3. Enter the display name for the bot. This is the name shown in the chat list, for example,
My WorkBuddy.4. Enter the username for the bot. It must meet two requirements: it must be globally unique and end with
bot, for example, my_workbuddy_ai_bot.5. After successful creation, BotFather returns a Bot Token in a format similar to
123456789:ABCdefGHIjklMNOpqrsTUVwxyz.6. Copy and securely store the Token.
Note: Managing an Existing bot
Sending
/mybots in BotFather allows you to view and manage your created bots, including viewing tokens, modifying names, and adjusting settings.III. Connecting in WorkBuddy AI
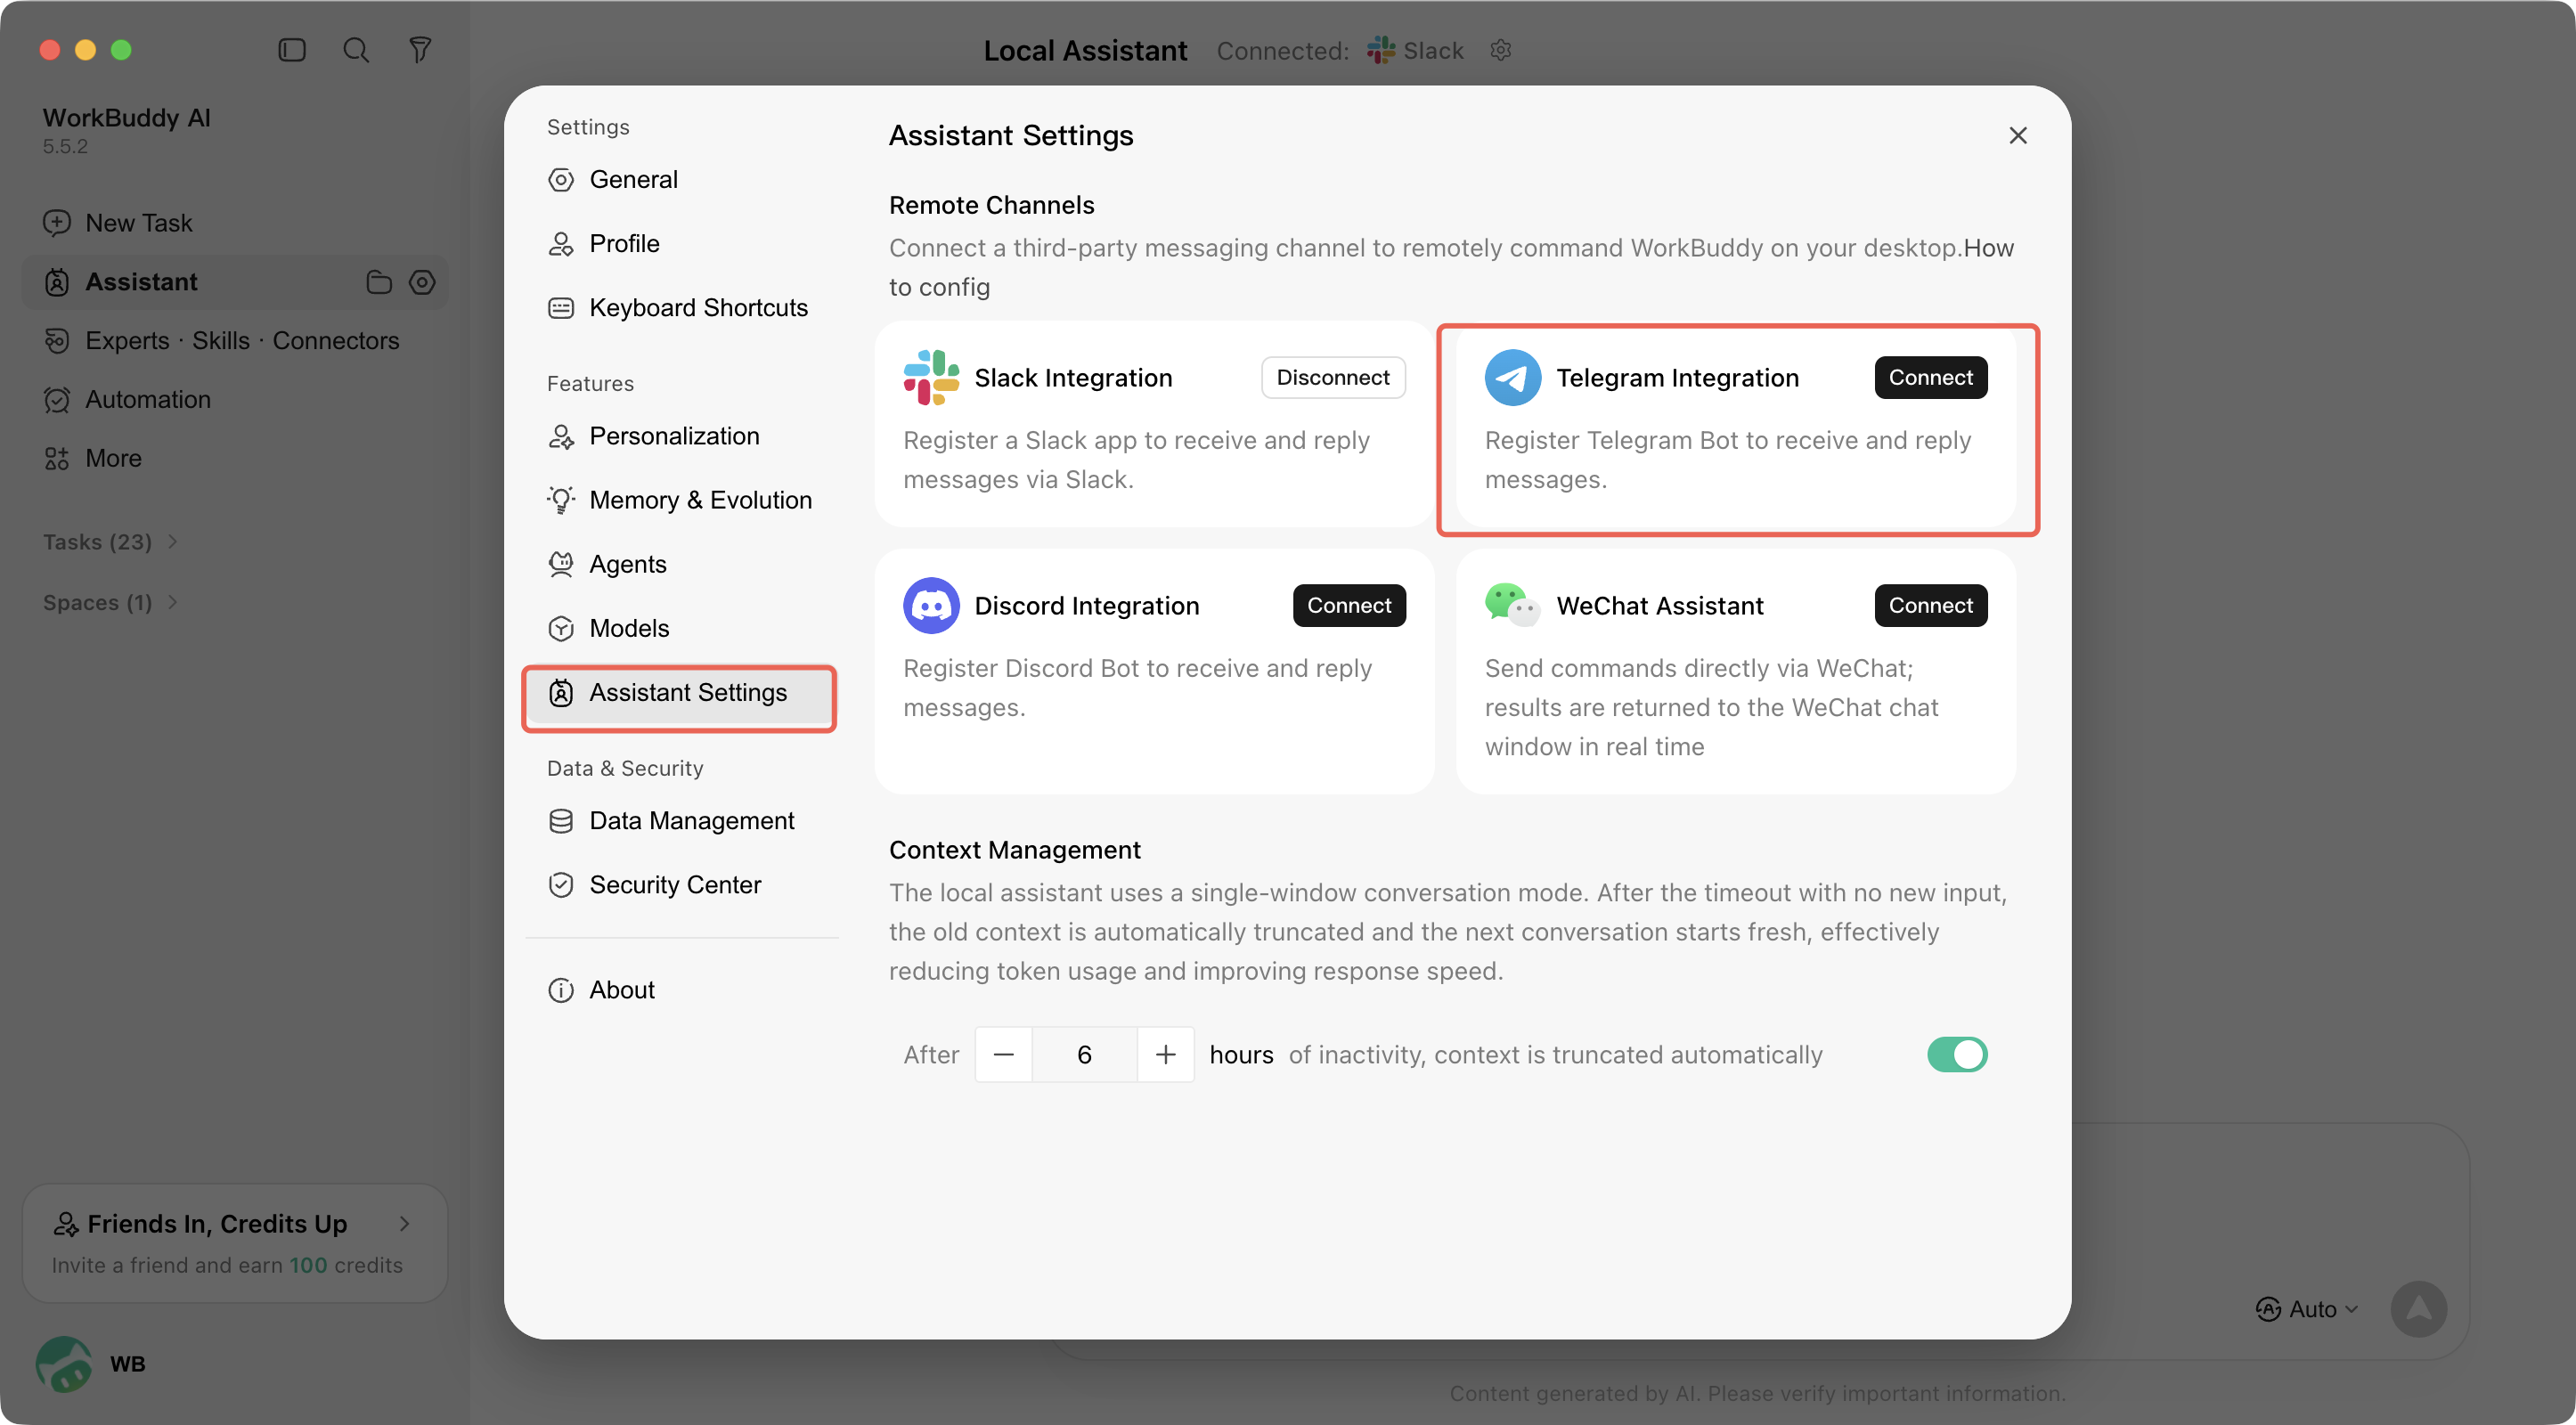
1. Open WorkBuddy AI and click Assistant in the left sidebar.
2. Go to Assistant Settings.
3. In the Remote Channels section, find Telegram Integration and click Connect.
4. In the Register Telegram Channel window that appears, fill in the following:
Bot Token: Enter the Token obtained from BotFather in the previous chapter.
API Base URL (optional): Leave it blank. For details, see the description below.
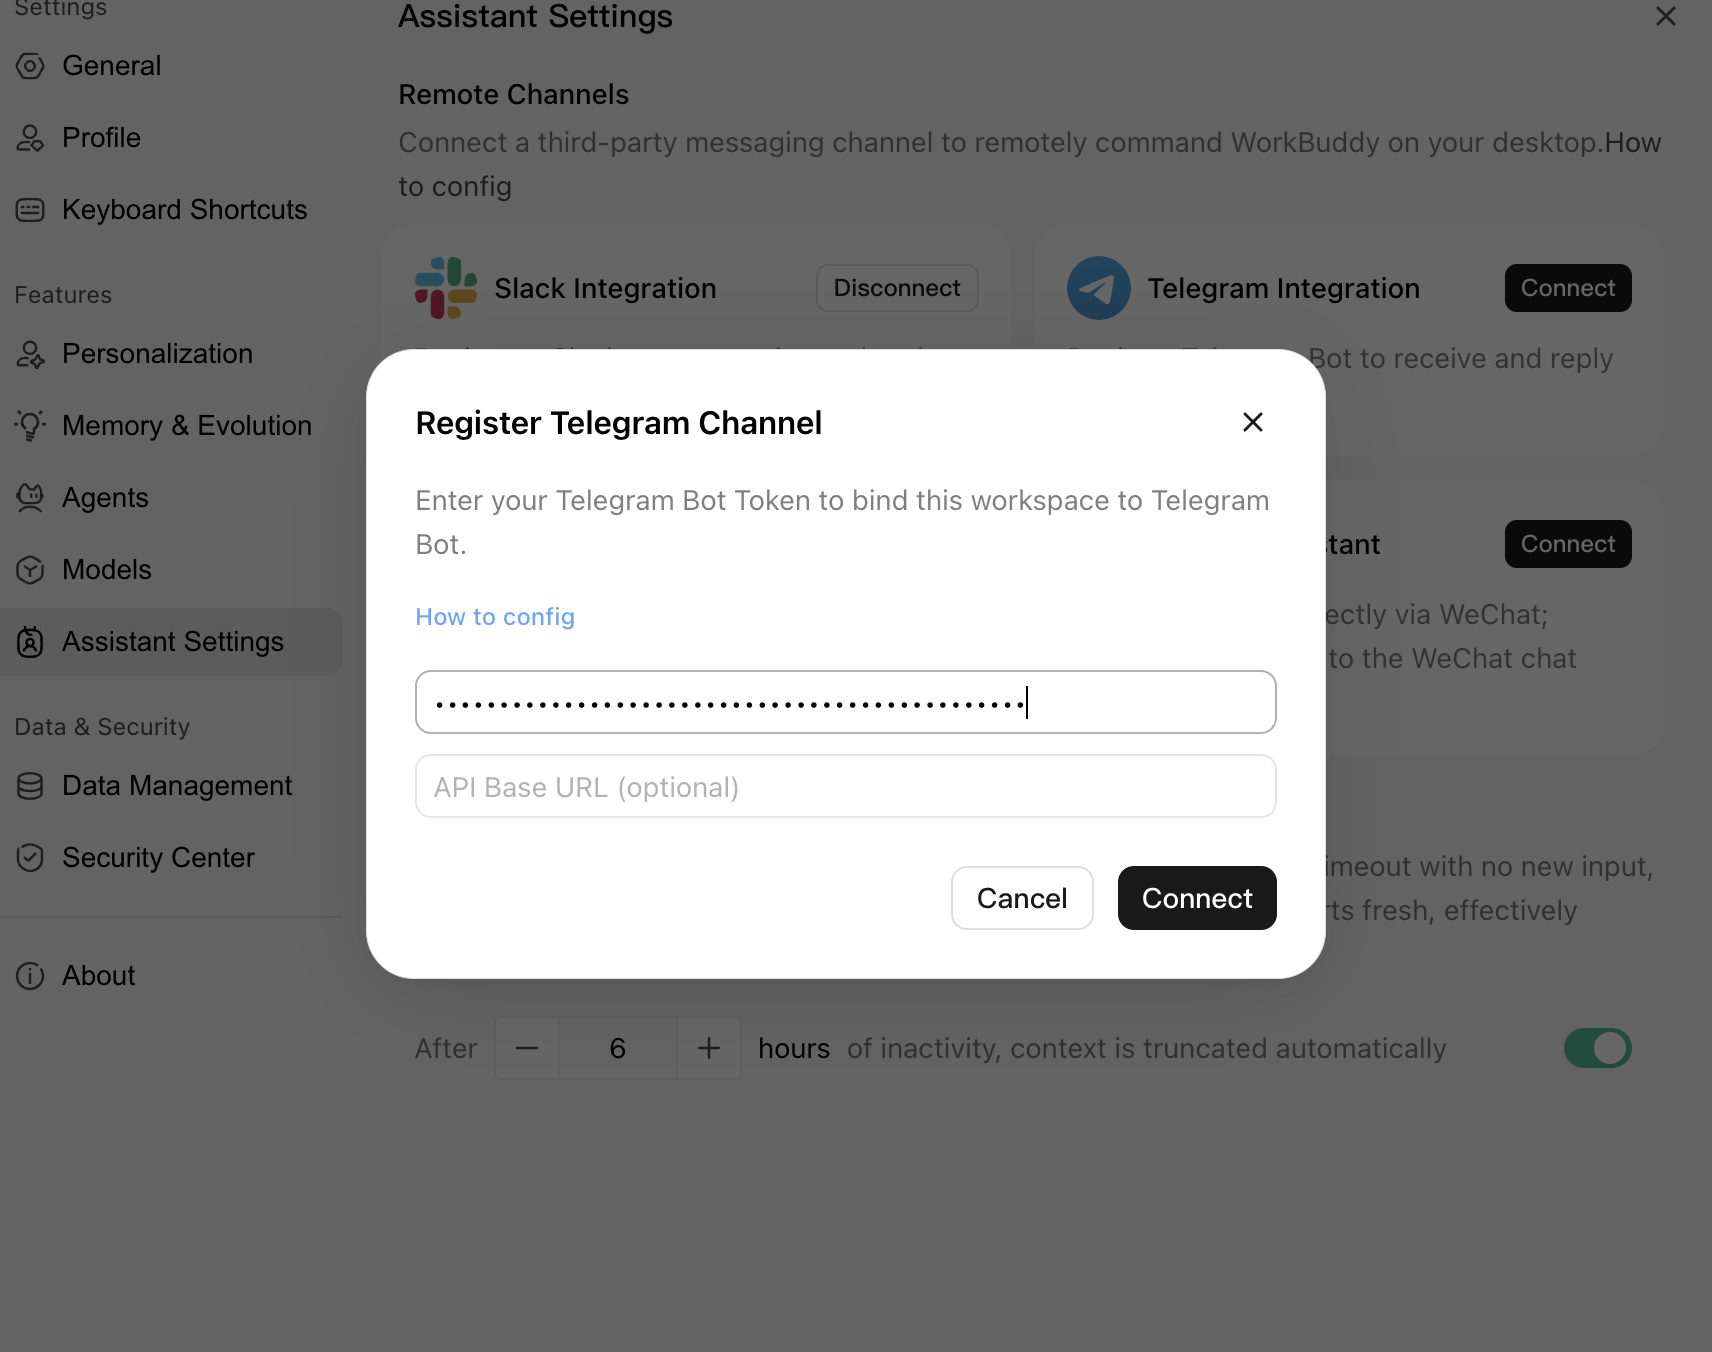
5. Click Connect.
After a successful connection, the button on the Telegram Integration card changes to Disconnect.
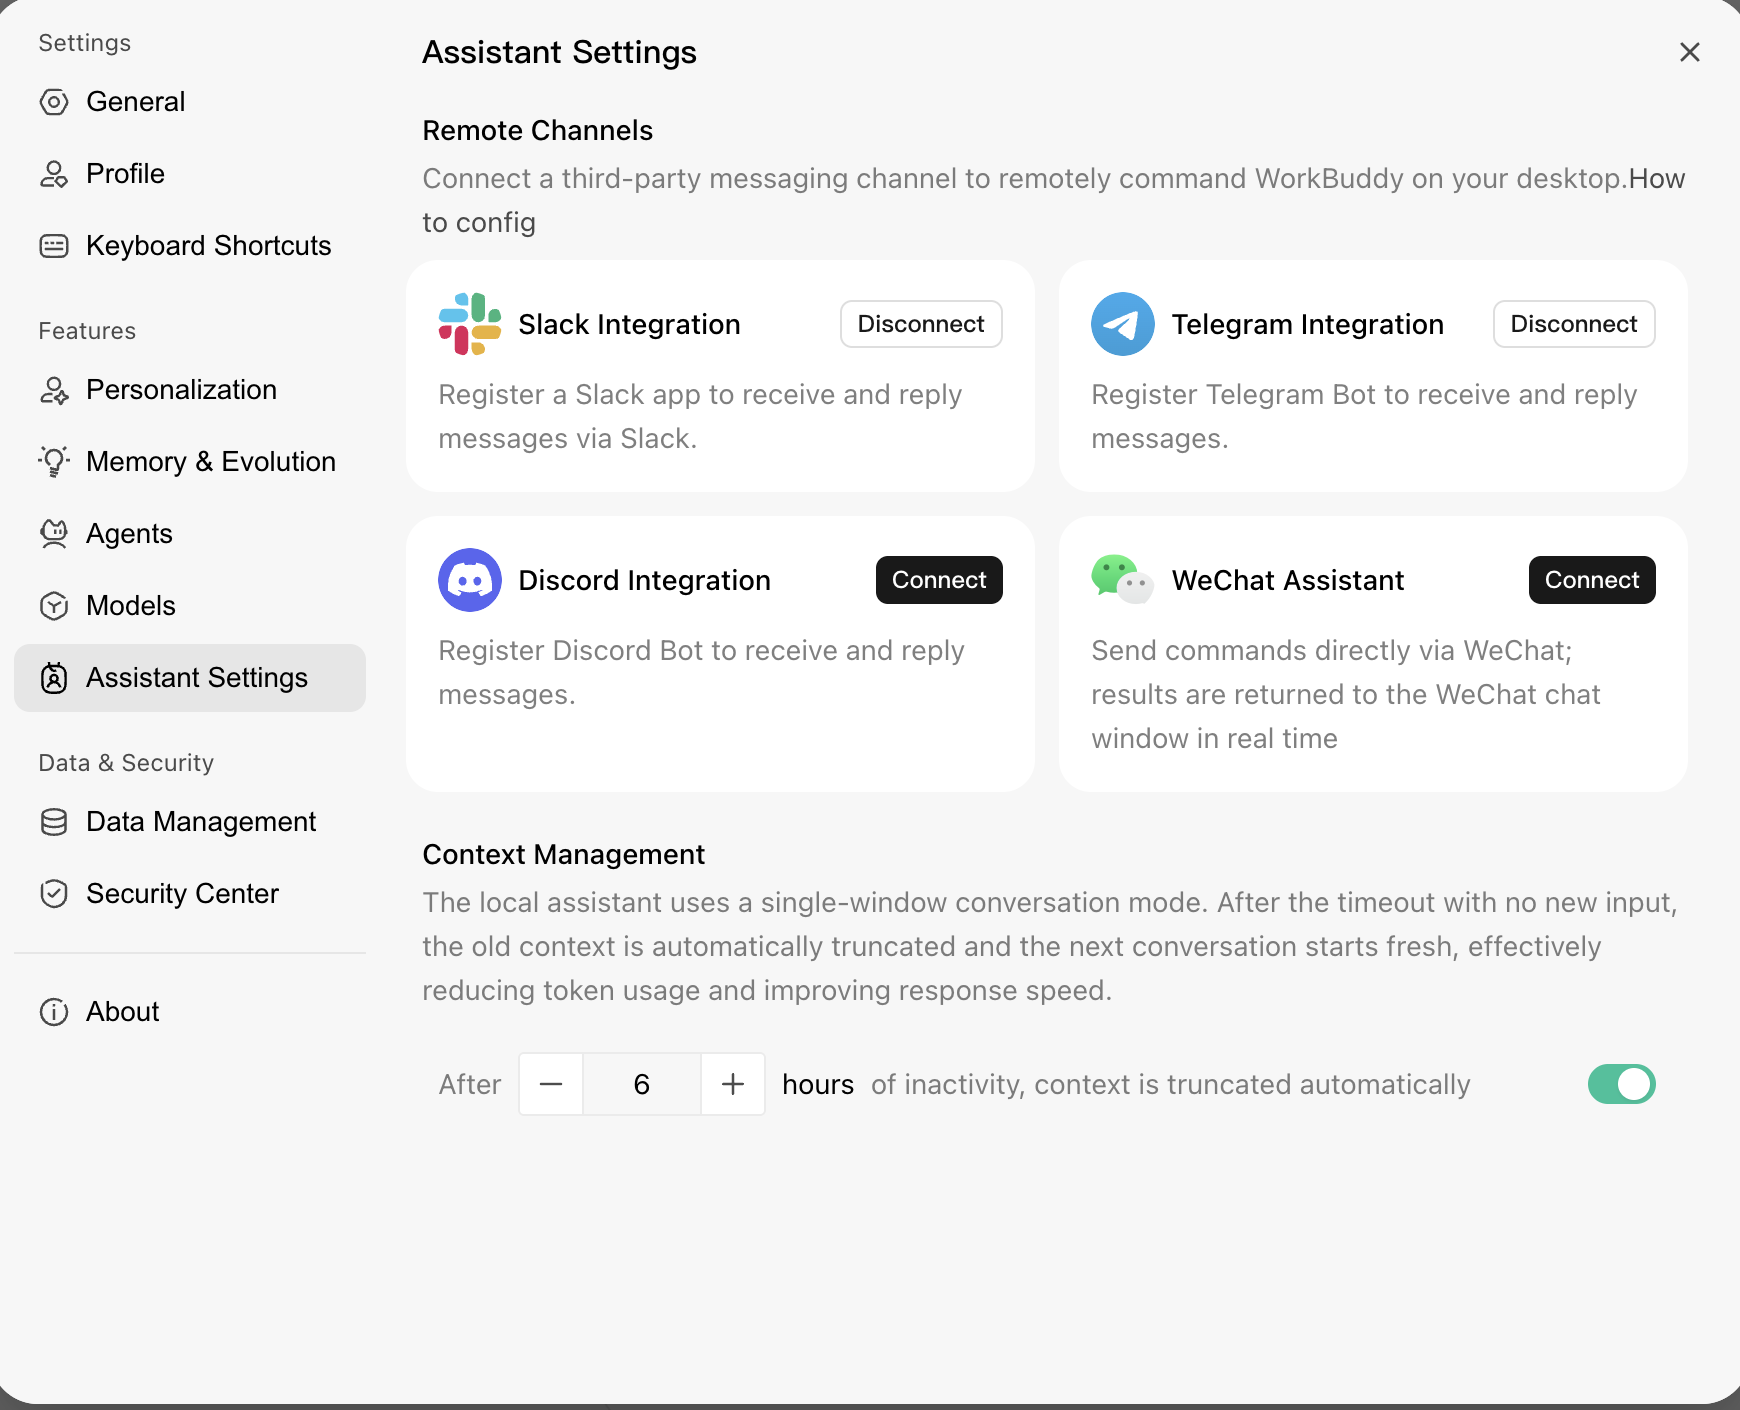
Note: When to Fill in the API Base URL
This field is used to specify a self-hosted Telegram Bot API server. In most cases, leave it blank to use the official Telegram service.
You need to set up your own server and fill in this field only when you encounter the following situations:
You need to transfer files larger than 50 MB through Telegram. The official API has an upload limit of 50 MB and a download limit of 20 MB, while a self-hosted server can increase the limit to 2 GB.
The network environment must forward Telegram API requests through your own server.
Setting up your own server requires applying for an api_id and api_hash, which is an advanced use case and is not covered in this guide.
IV. Getting Started with the Bot
1. Search for your bot username in Telegram, for example,
@my_workbuddy_ai_bot.2. Open the conversation and click Start (or send
/start).3. Send a message, and WorkBuddy AI will reply in real time through the bot.
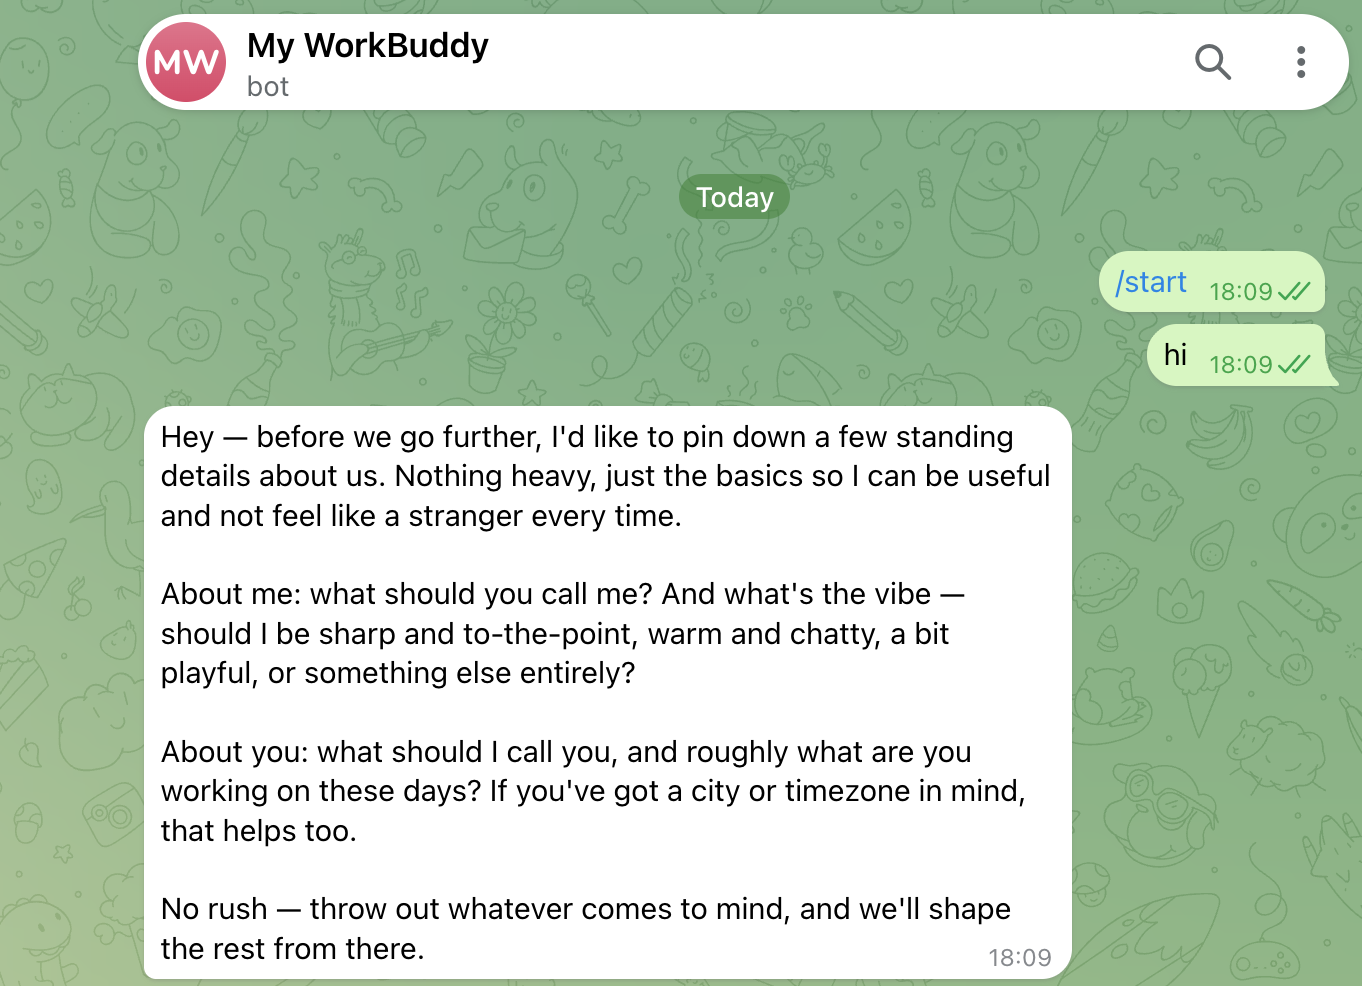
Note: You Must Send /start First
Telegram requires users to initiate a conversation with the bot before the bot can send messages to them. If you wait for a message without clicking Start, you will not receive any reply.
V. Usage
Send a text message to the bot to assign a task.
Send images, documents, and files as task context.
Use
/clear to clear the current session history.Receive execution results in Markdown format.
Note: Using in Groups
To use the bot in a group, you must first disable Telegram's privacy mode. Otherwise, the bot can only receive commands starting with
/ in the group and will not receive regular messages.To disable it: send
/setprivacy in @BotFather, select the corresponding bot, and then select Disable.VI. Security Recommendations
A Bot Token is equivalent to a password. Keep it secure.
Do not share the Token publicly or commit it to a code repository.
If the Token has been leaked, run
/mybots in @BotFather, select the corresponding bot, go to API Token → Revoke current token to regenerate it, and then update it in WorkBuddy AI.Note:
A Bot Token grants remote operation permissions for WorkBuddy AI on your computer. Anyone with the Token can send tasks to your computer, so keep it secure.
VII. FAQ
Issue | Solution |
Bot Not Responding | Confirm that WorkBuddy AI is running on the computer and the channel status is connected. |
No Response After a Message Is Sent | Confirm that you have clicked Start or sent /start in the bot conversation. |
Message Delivery Failure | Check the network connection of the computer and the Telegram client. |
Invalid Bot Token | Run /mybots in @BotFather to view or generate the Token again, and update it in WorkBuddy AI. |
Username Already Taken When a Bot Is Created. | Telegram requires bot usernames to be globally unique. Use a different name and try again. |
No Response to Messages in Group | Disable privacy mode in @BotFather through /setprivacy. |
Large File Transfer Failed | The official Telegram API limits uploads to 50 MB and downloads to 20 MB. If these limits are exceeded, you need to build your own Bot API server. |
Connection Interrupted | Check the network connection. WorkBuddy AI will automatically attempt to reconnect. |
Help and Support
Was this page helpful?
You can also Contact sales or Submit a Ticket for help.
Help us improve! Rate your documentation experience in 5 mins.
Feedback