Slack Integration Guide
Download
Focus Mode
Font Size
After connecting WorkBuddy AI to Slack, you can send tasks and receive execution results directly in Slack, allowing you to remotely control WorkBuddy AI on your computer anytime and anywhere.
I. Prerequisites
Before you begin, make sure you have met the following prerequisites:
WorkBuddy AI is installed and logged in on your computer, and it remains running.
You have a Slack workspace and the permission to install apps, or you can request installation from an administrator.
Note:
During remote control, the computer must remain powered on and WorkBuddy AI must remain running. If the computer enters sleep mode or the application exits, messages from Slack cannot be executed.
II. Creating a Slack App
You need to first create an app in Slack and obtain two credentials: Bot Token and App-Level Token.
We recommend creating the app using an App Manifest, which completes the configuration of Socket Mode, permissions, and event subscriptions all at once.
Step 1: Creating an App from the App Manifest
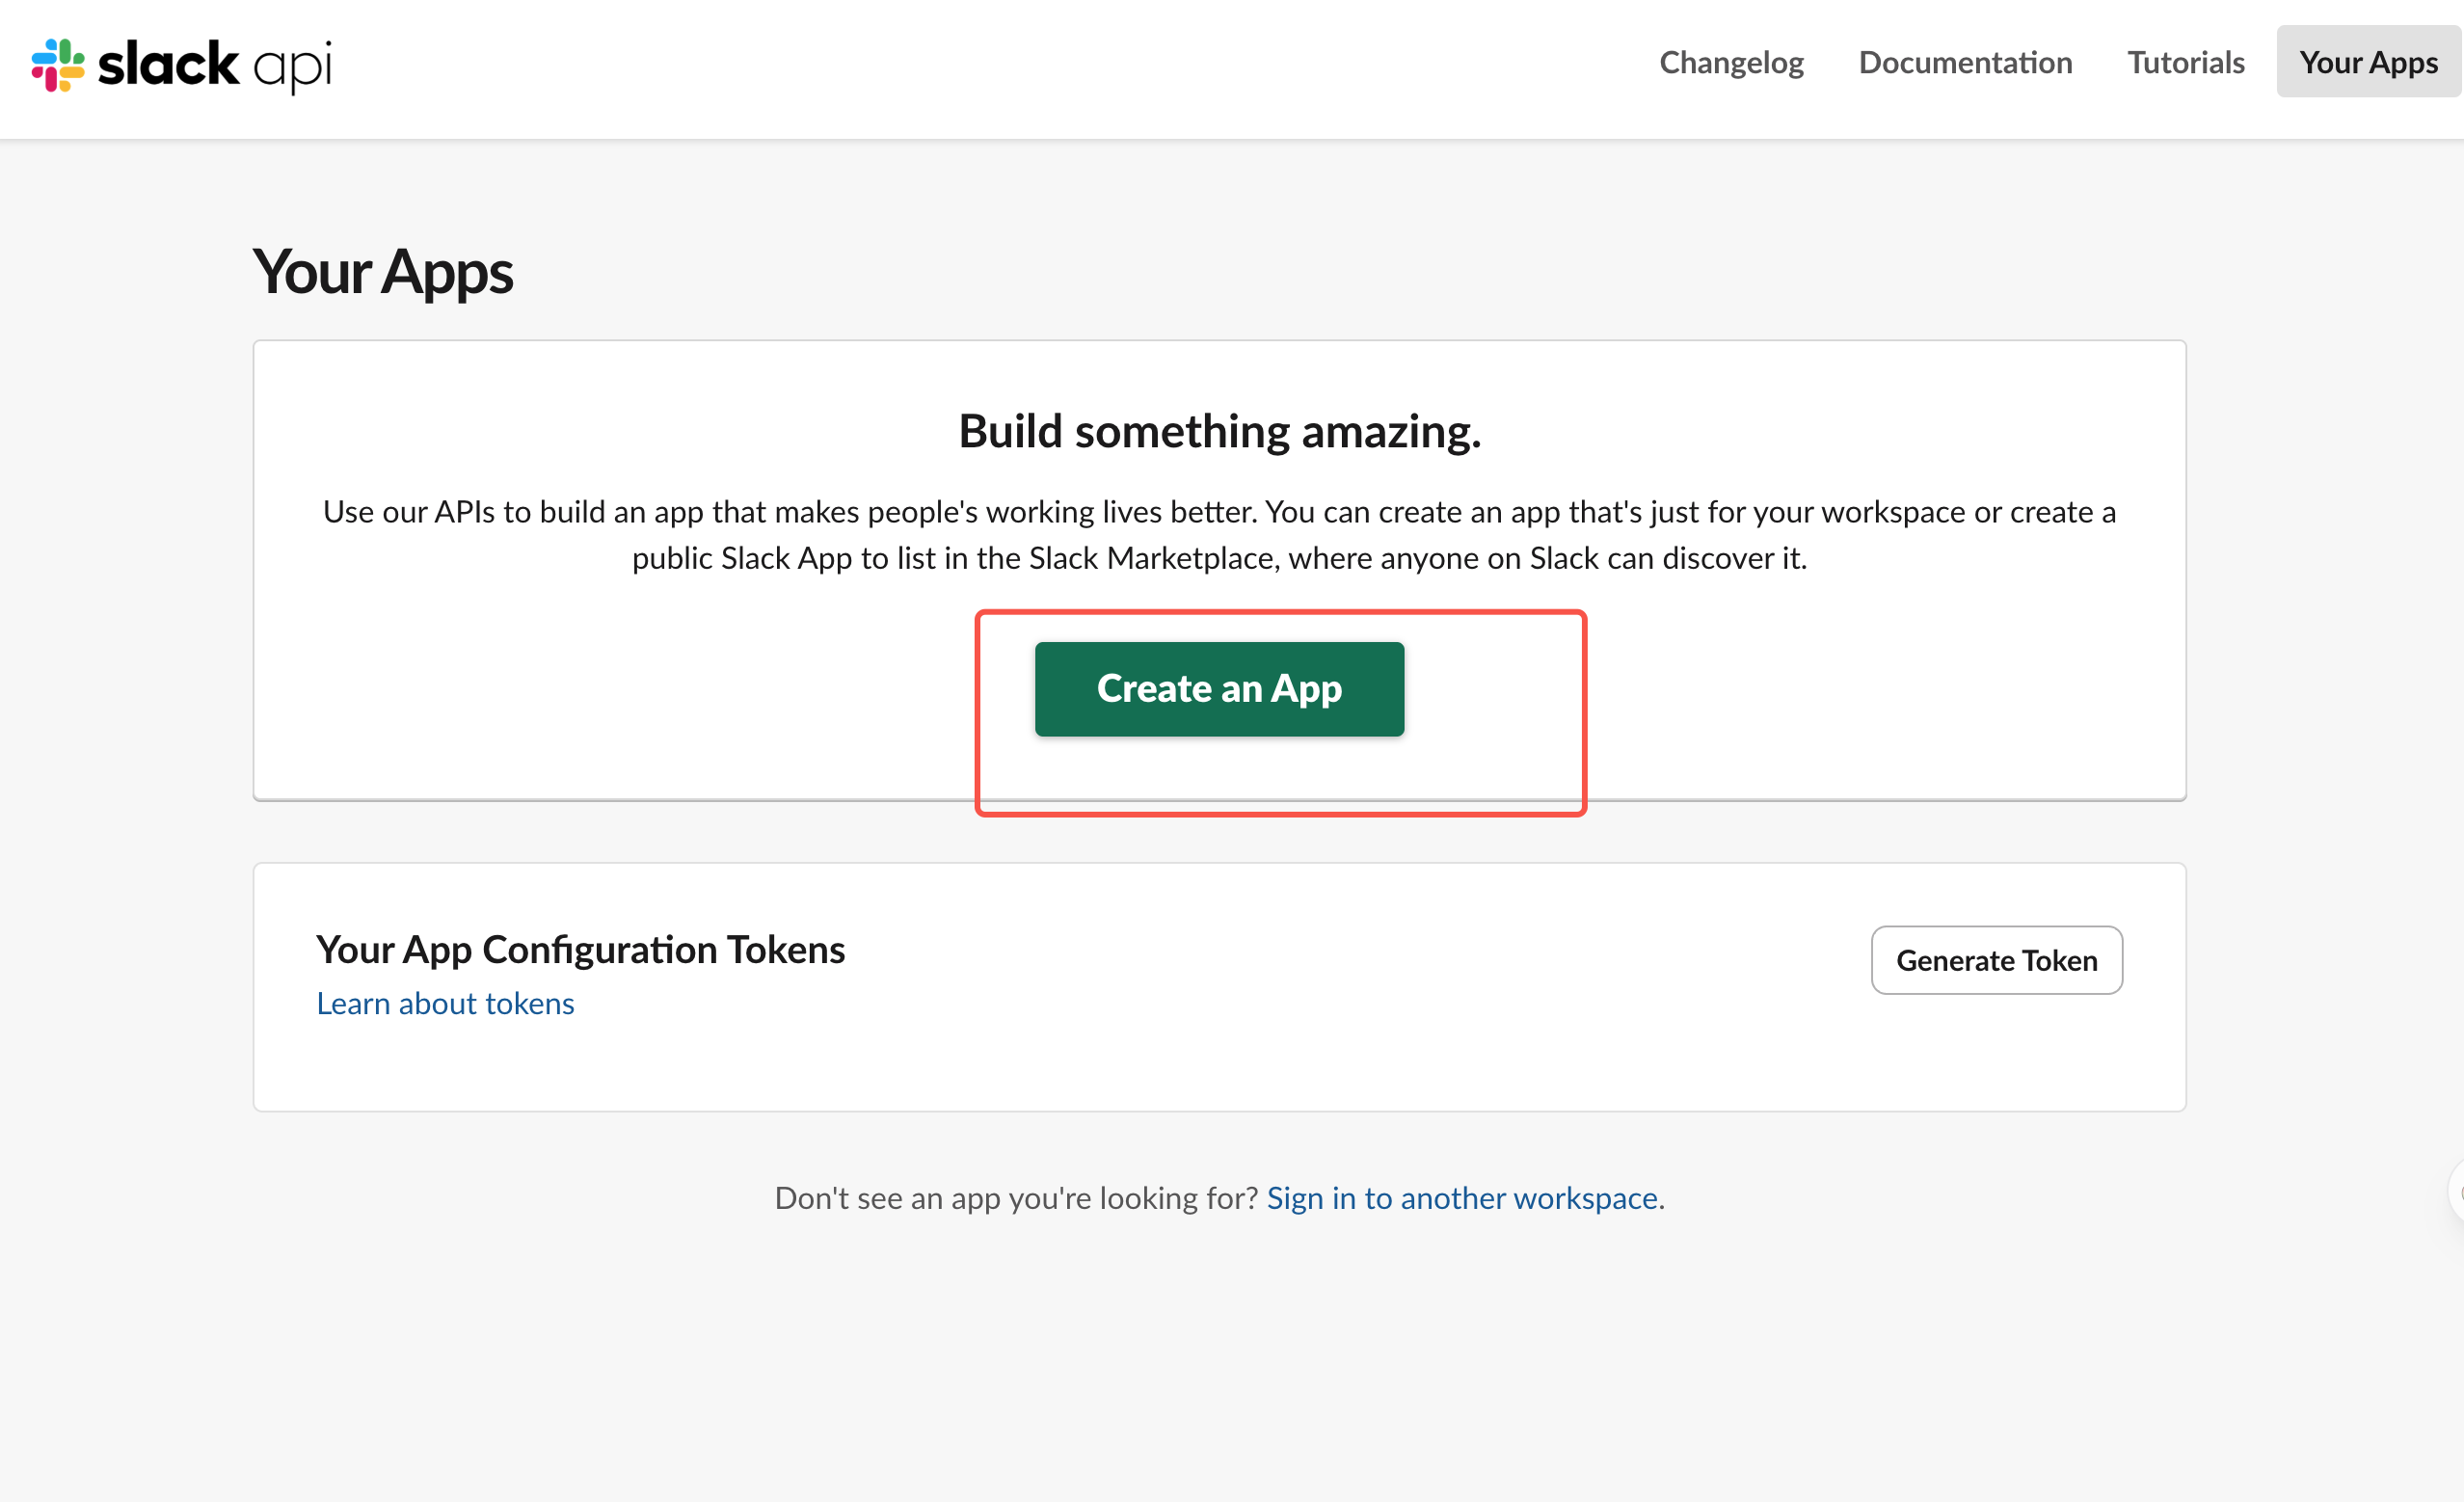
1. Open api.slack.com/apps and log in.
2. Click Create New App and select From an app manifest.
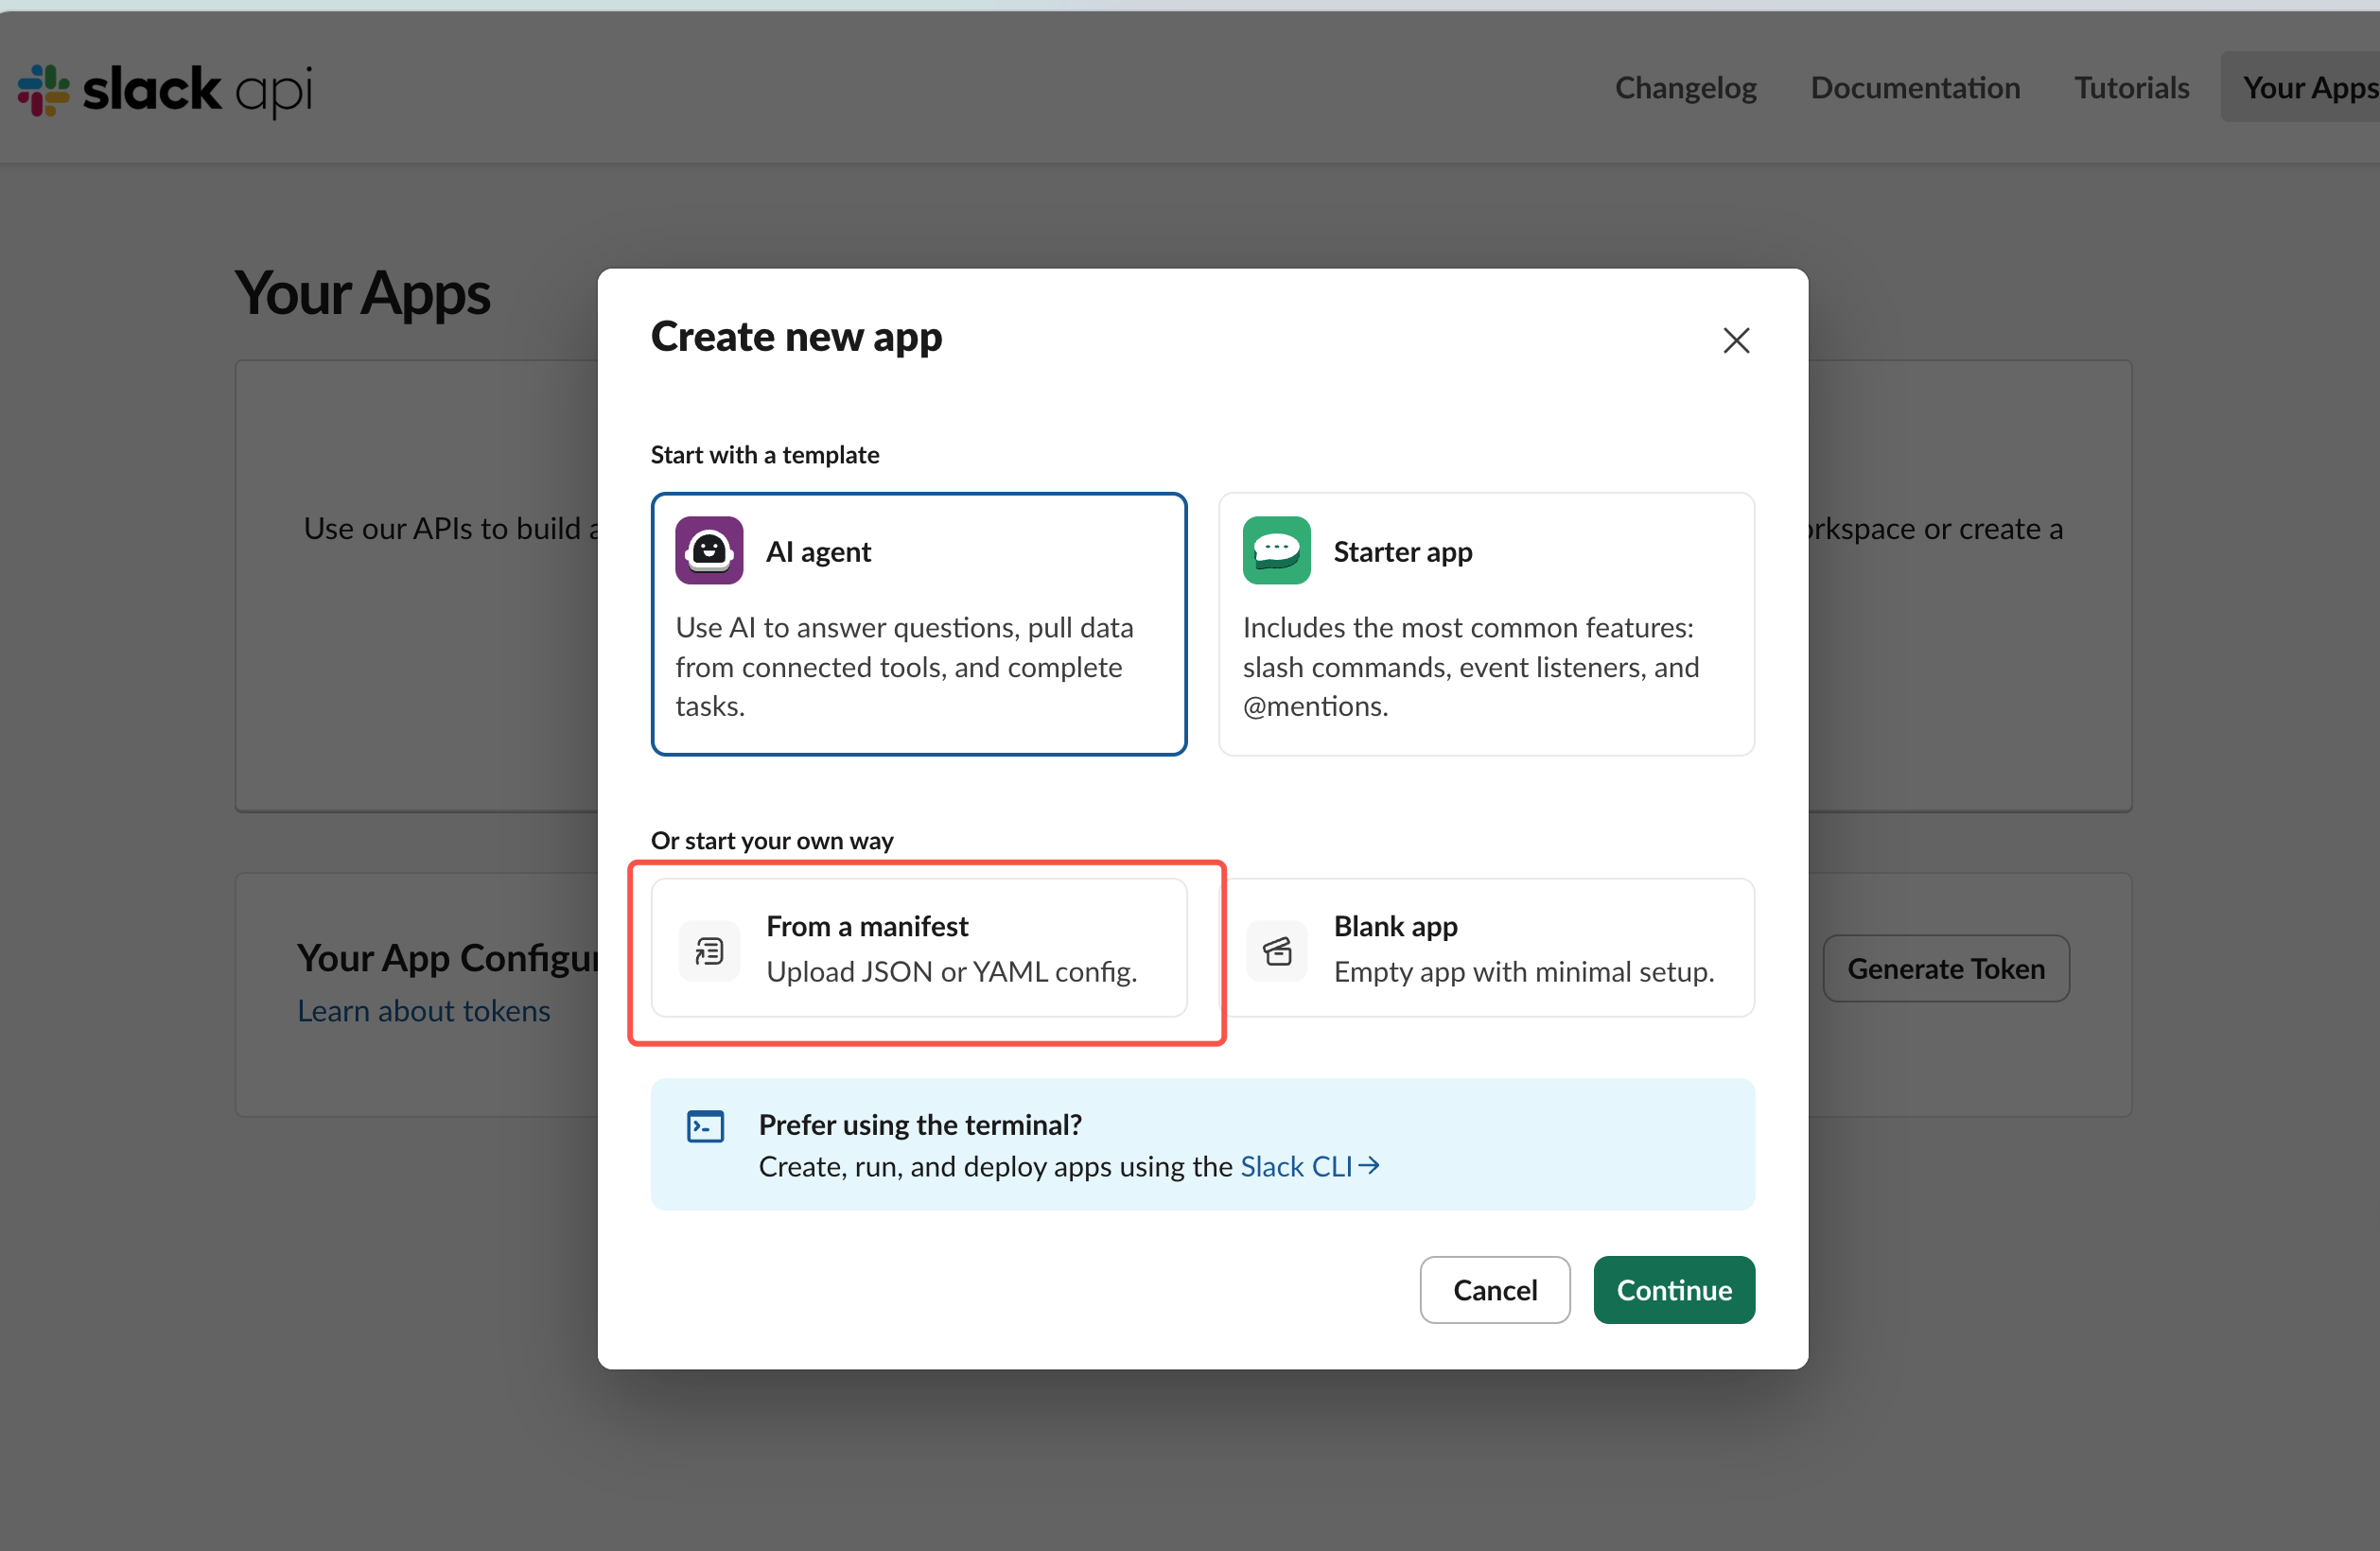
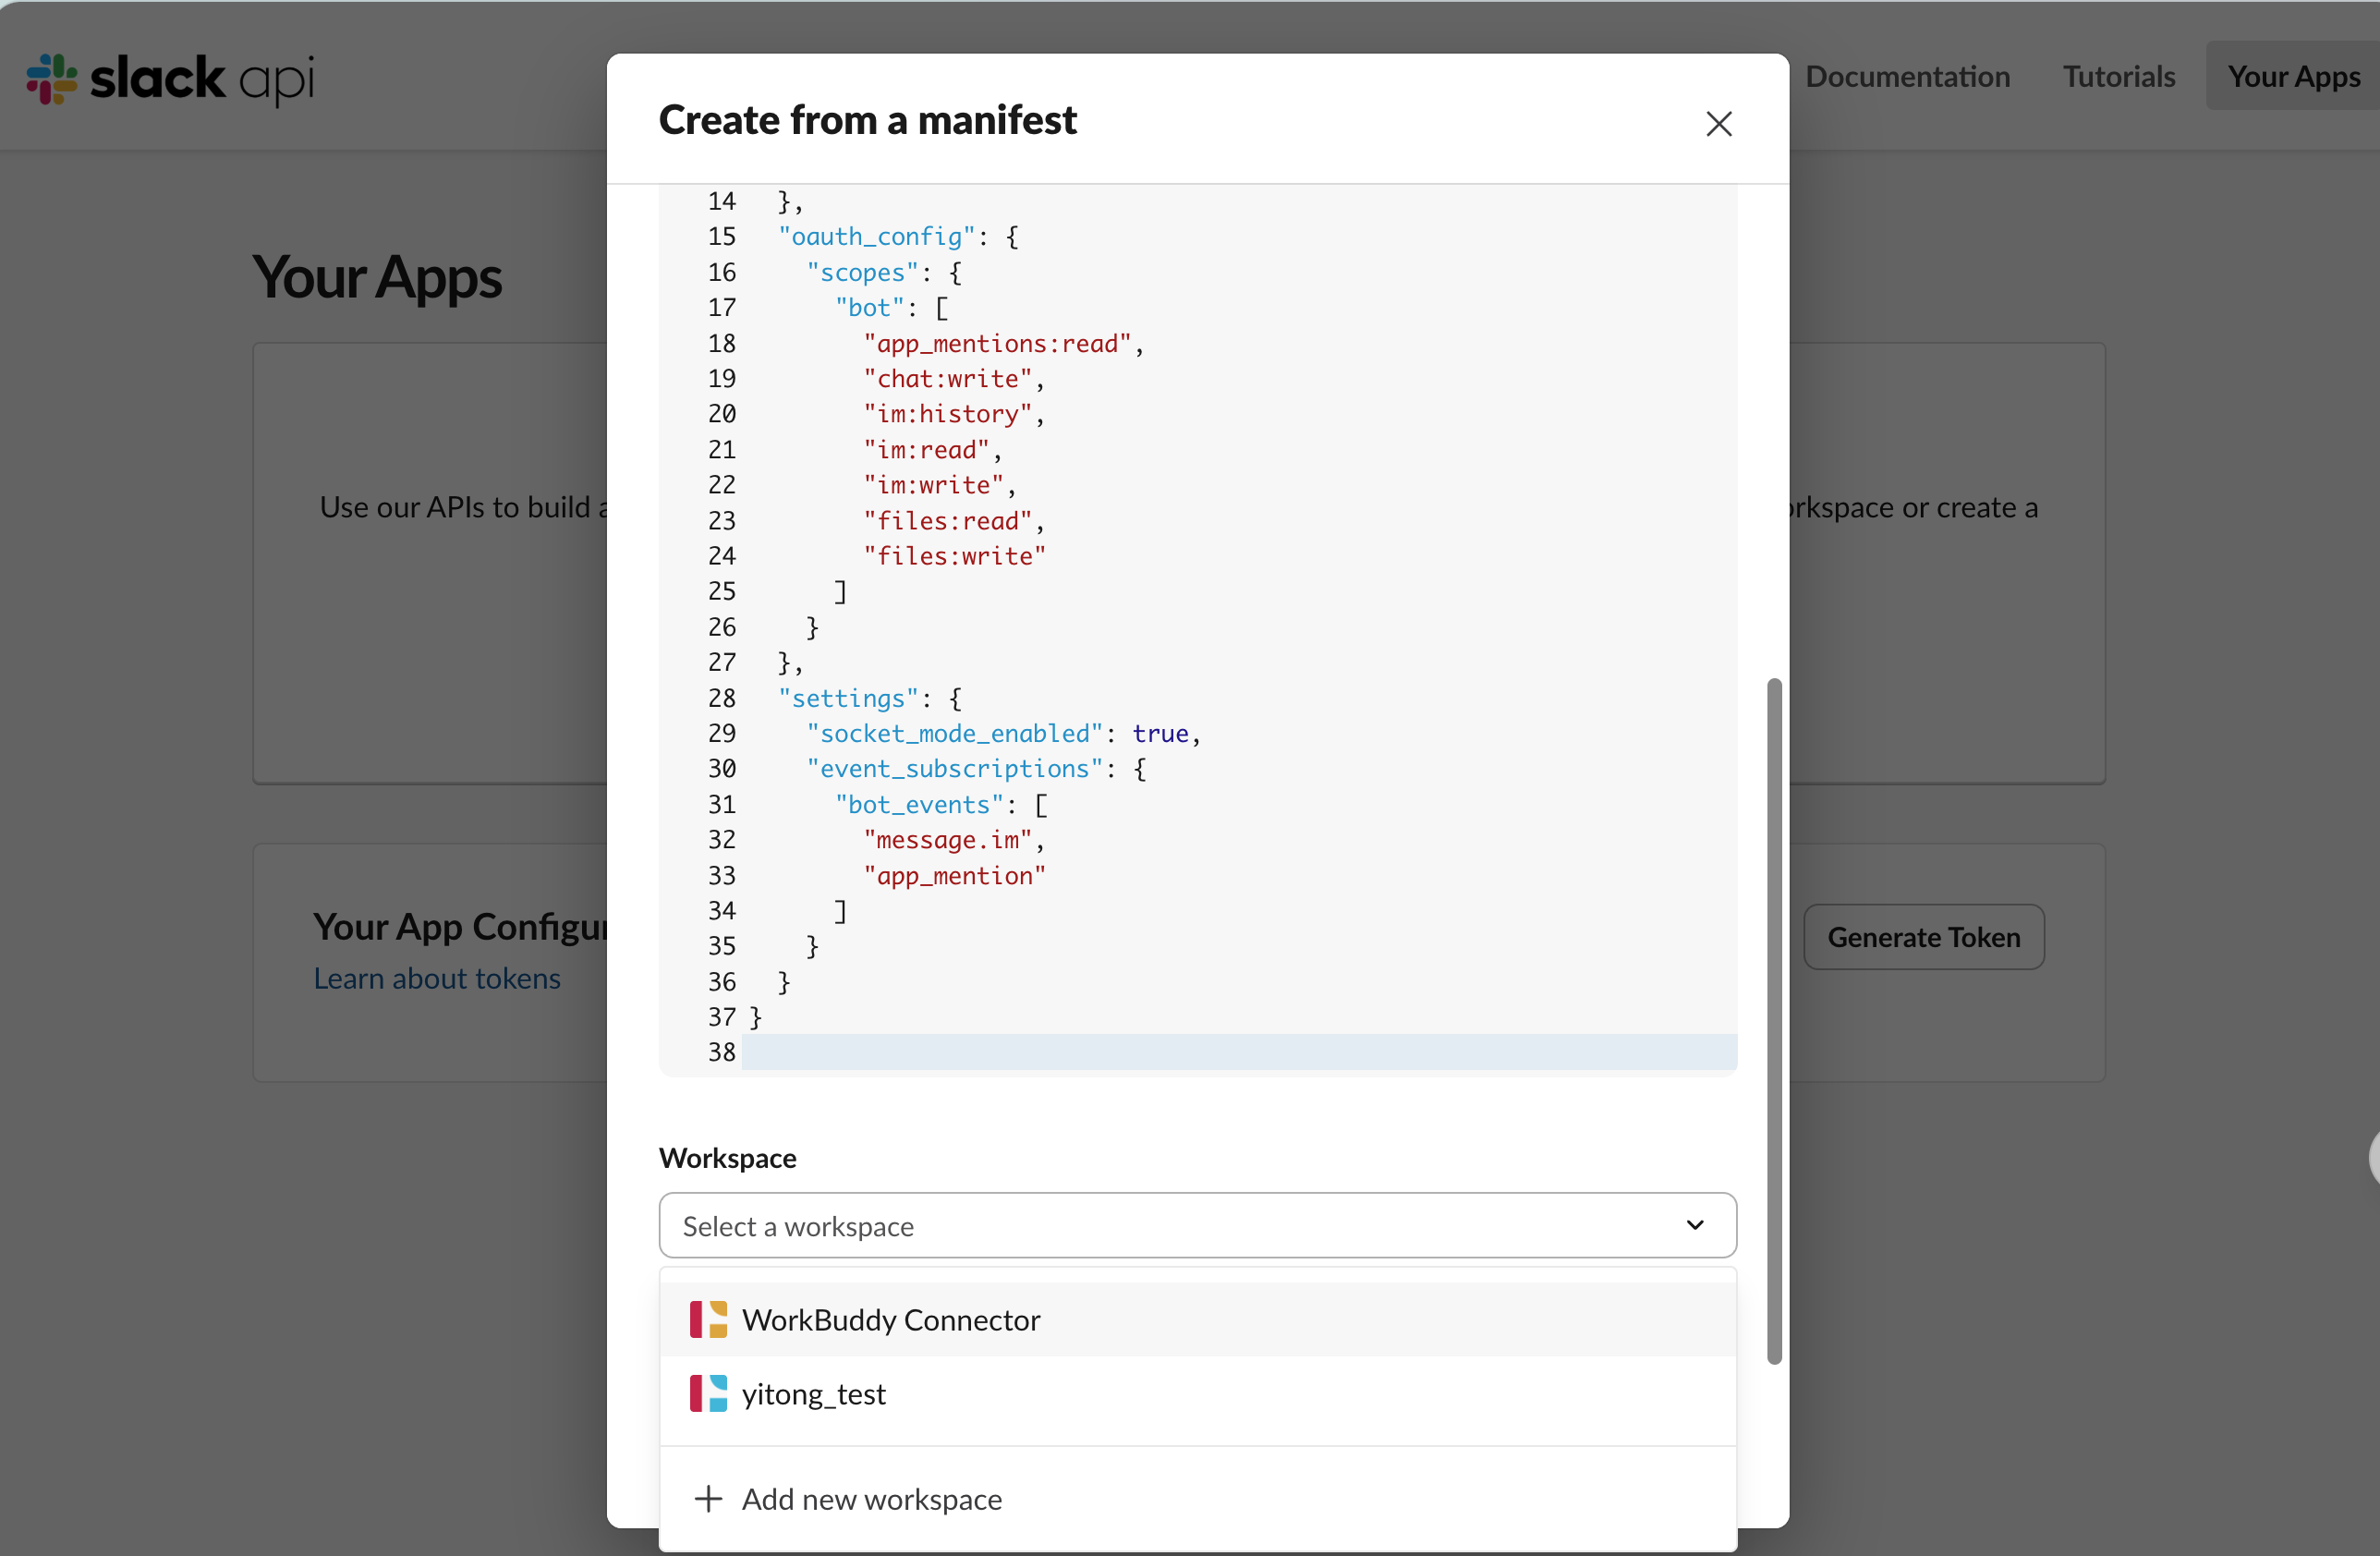
3. Select the workspace to install the app to, and then click Next.
4. Switch to the JSON tab and paste the following content into the input field:
{"display_information": {"name": "WorkBuddy AI"},"features": {"bot_user": {"display_name": "WorkBuddy AI","always_online": true},"app_home": {"messages_tab_enabled": true,"messages_tab_read_only_enabled": false}},"oauth_config": {"scopes": {"bot": ["app_mentions:read","chat:write","im:history","im:read","im:write","files:read","files:write"]}},"settings": {"socket_mode_enabled": true,"event_subscriptions": {"bot_events": ["message.im","app_mention"]}}}
5. Click Next, review the permission list, and then click Create.
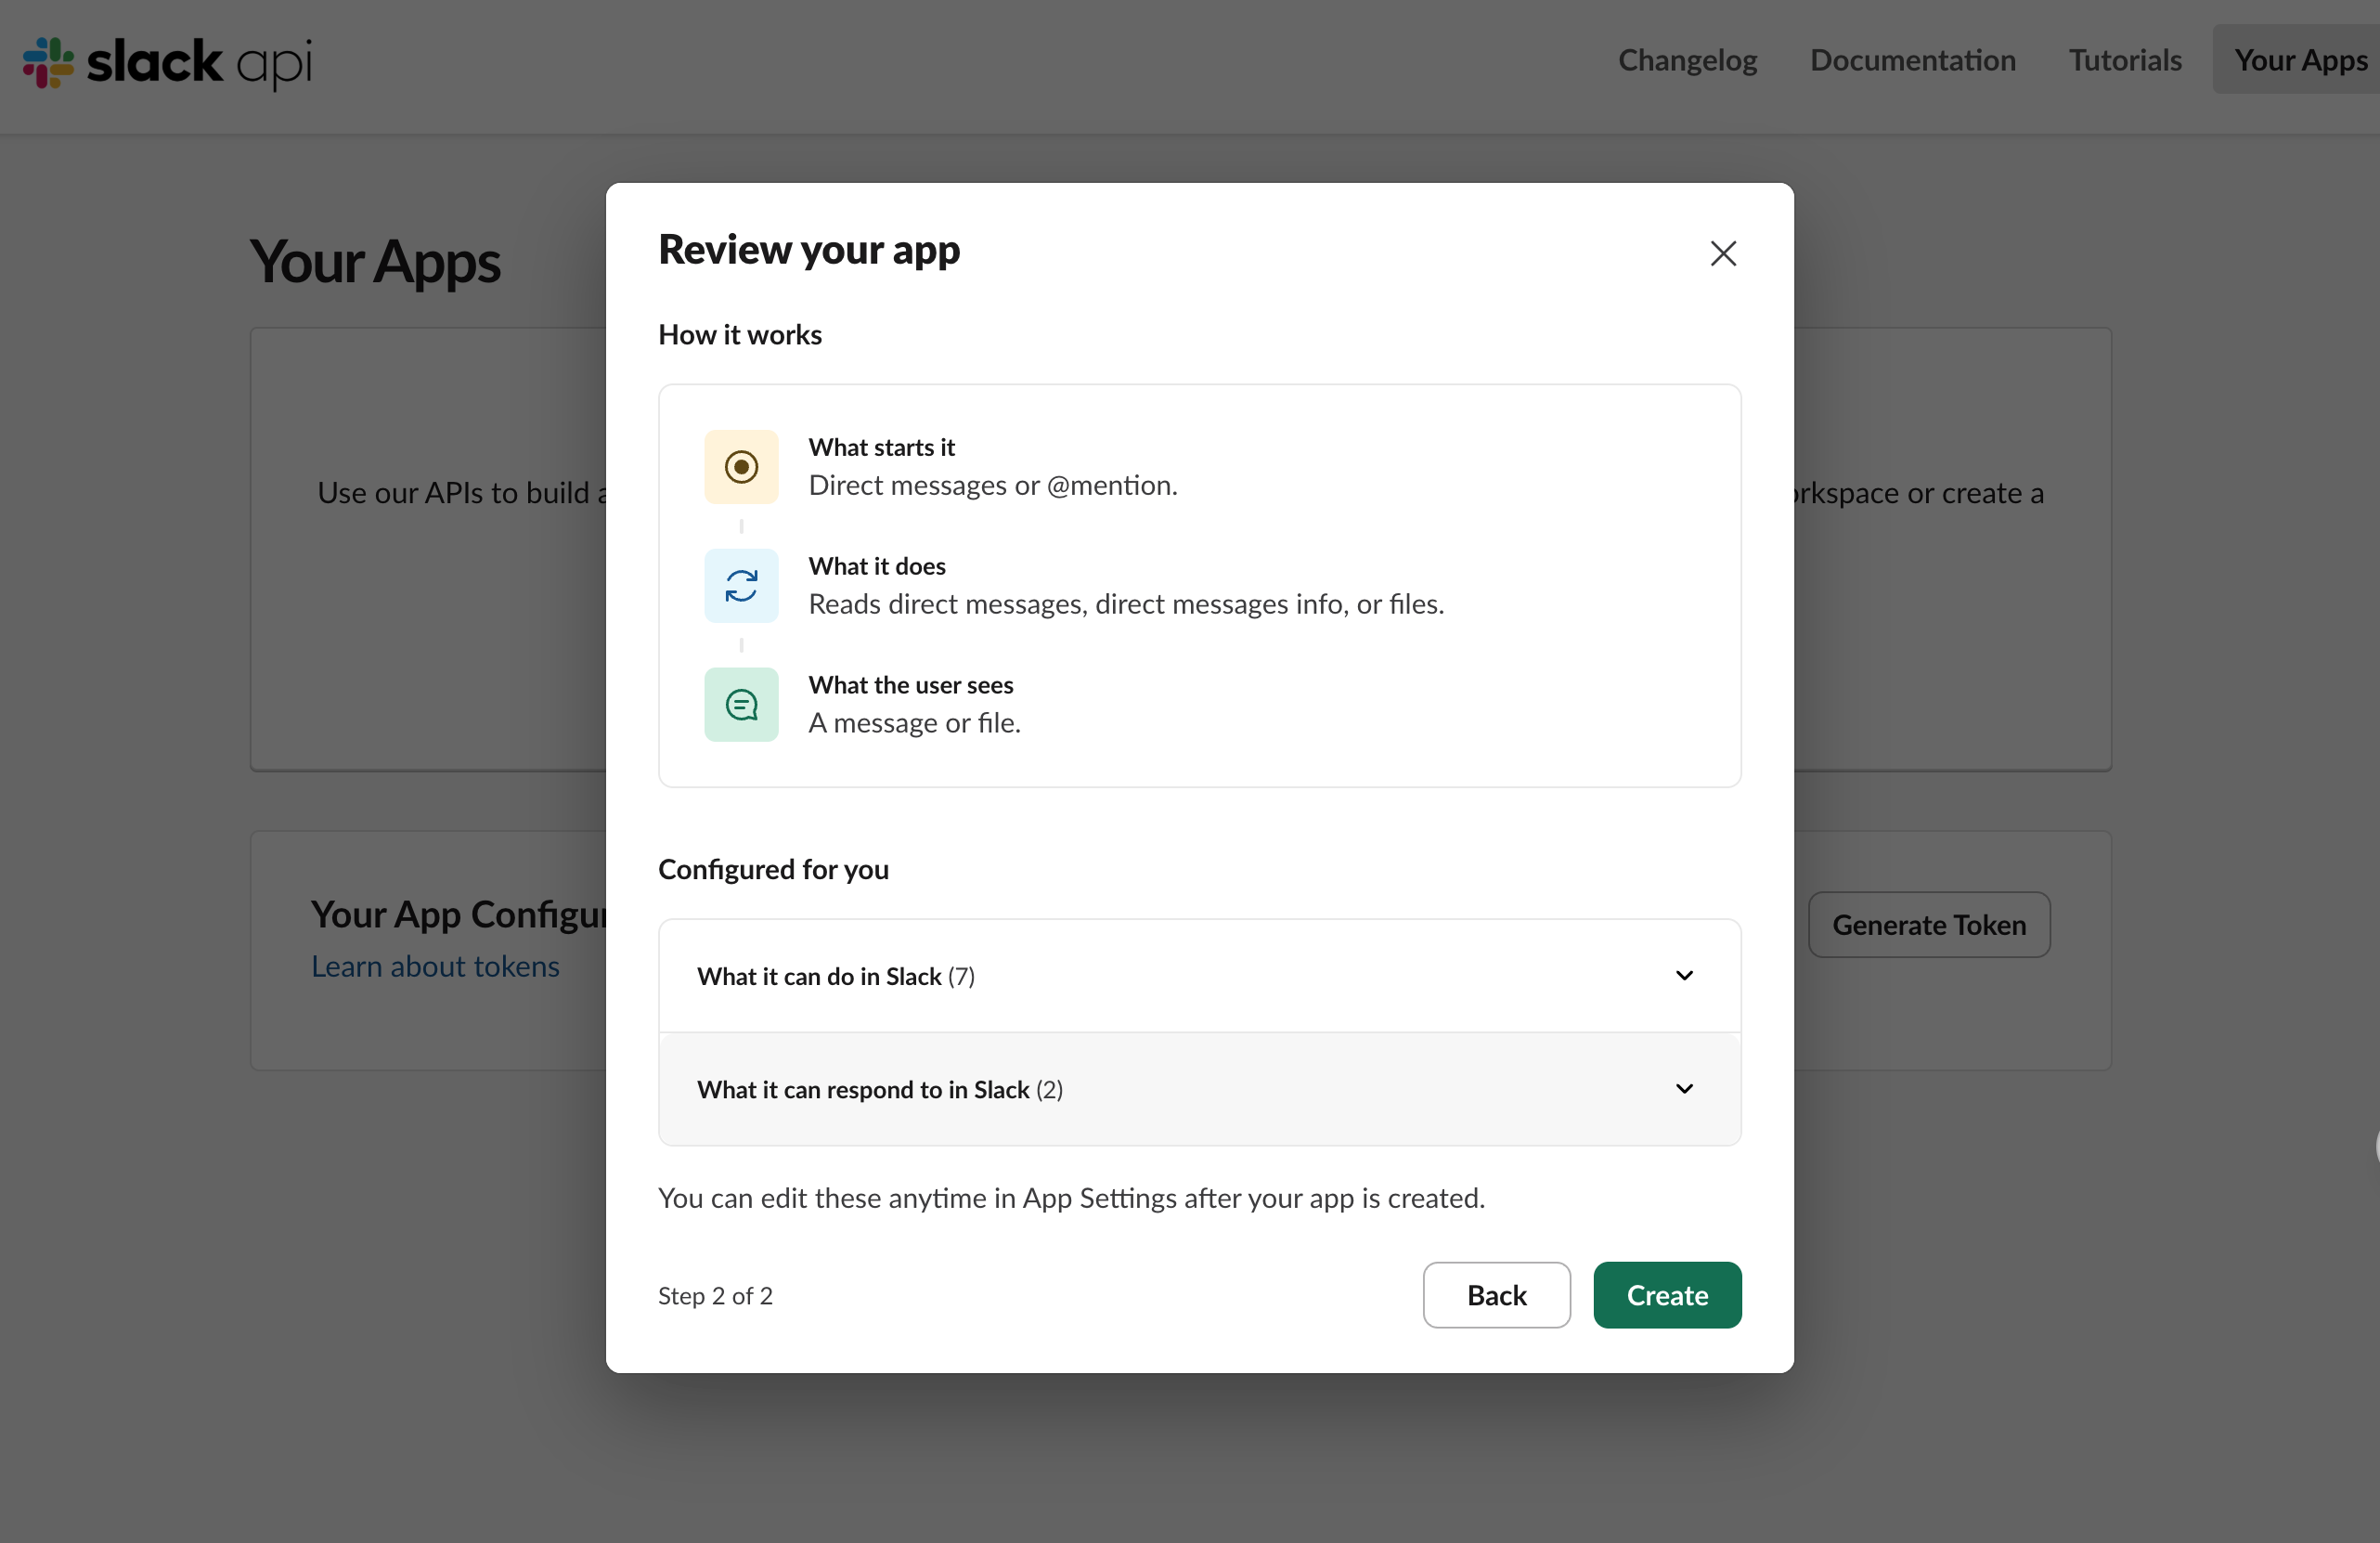
After creation is complete, Socket Mode, required permissions, and event subscriptions are all configured.
Note:
The
display_information.name and bot_user.display_name in the manifest can be changed to your preferred names without affecting functionality.Step 2: Obtaining an App-Level Token (Starting with xapp-)
After the app is created, you will be automatically directed to the Basic Information page:
1. Scroll down to find the App-Level Tokens section.
2. Click Generate Token and Scopes.
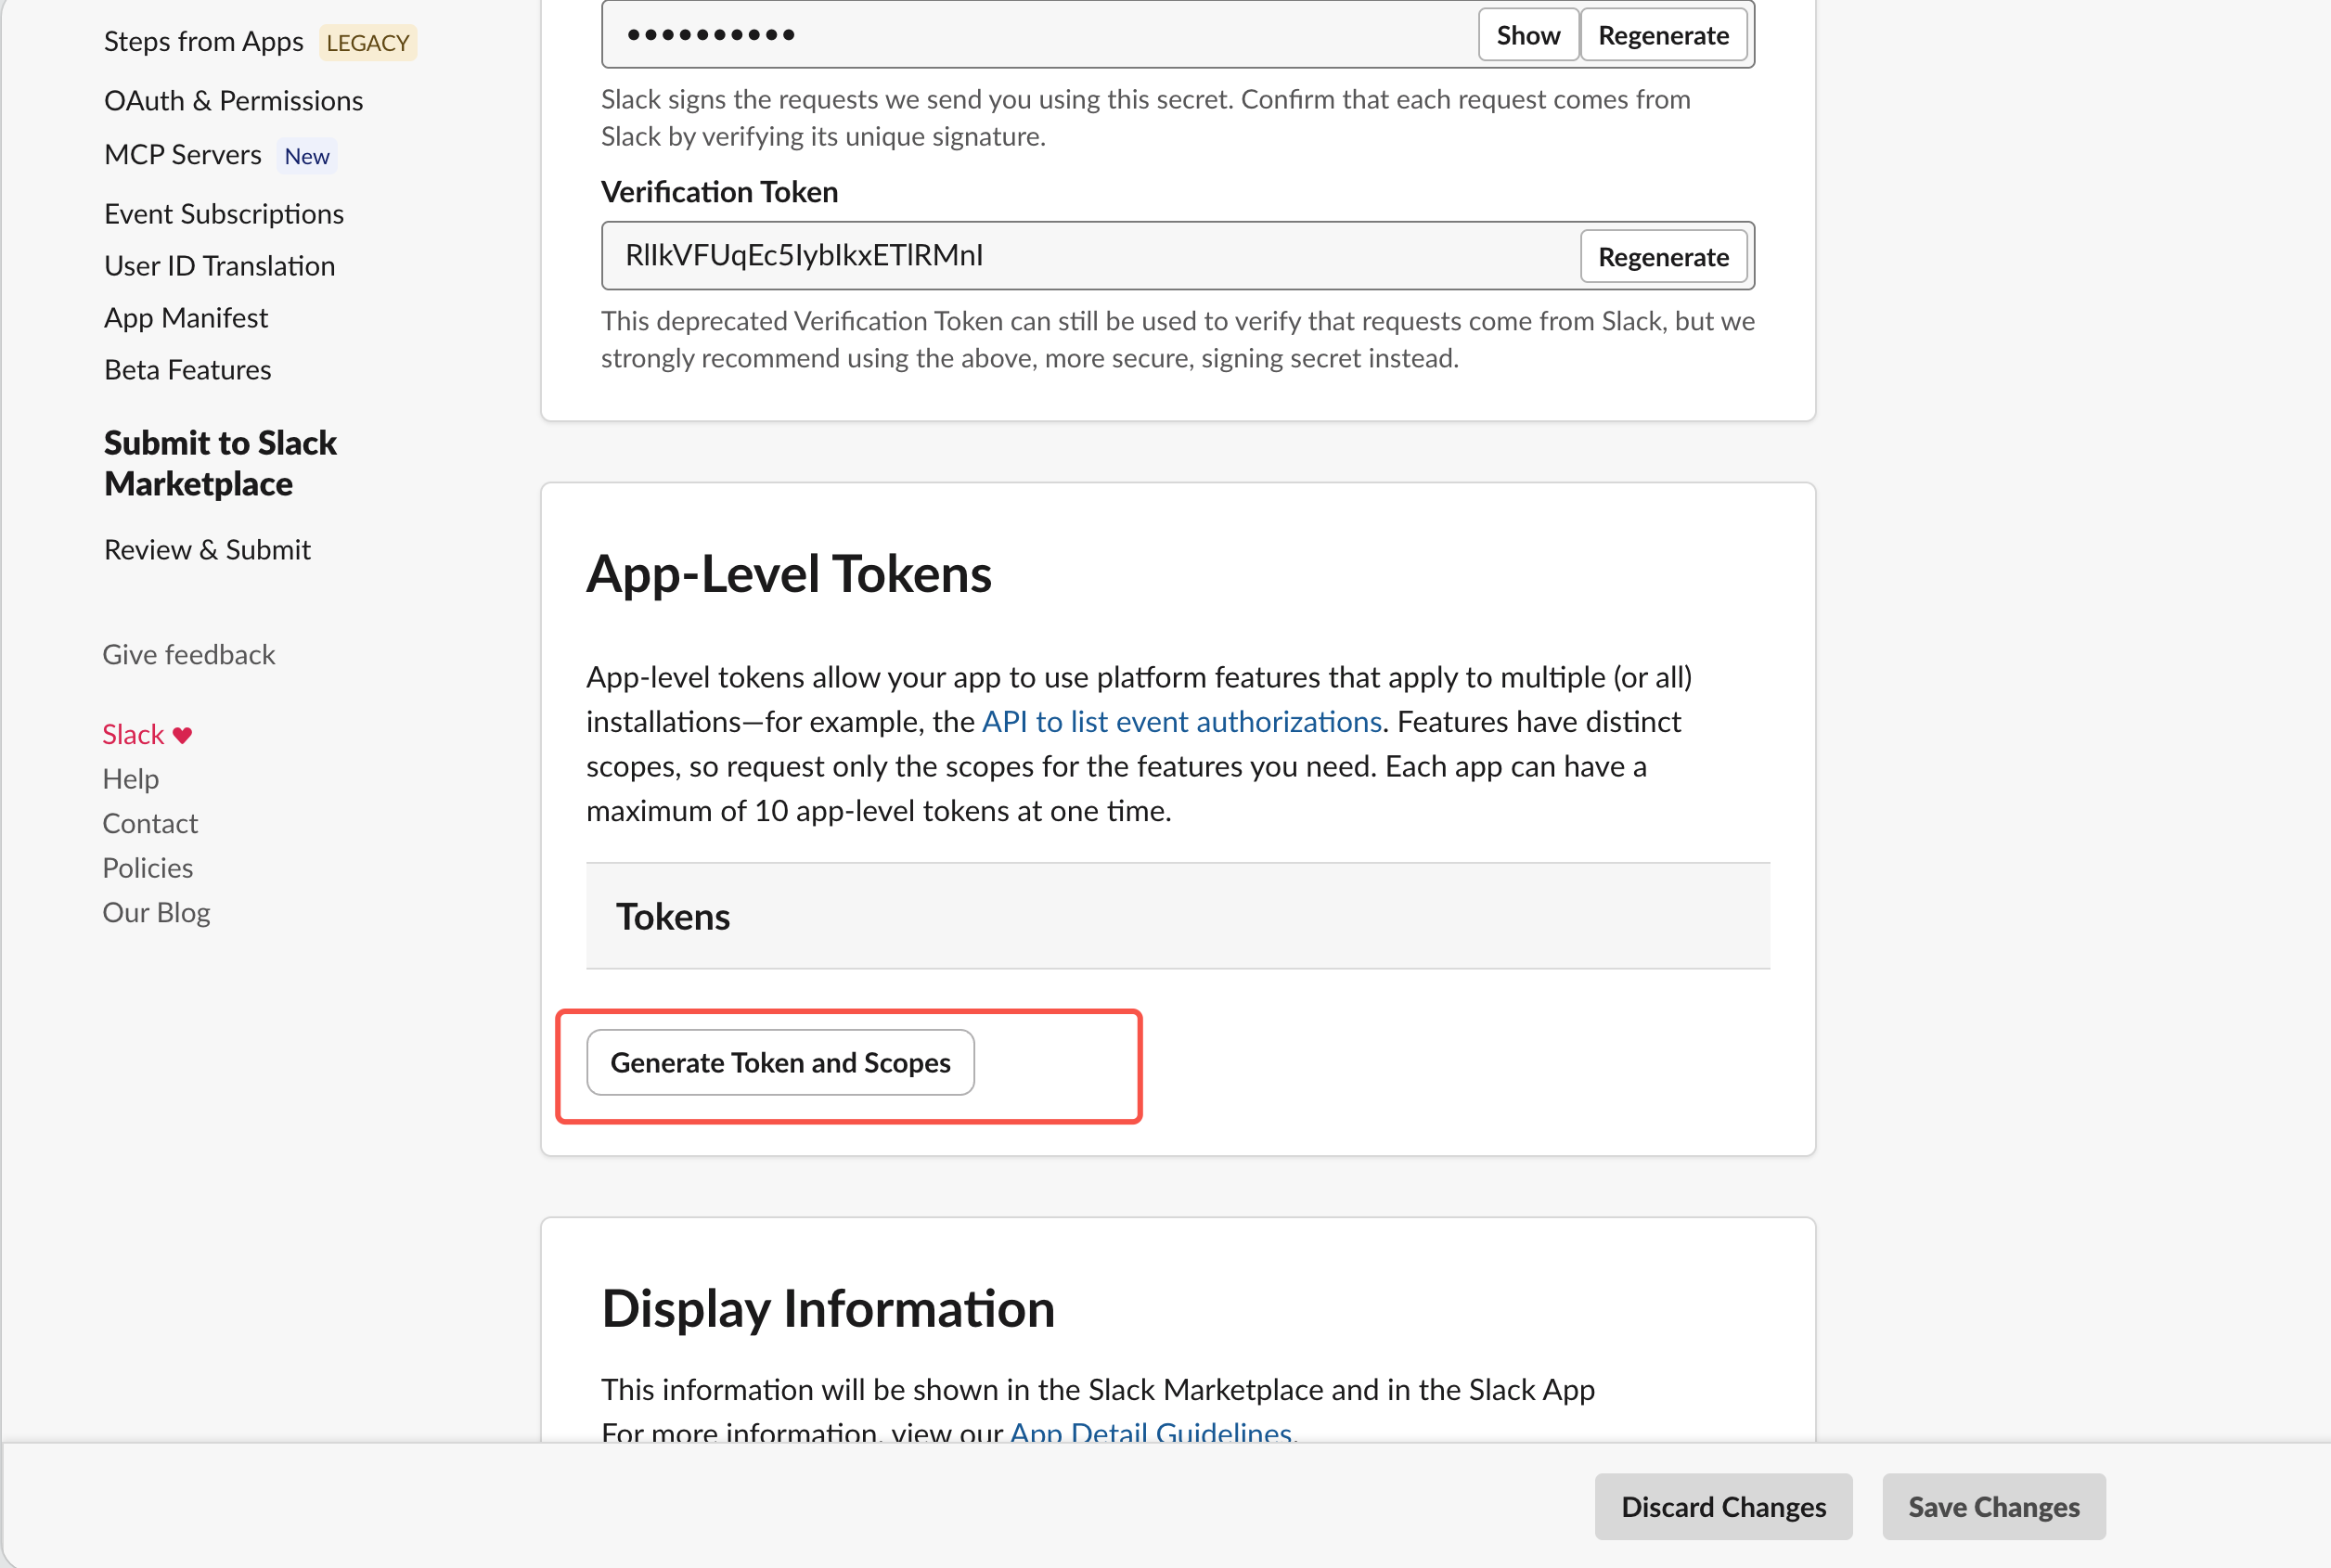
3. Enter a token name, for example,
workbuddy-test.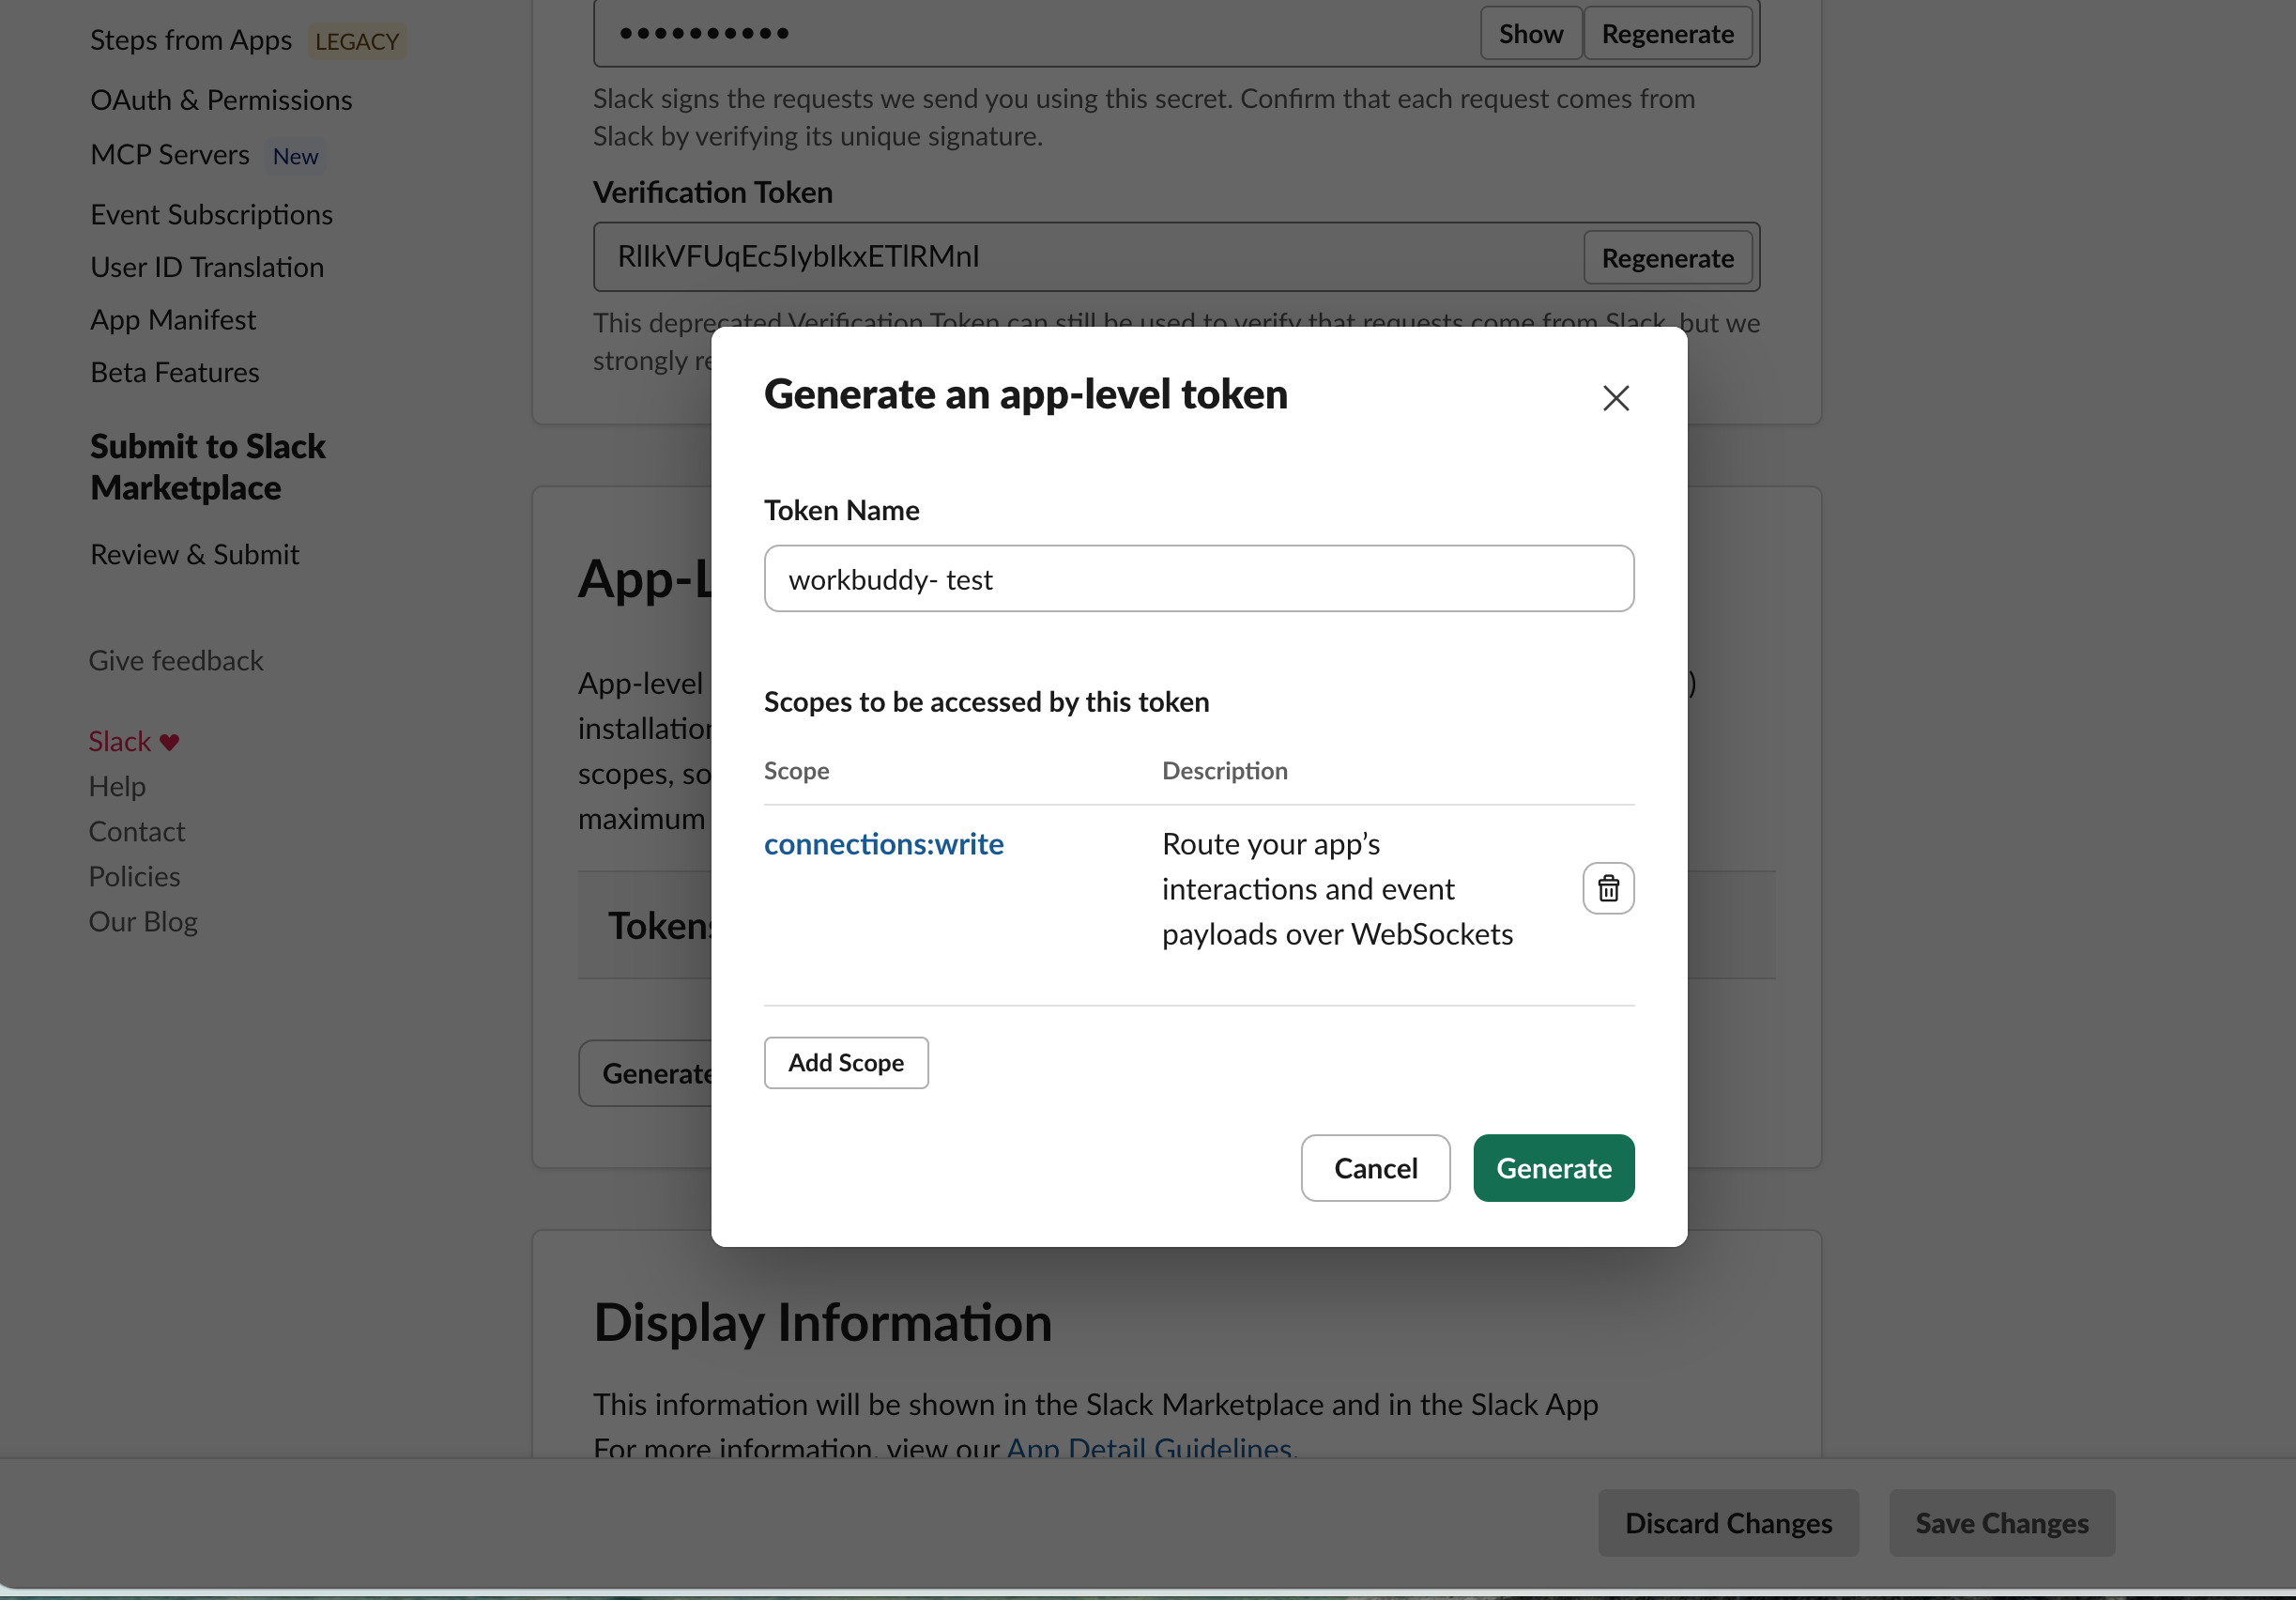
4. Click Add Scope and select
connections:write.5. Click Generate.
6. Copy the generated token in the format
xapp-1-A... and keep it safe for later use.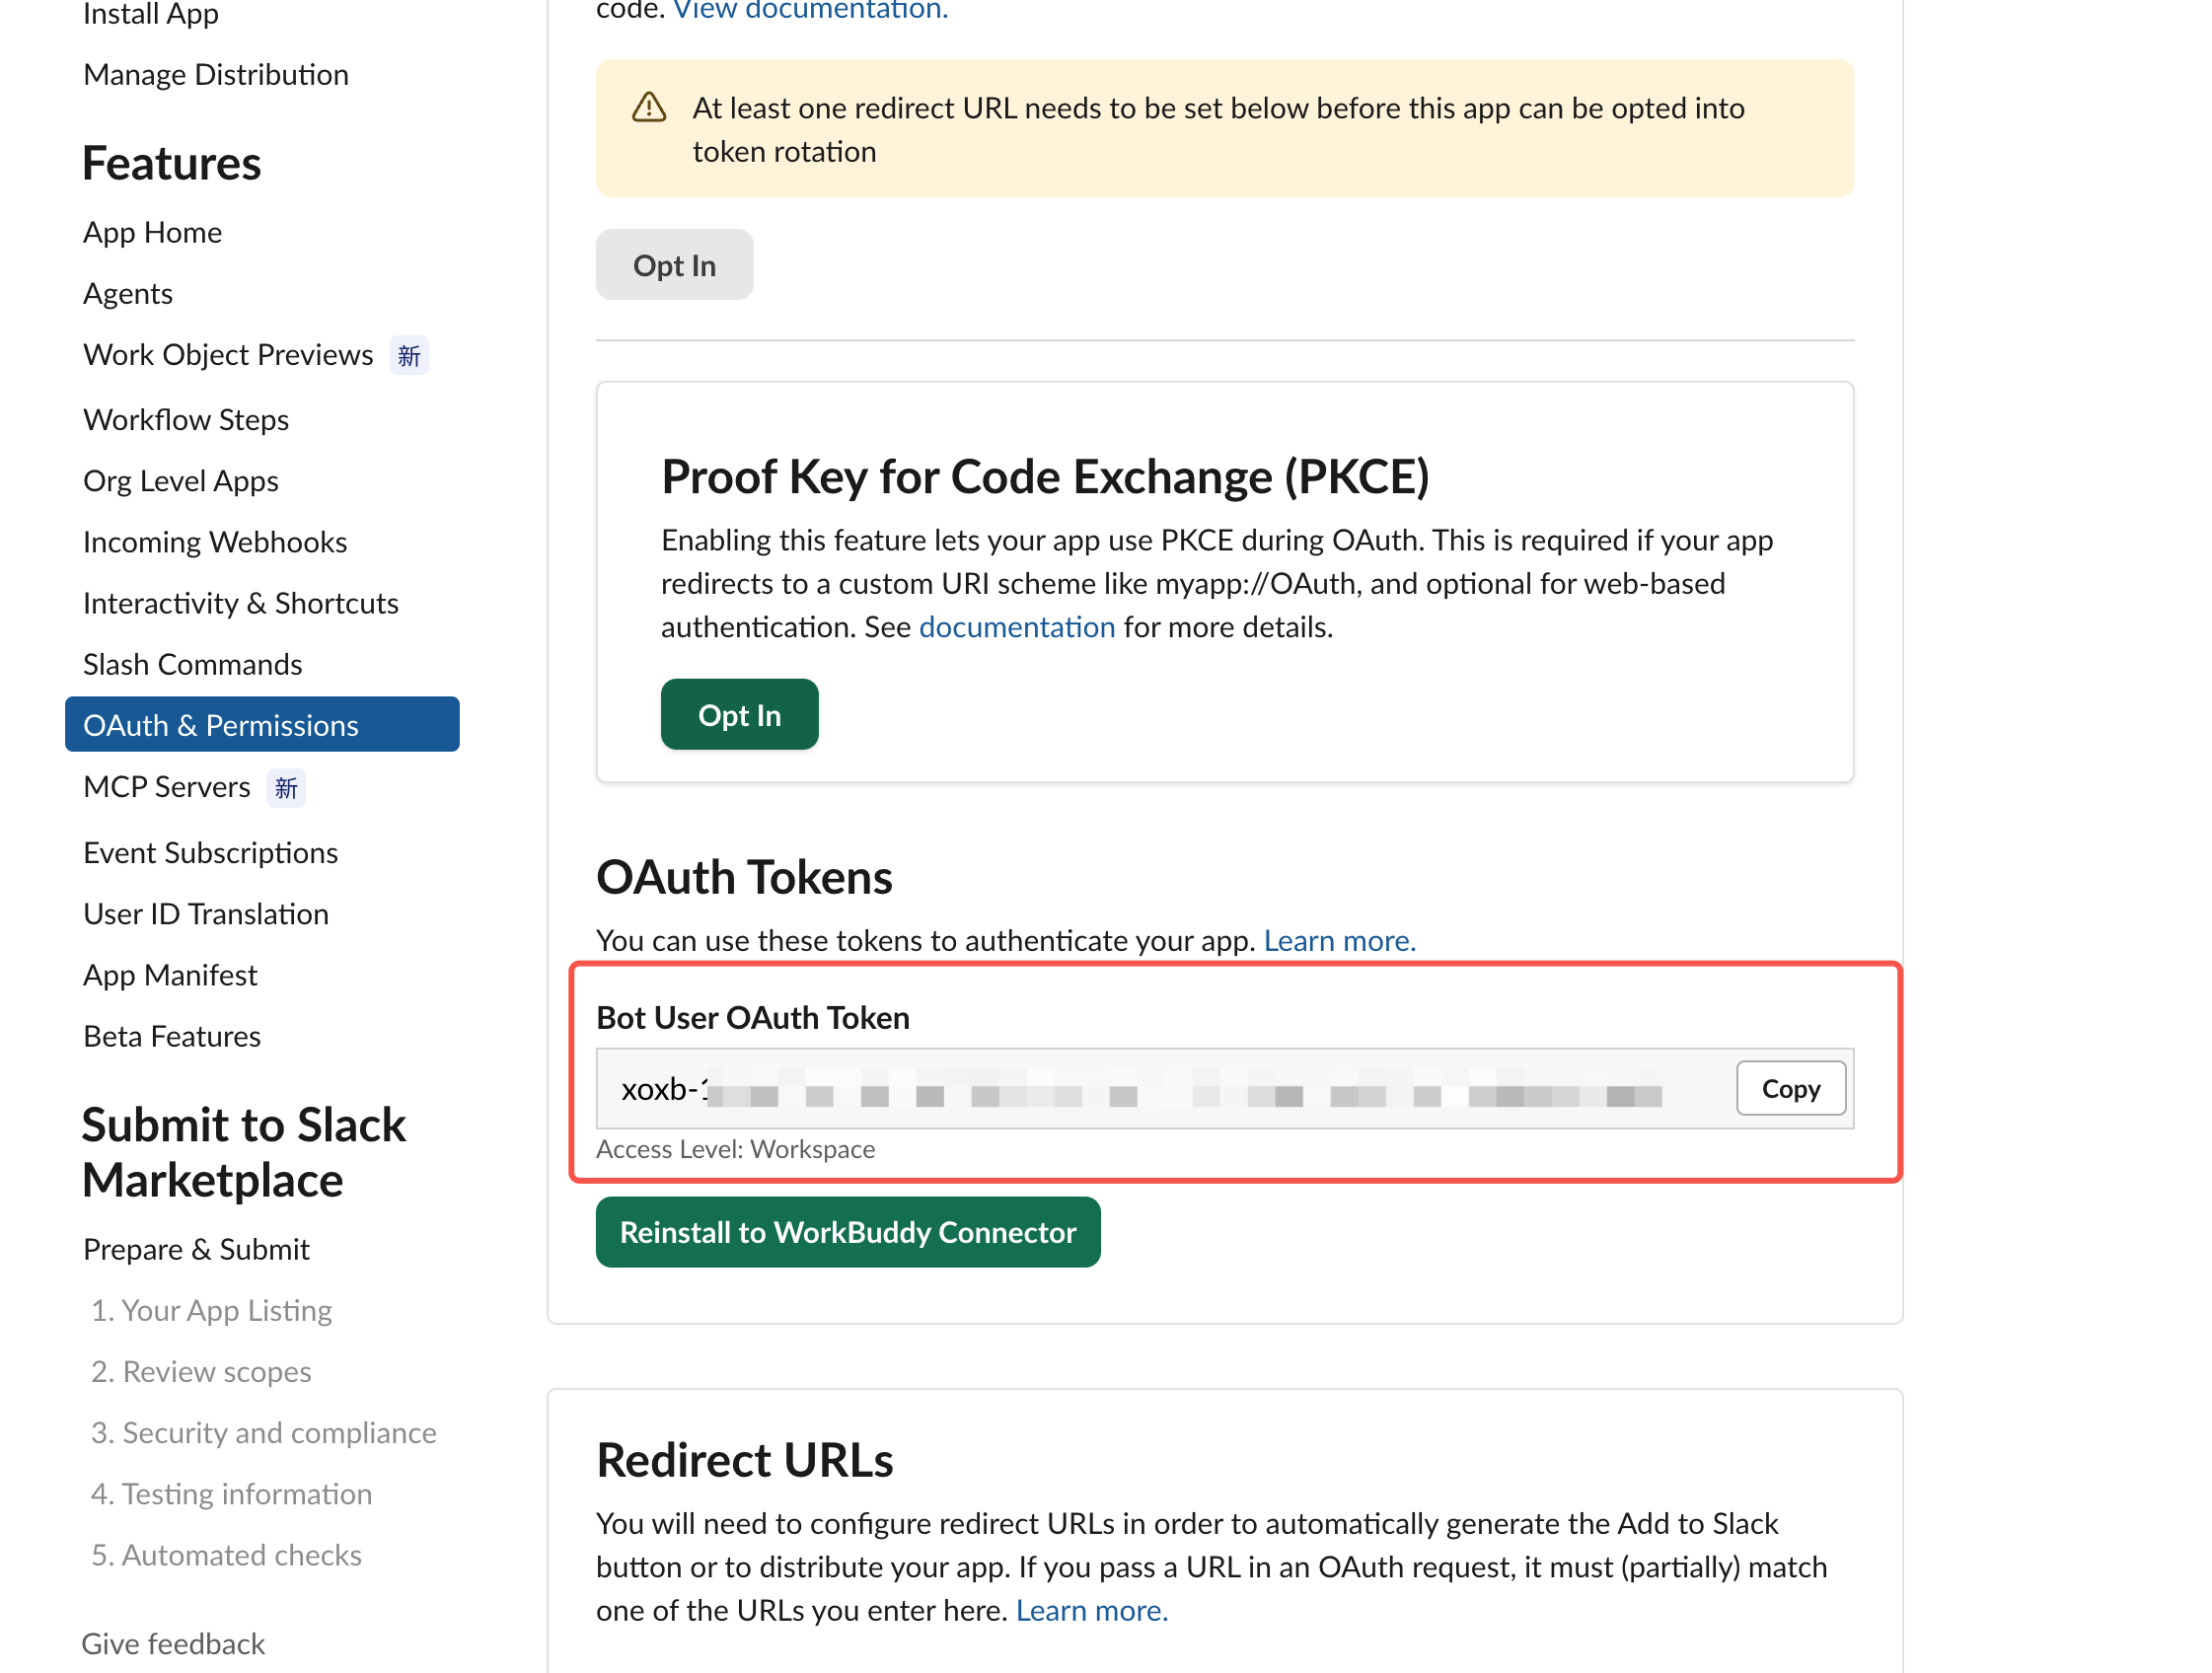
Note: You Must Add connections:write
Without this permission, Socket Mode cannot establish a connection, and the error message is difficult to identify. Make sure it is selected.
Step 3: Obtaining a Bot Token (Starting with xoxb-)
1. Go to OAuth & Permissions in the left menu.
2. Click Install to Workspace at the top of the page.
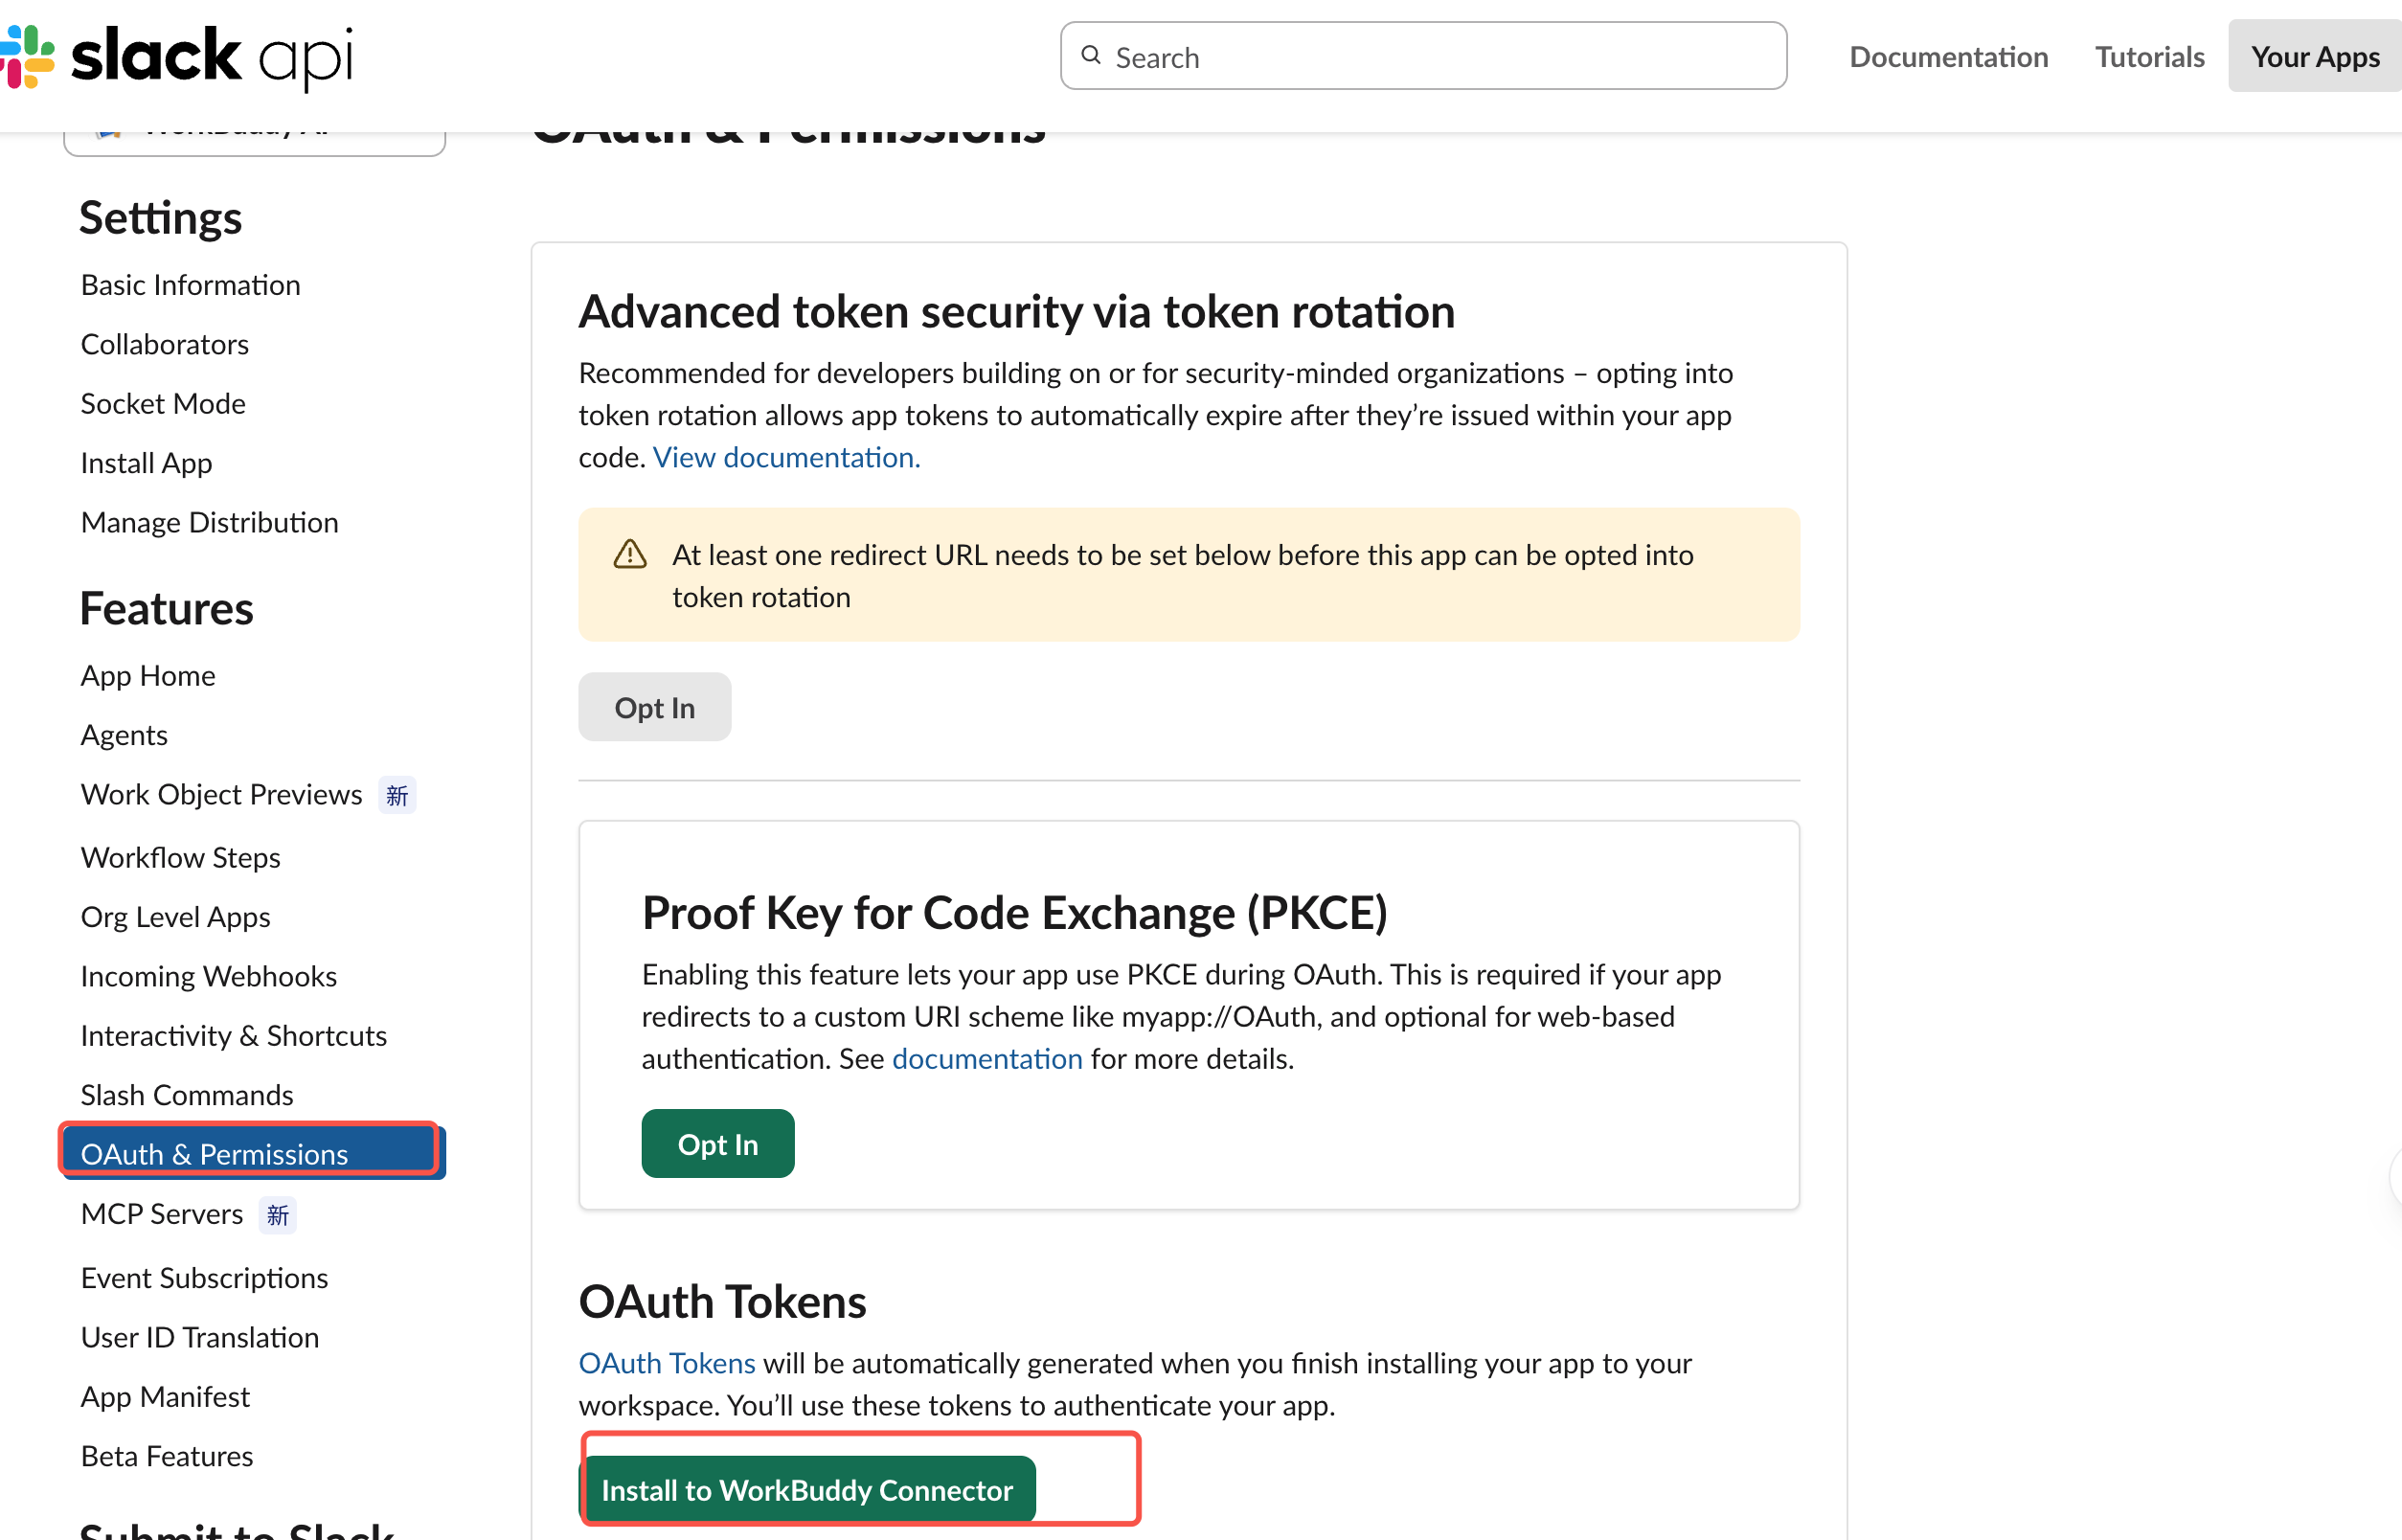
3. On the authorization page, click Allow to complete the installation.
4. After authorization is complete, you are automatically returned to this page. A Bot User OAuth Token appears at the top. Copy the token in the format
xoxb-....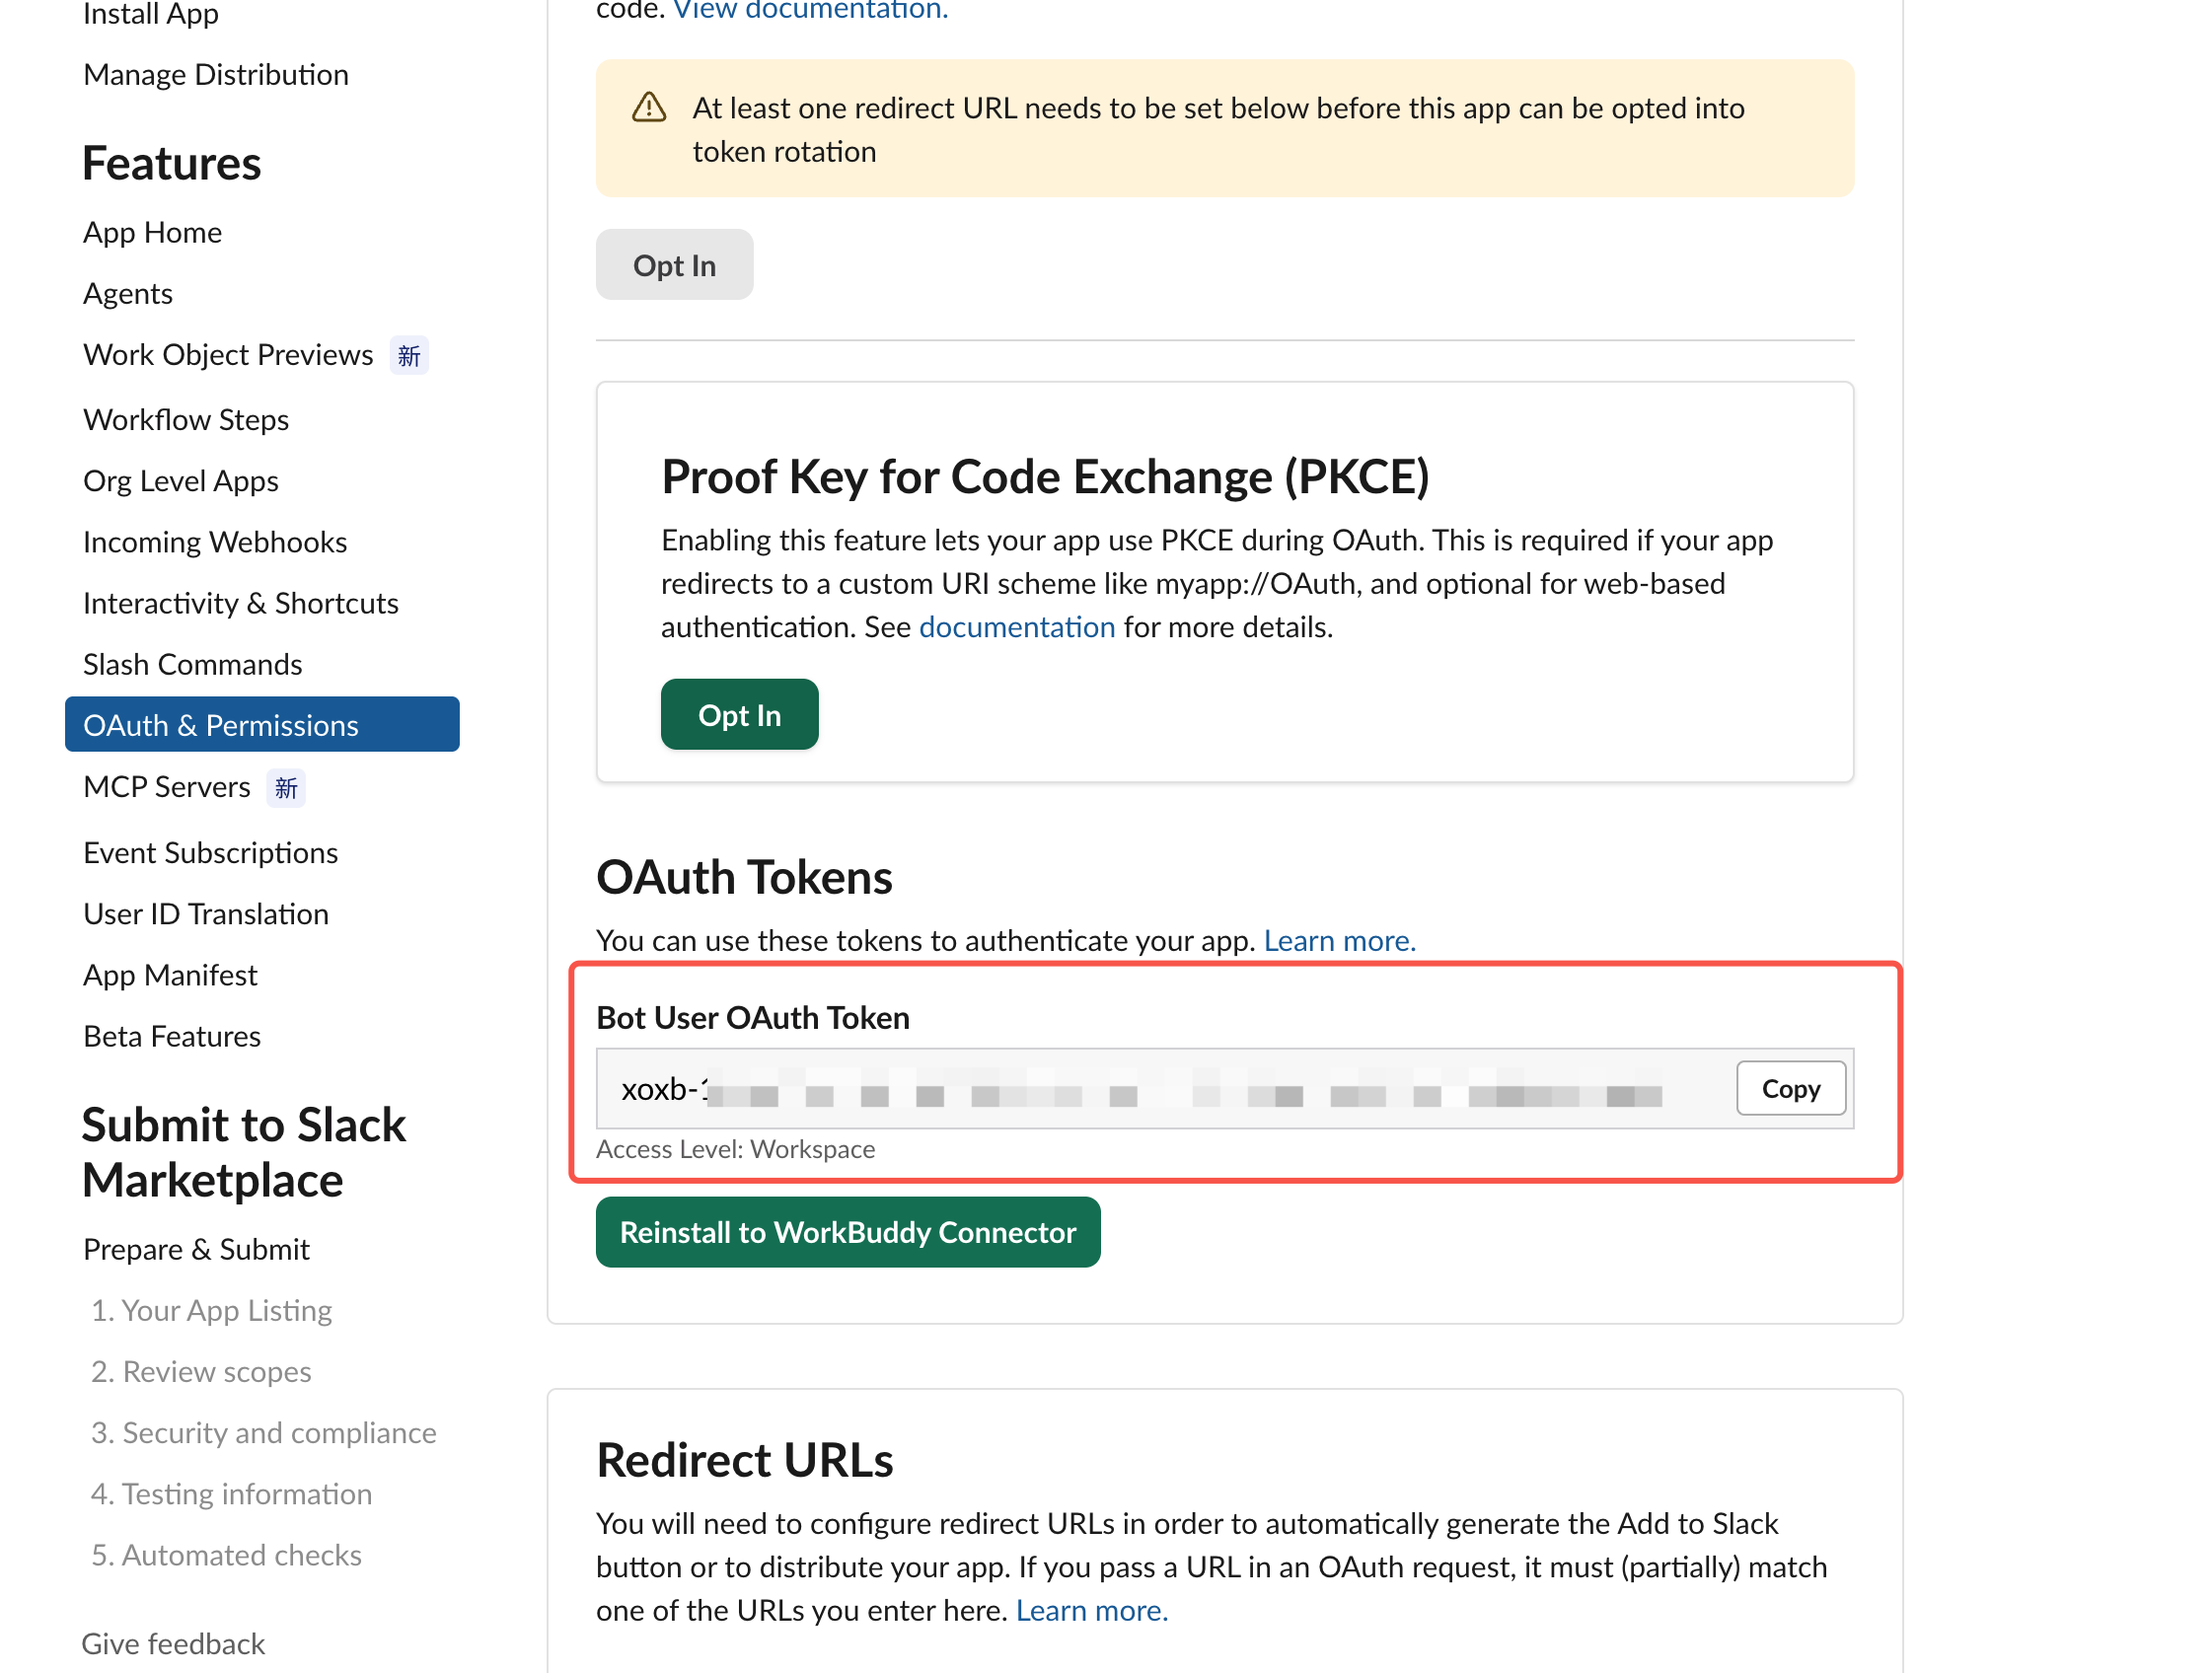
Note: Do Not Confuse the Two OAuth Tokens
This page may display two tokens at the same time:
Bot User OAuth Token (starting with
xoxb-) - this is the one required for this integration.User OAuth Token (starting with
xoxp-) do not use.Additionally, the Bot Token is not displayed until installation authorization is complete. If you cannot find the token on this page, perform the installation in step 2 first.
Note: When App Approval Is Enabled for the tip Workspace
If app installation approval is enabled for your workspace, Install to Workspace is displayed as Request to Install. In this case, the App-Level Token can still be generated normally, but the Bot Token does not appear until an administrator approves it.
III. Connecting in WorkBuddy AI
1. Open WorkBuddy AI and click Assistant in the left sidebar.
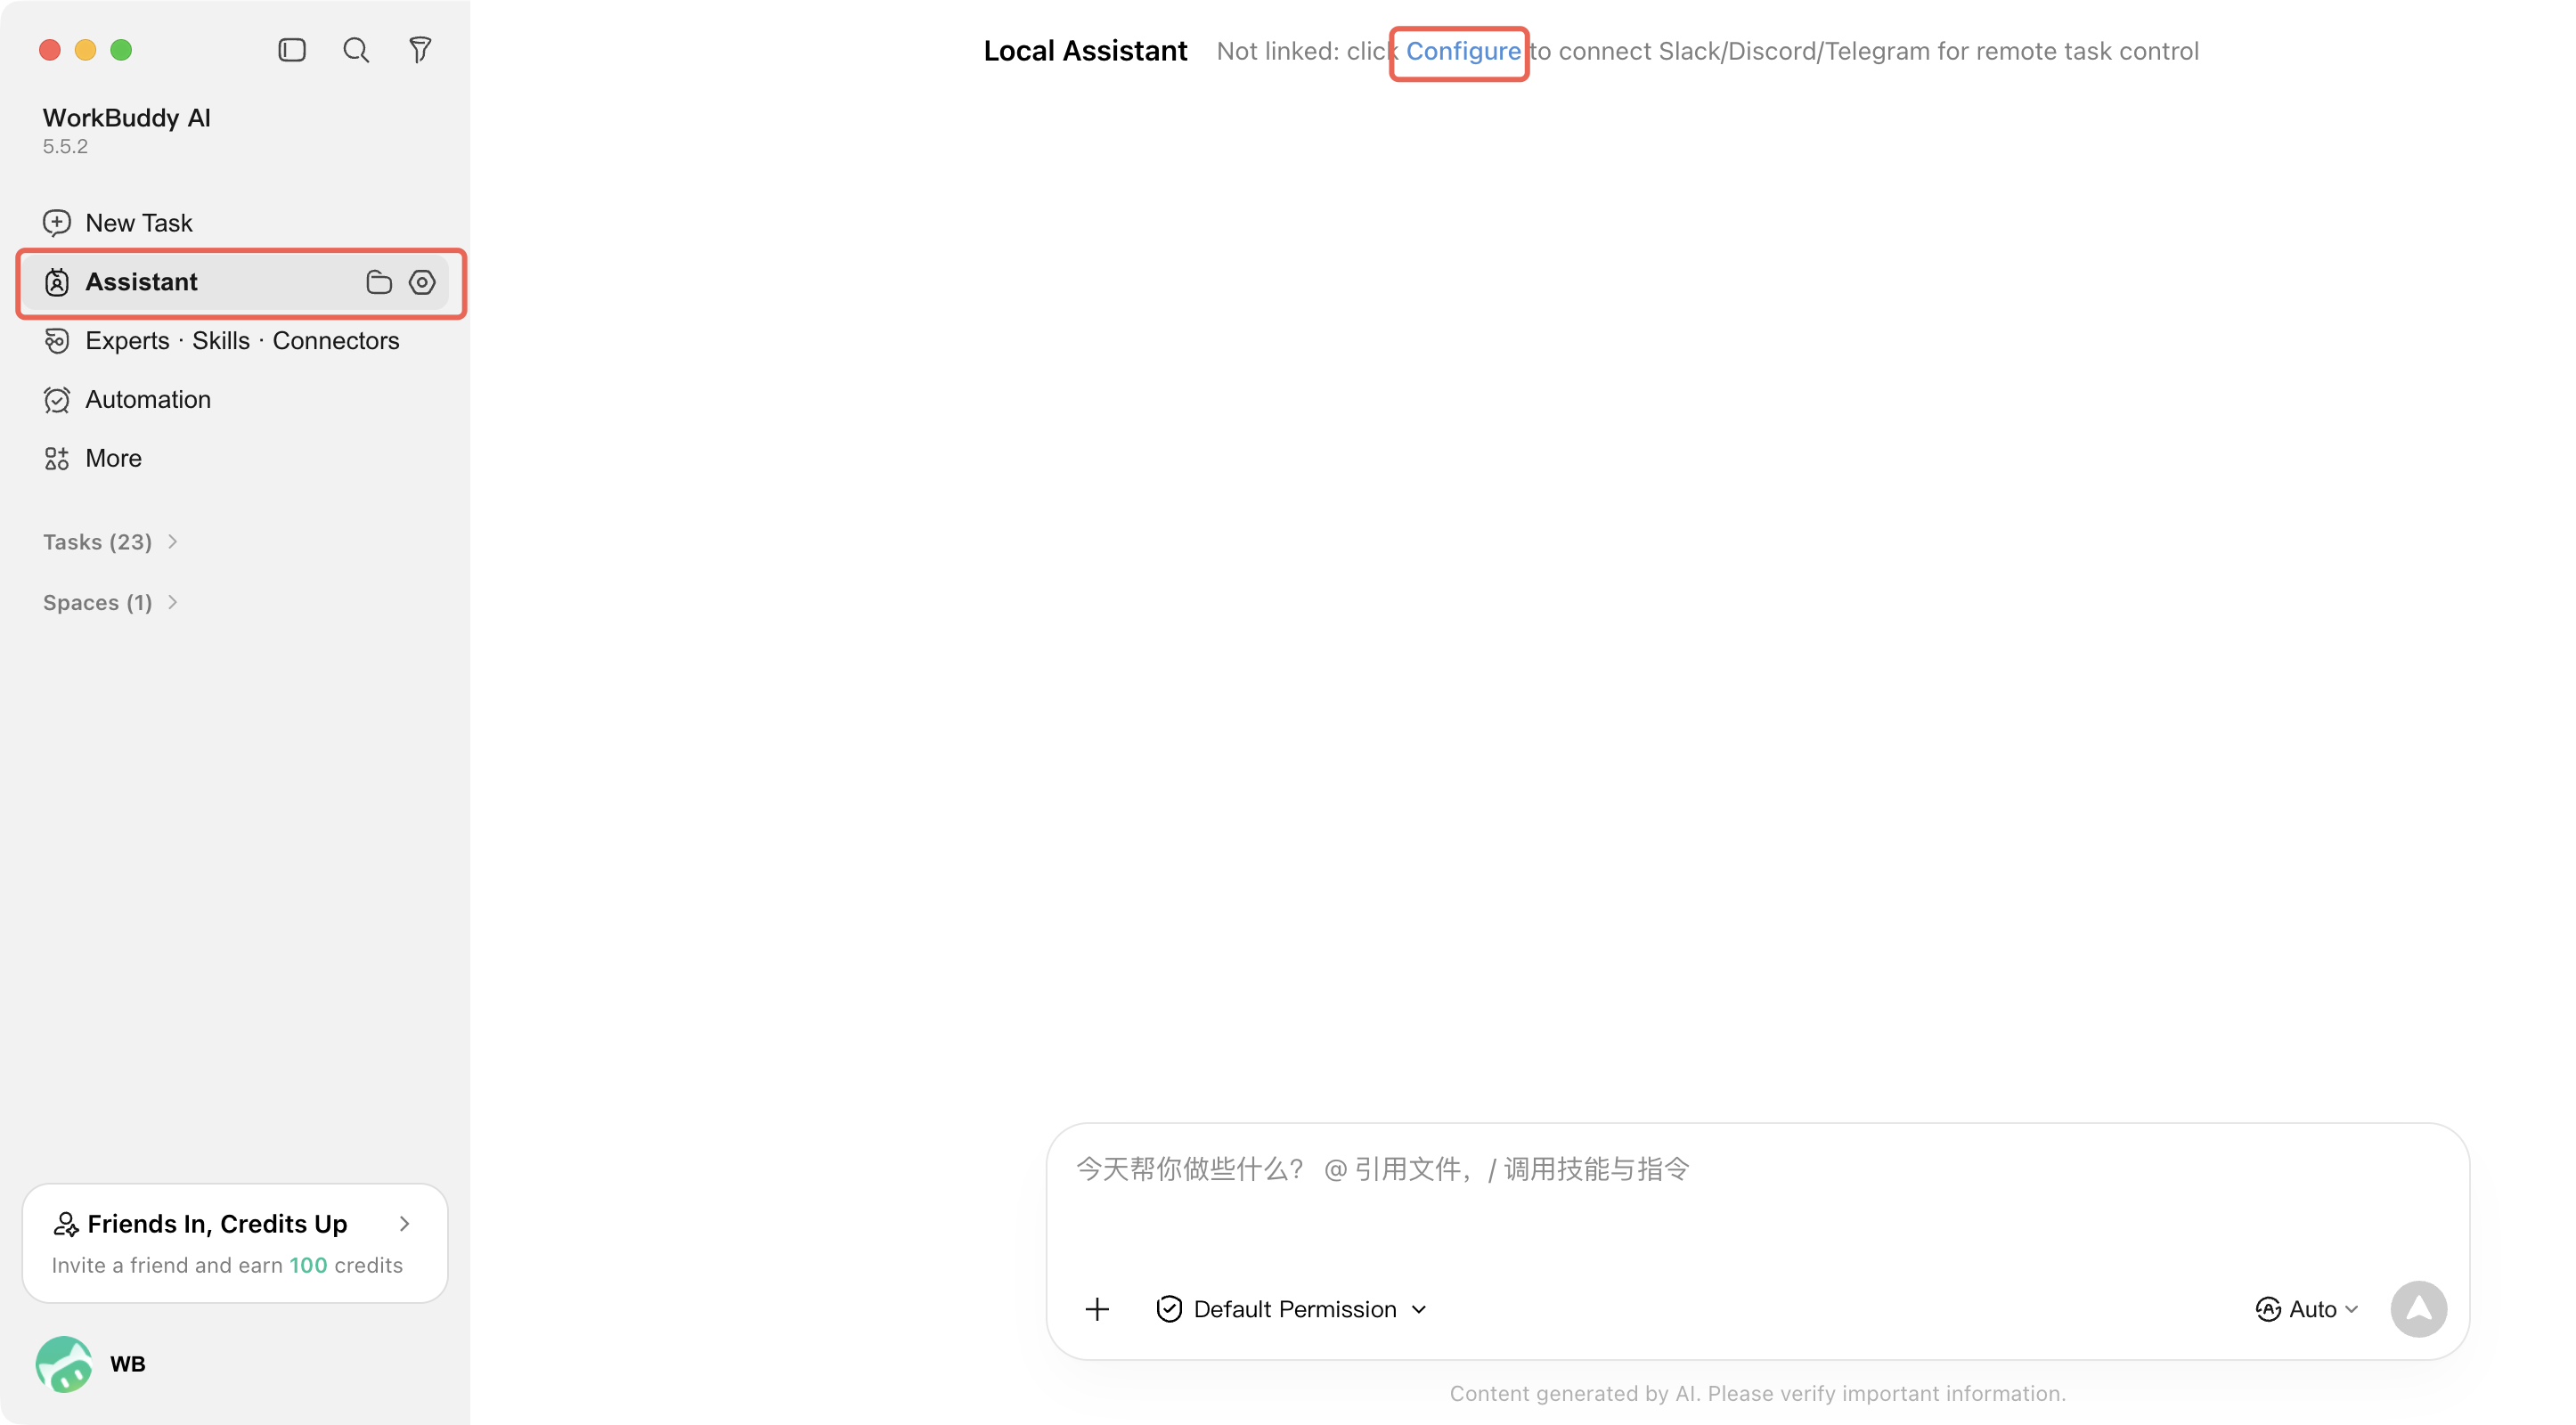
2. Go to Assistant Settings.
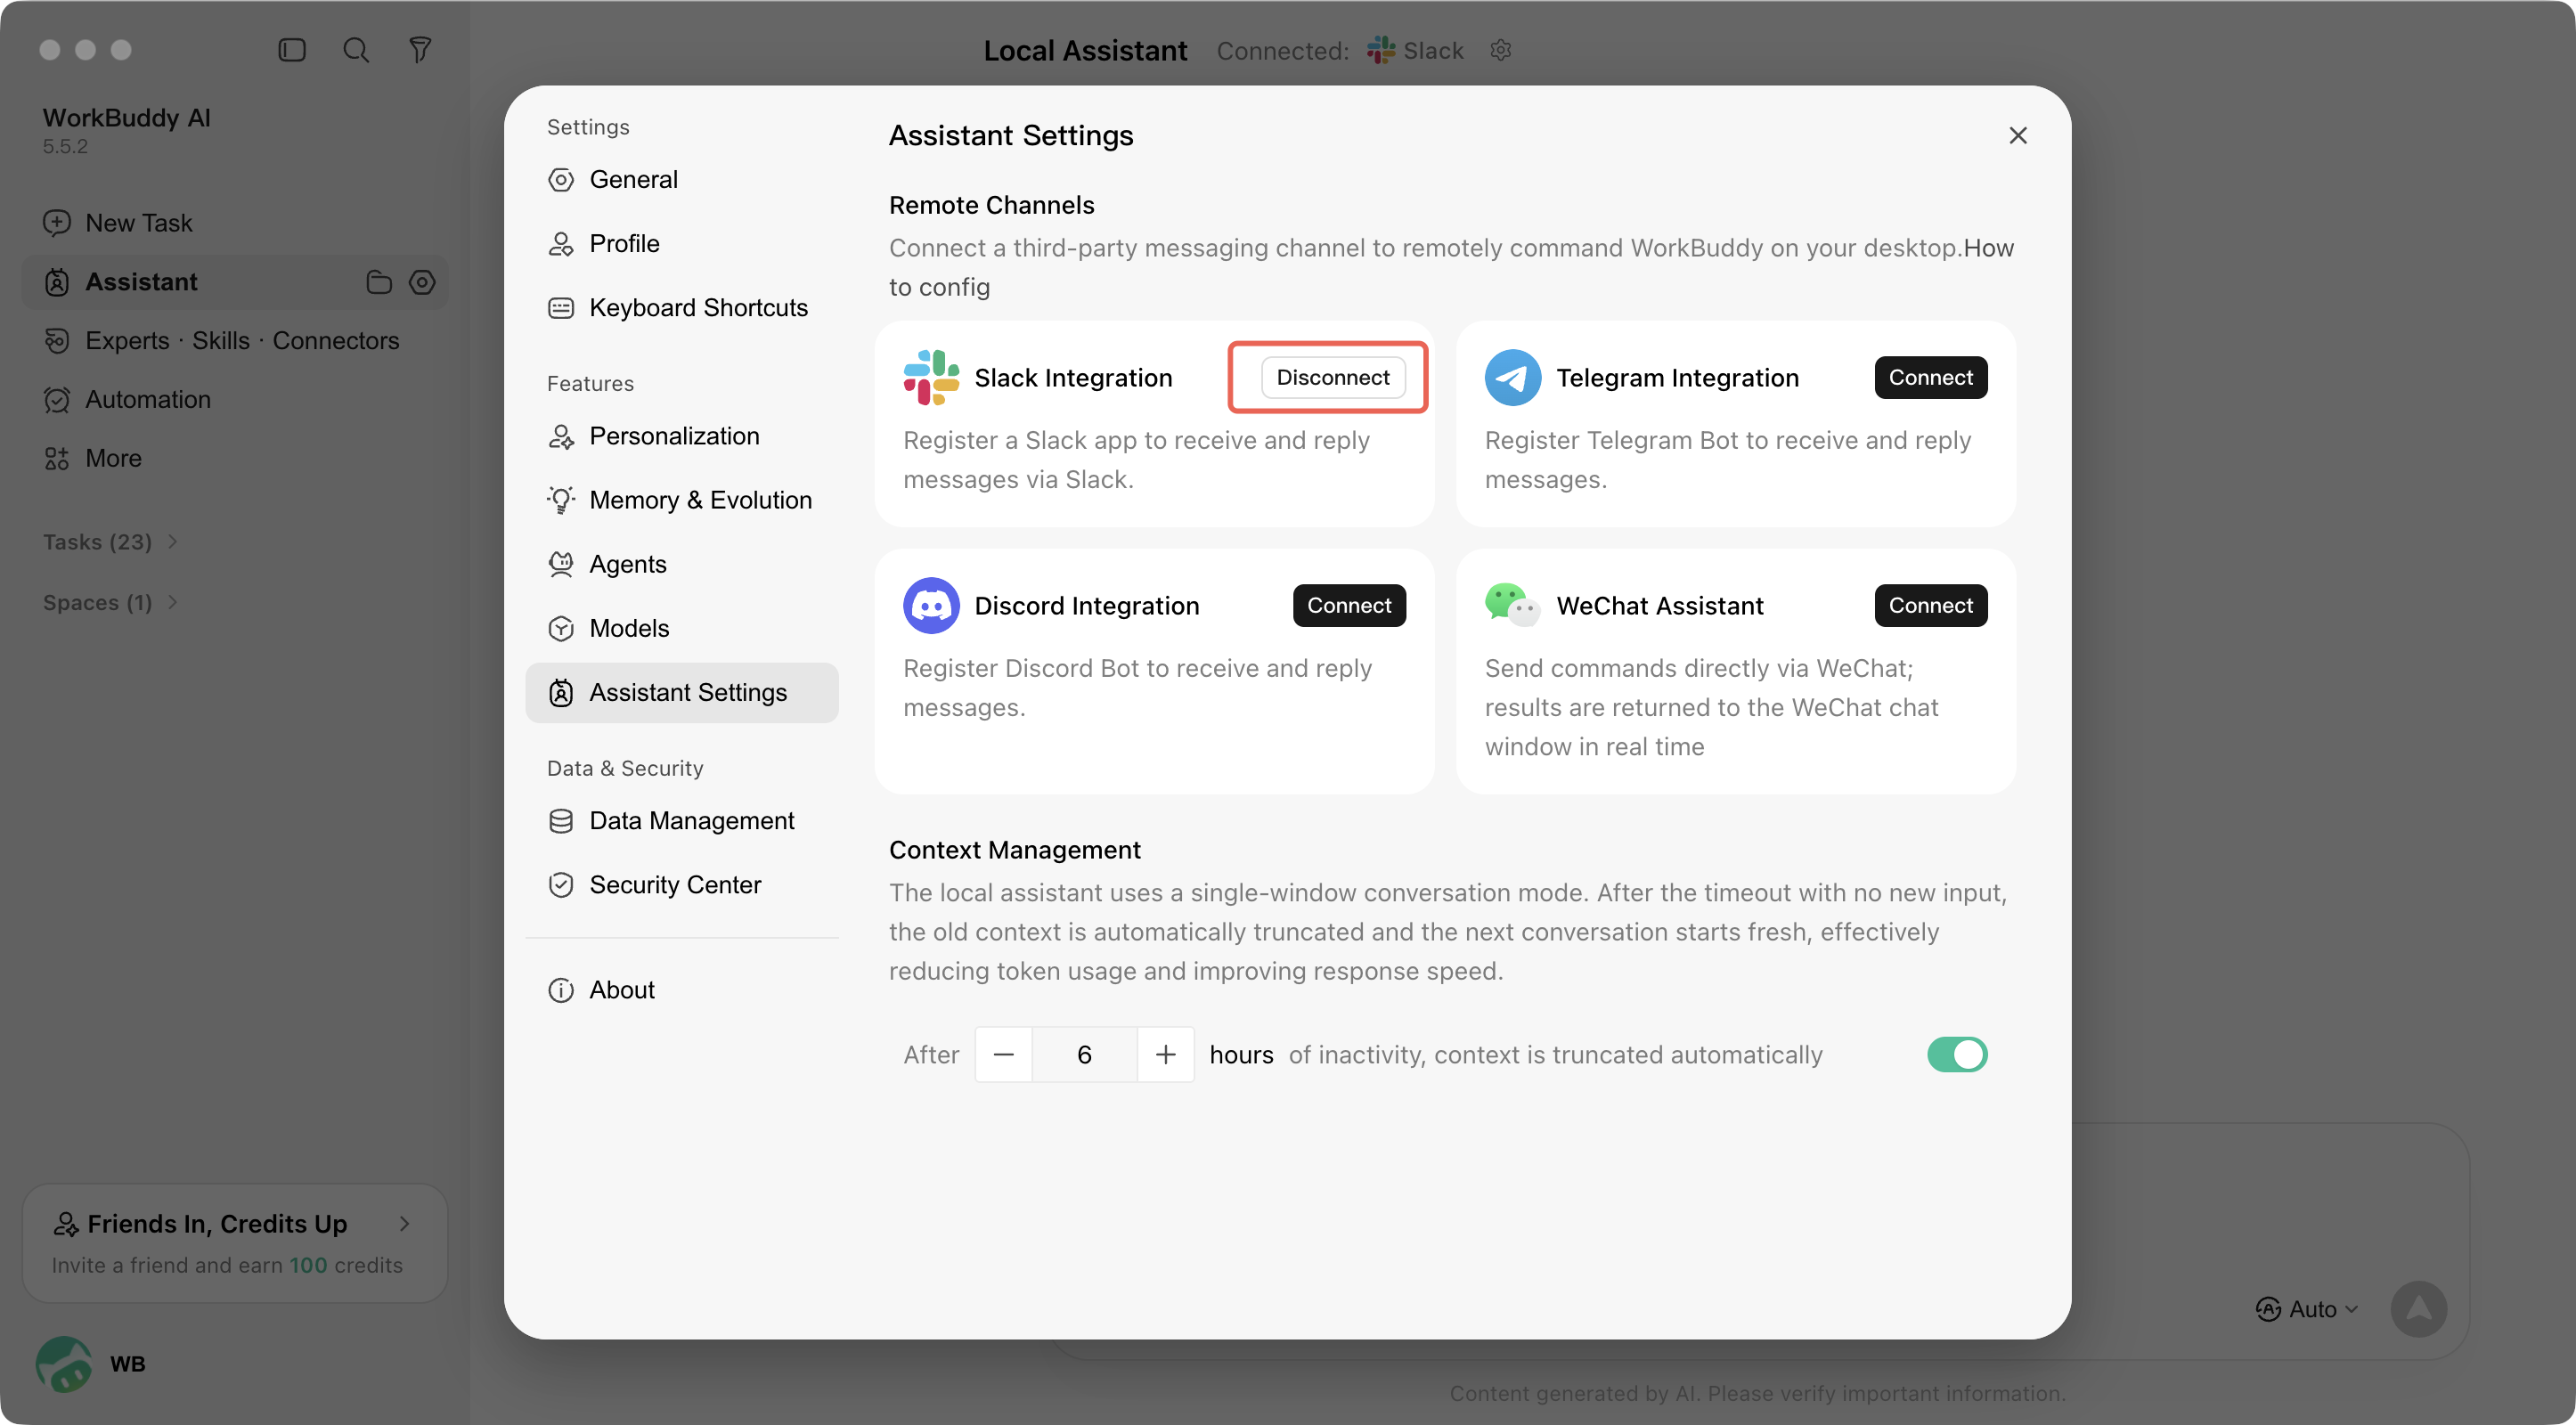
3. In the Remote Channels section, locate Slack Integration and click Connect.
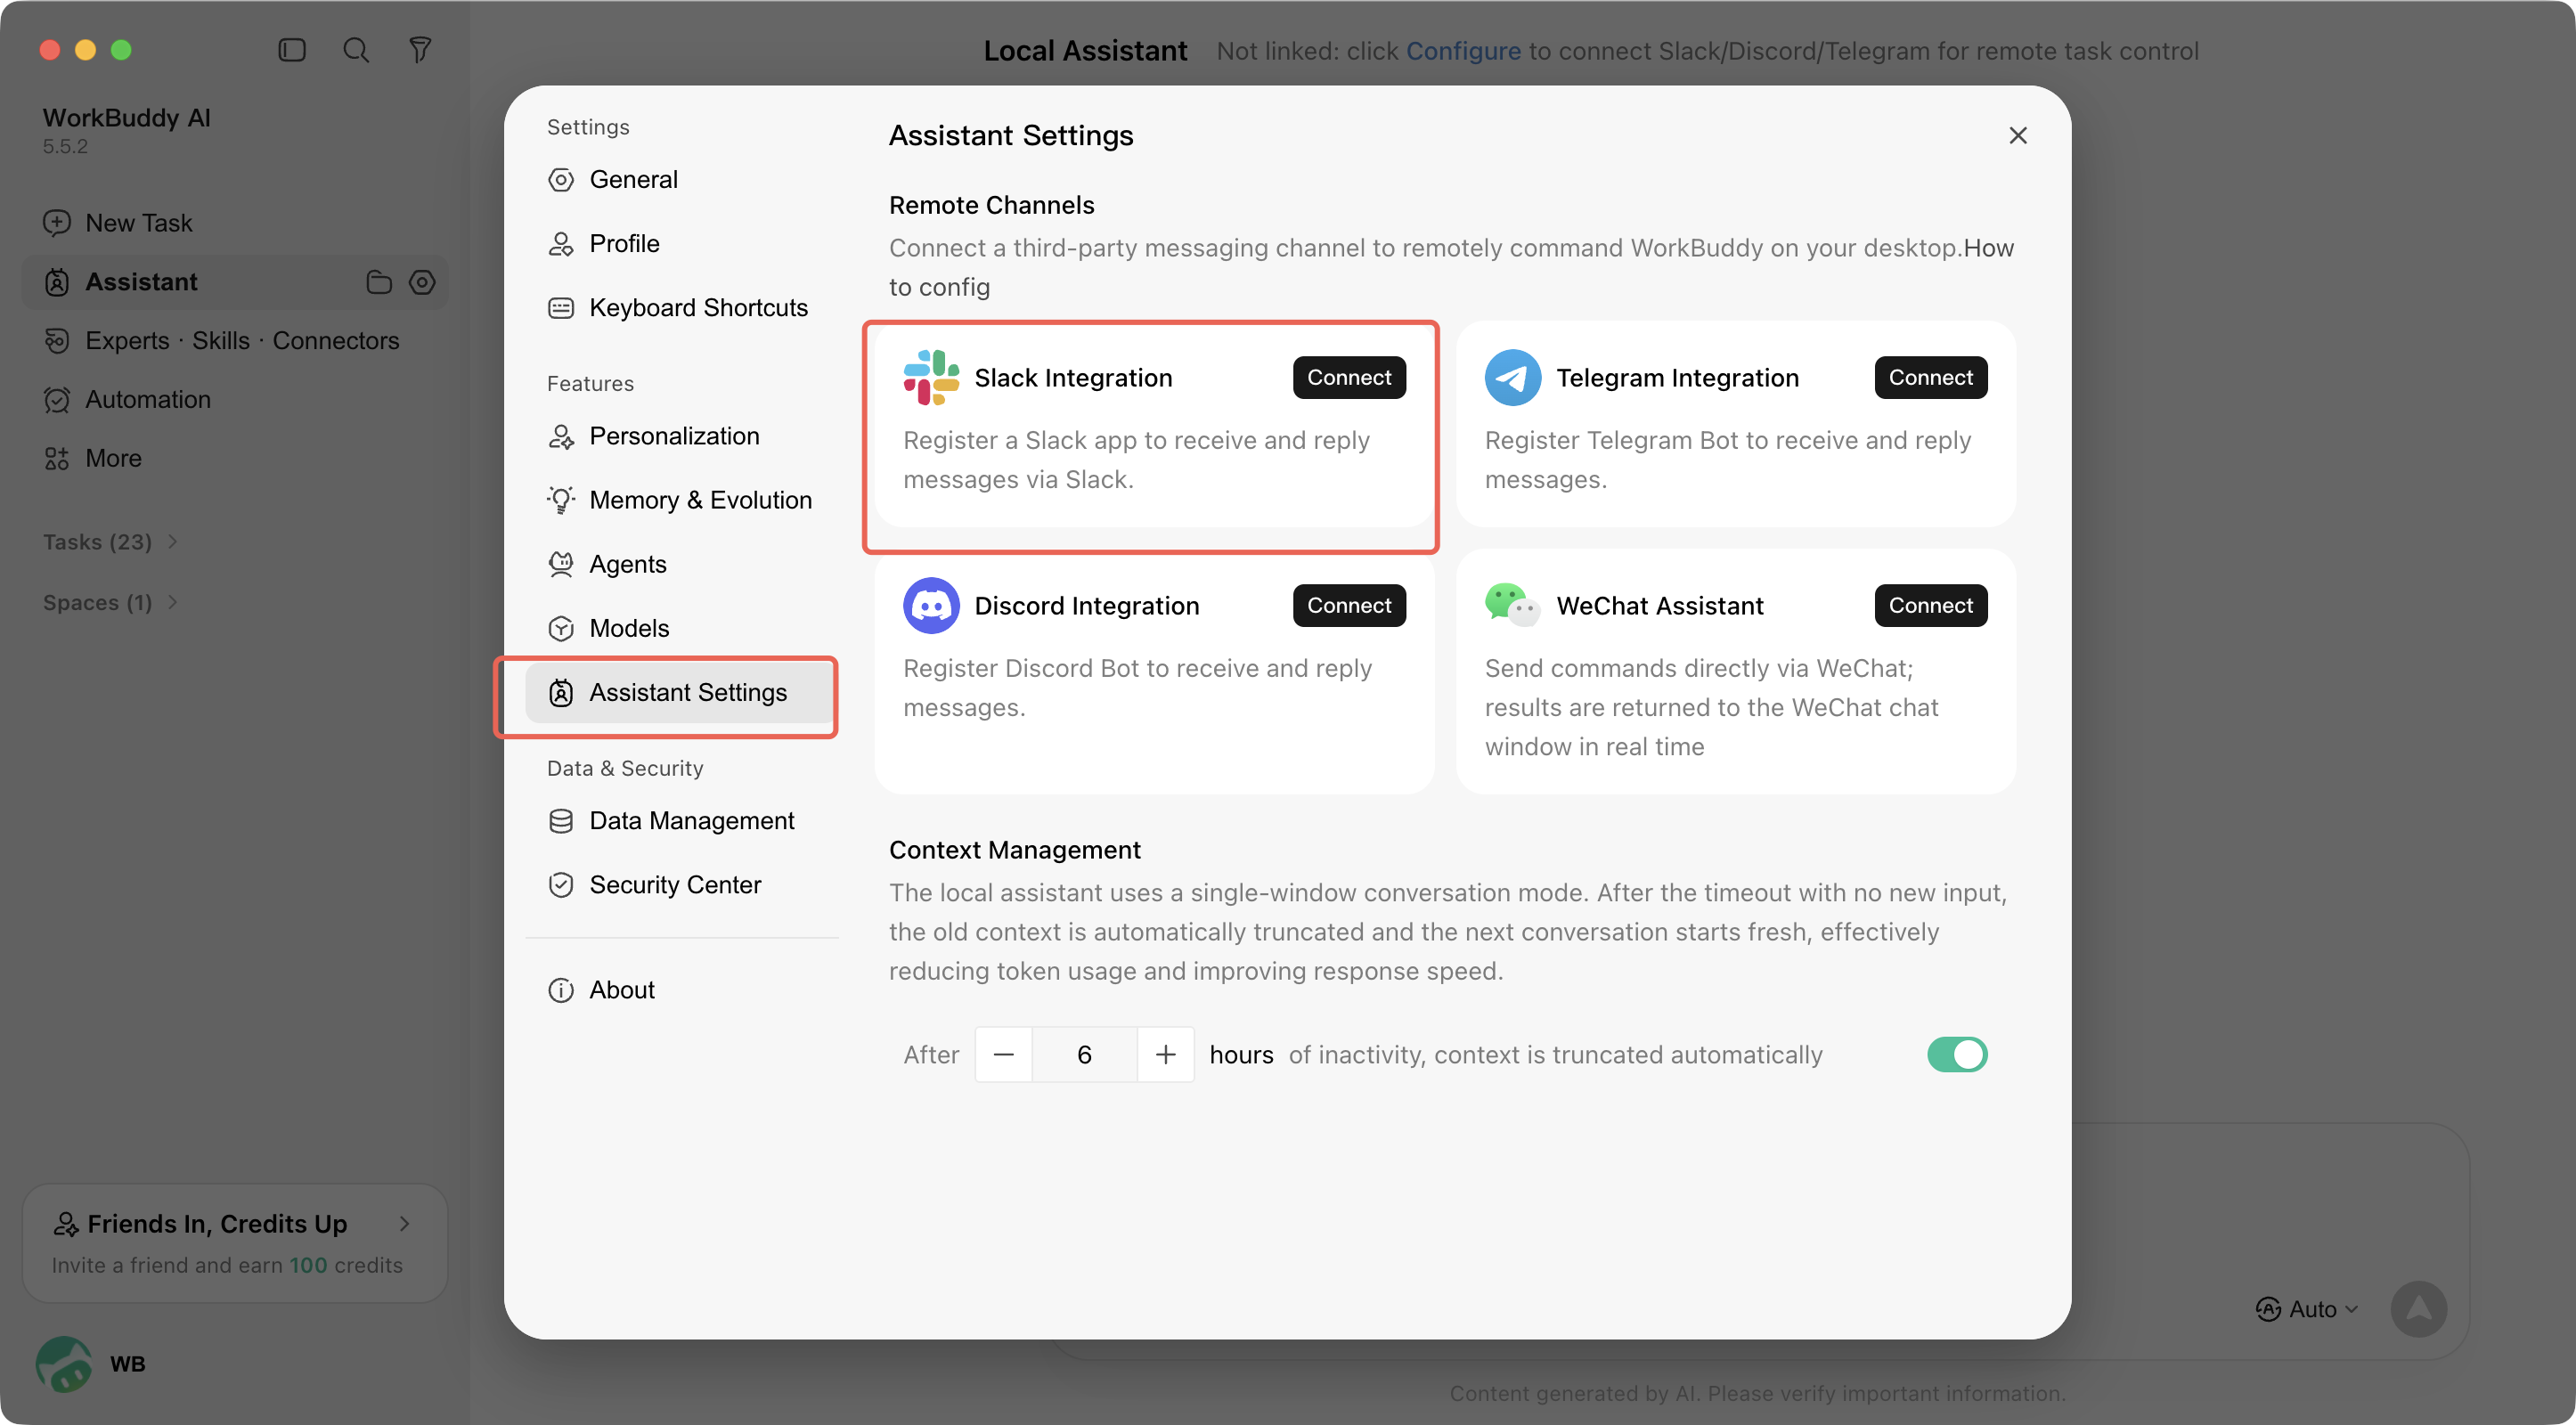
4. In the Register Slack Channel dialog that appears, enter the two credentials:
Bot Token (xoxb-...): Enter the token obtained in Create a Slack app - Step 3.
App-Level Token (xapp-...): Enter the token obtained in Create a Slack app - Step 2.
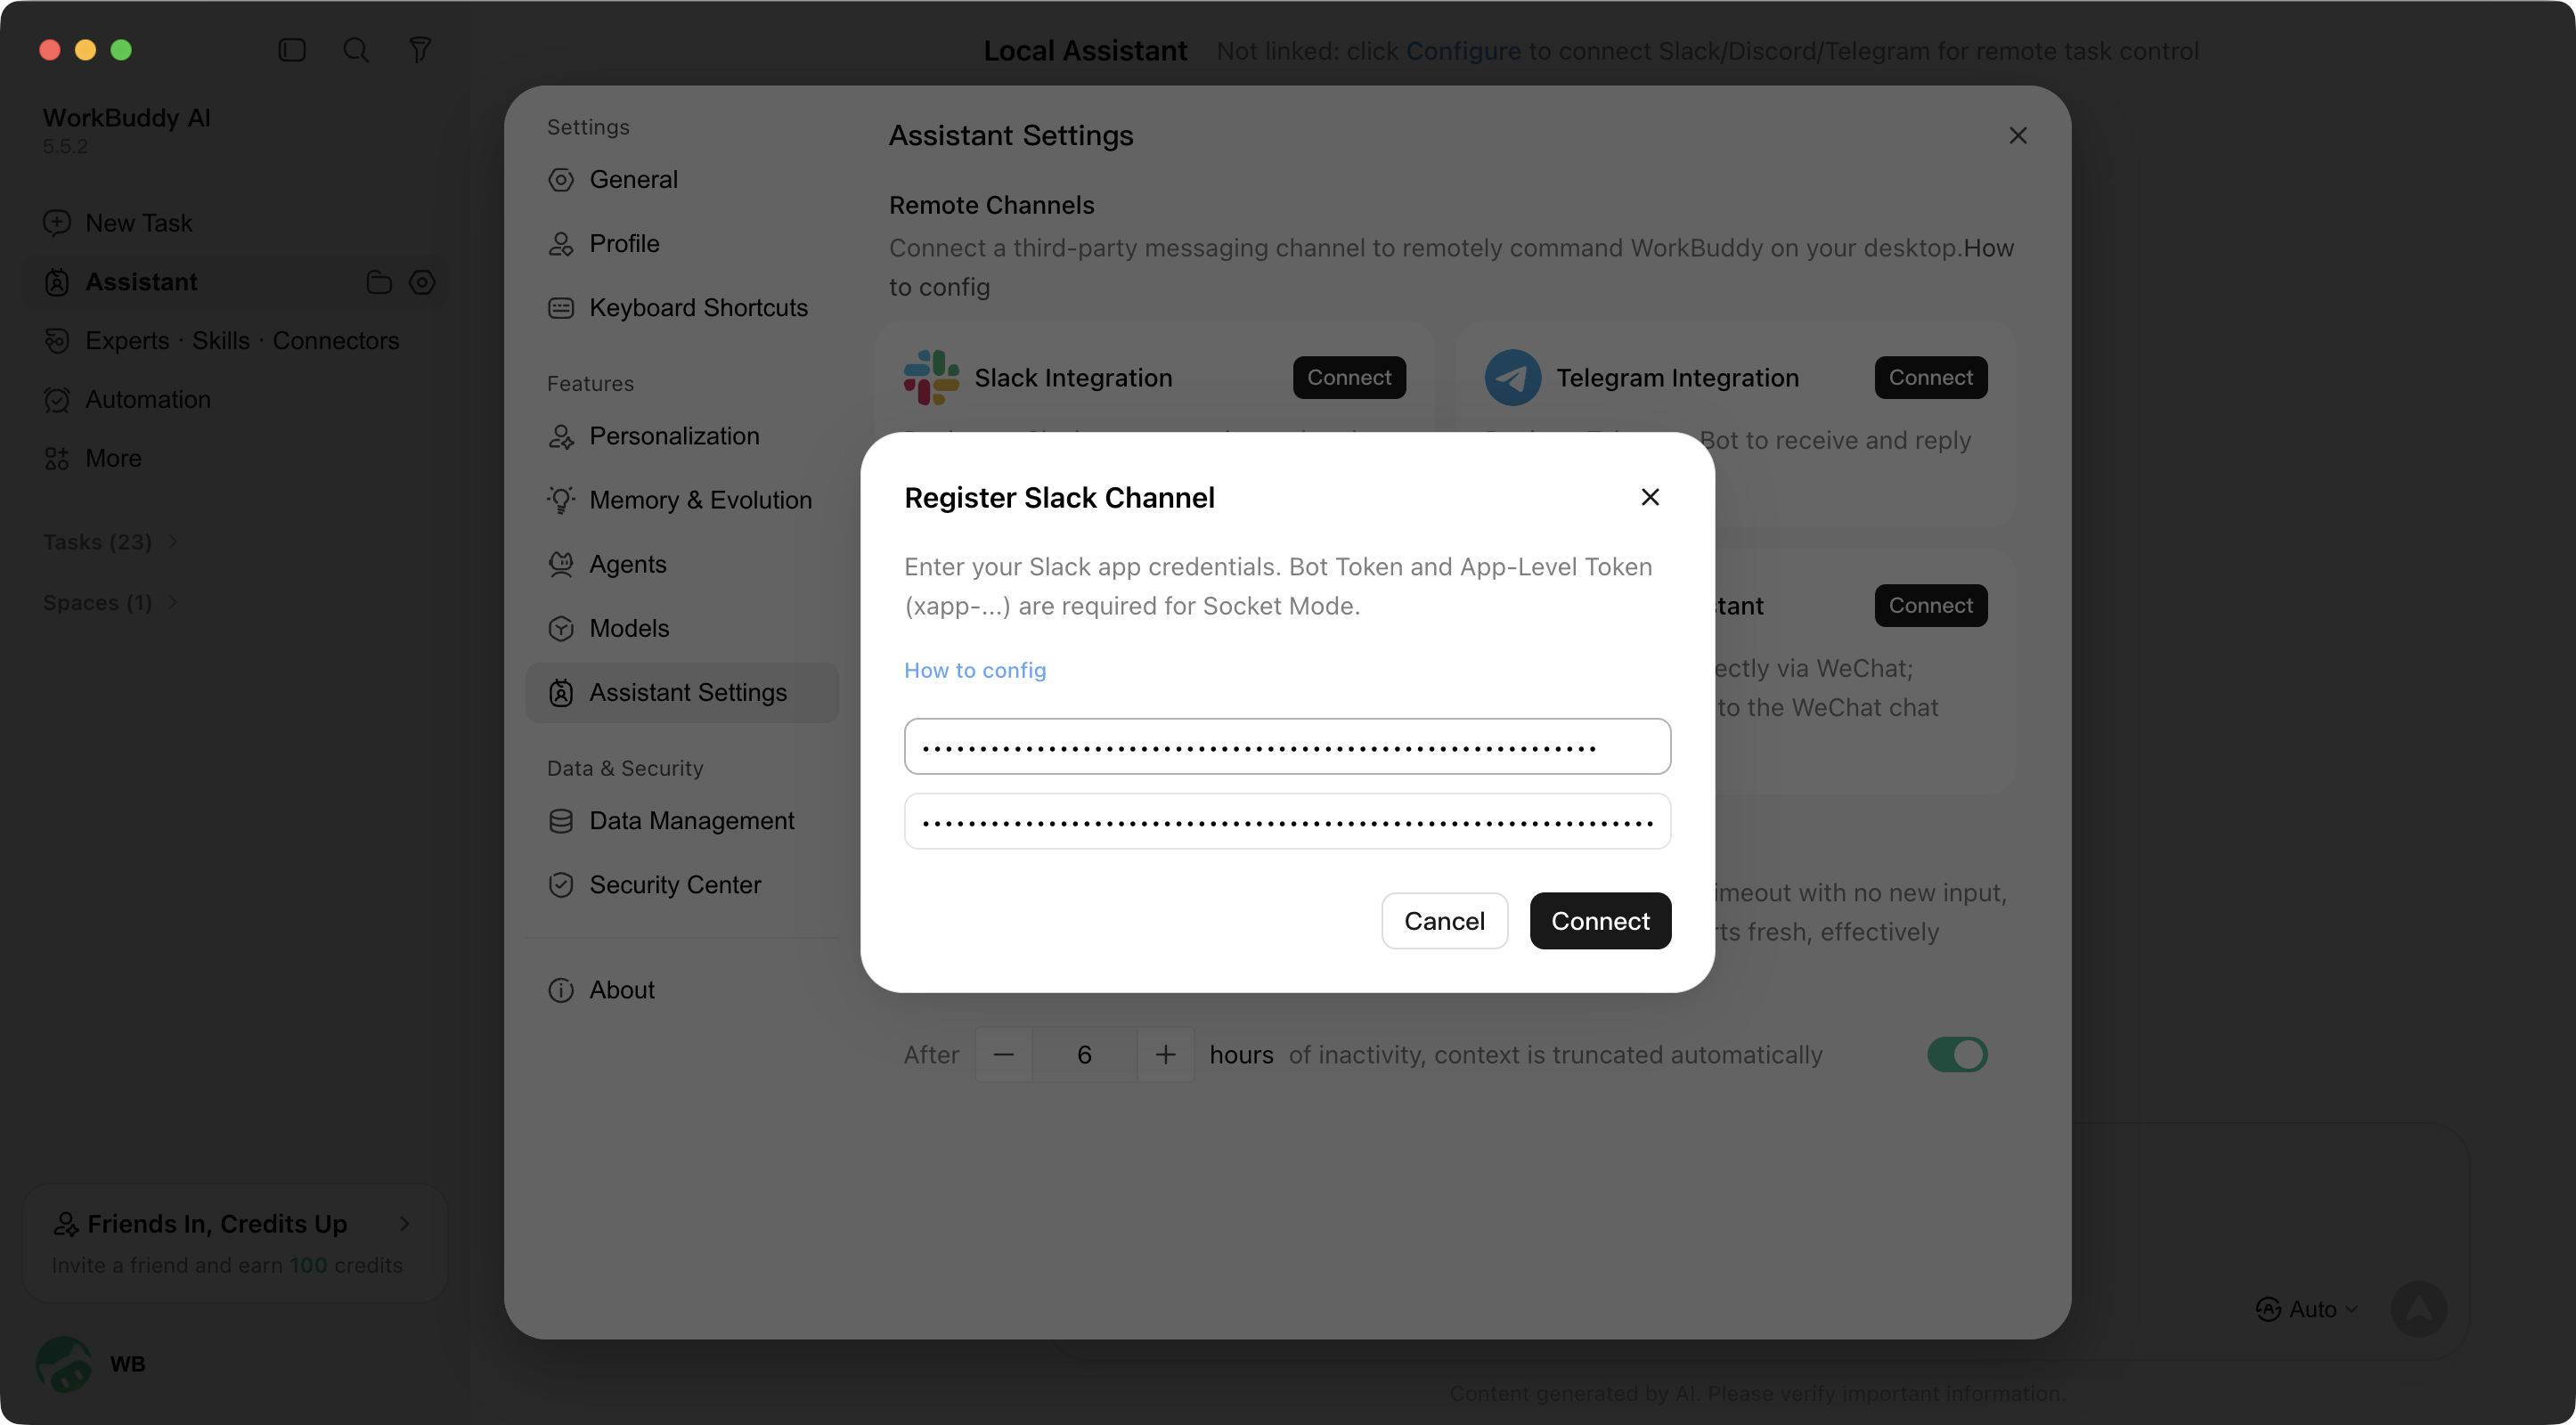
5. Click Connect to complete the pairing.
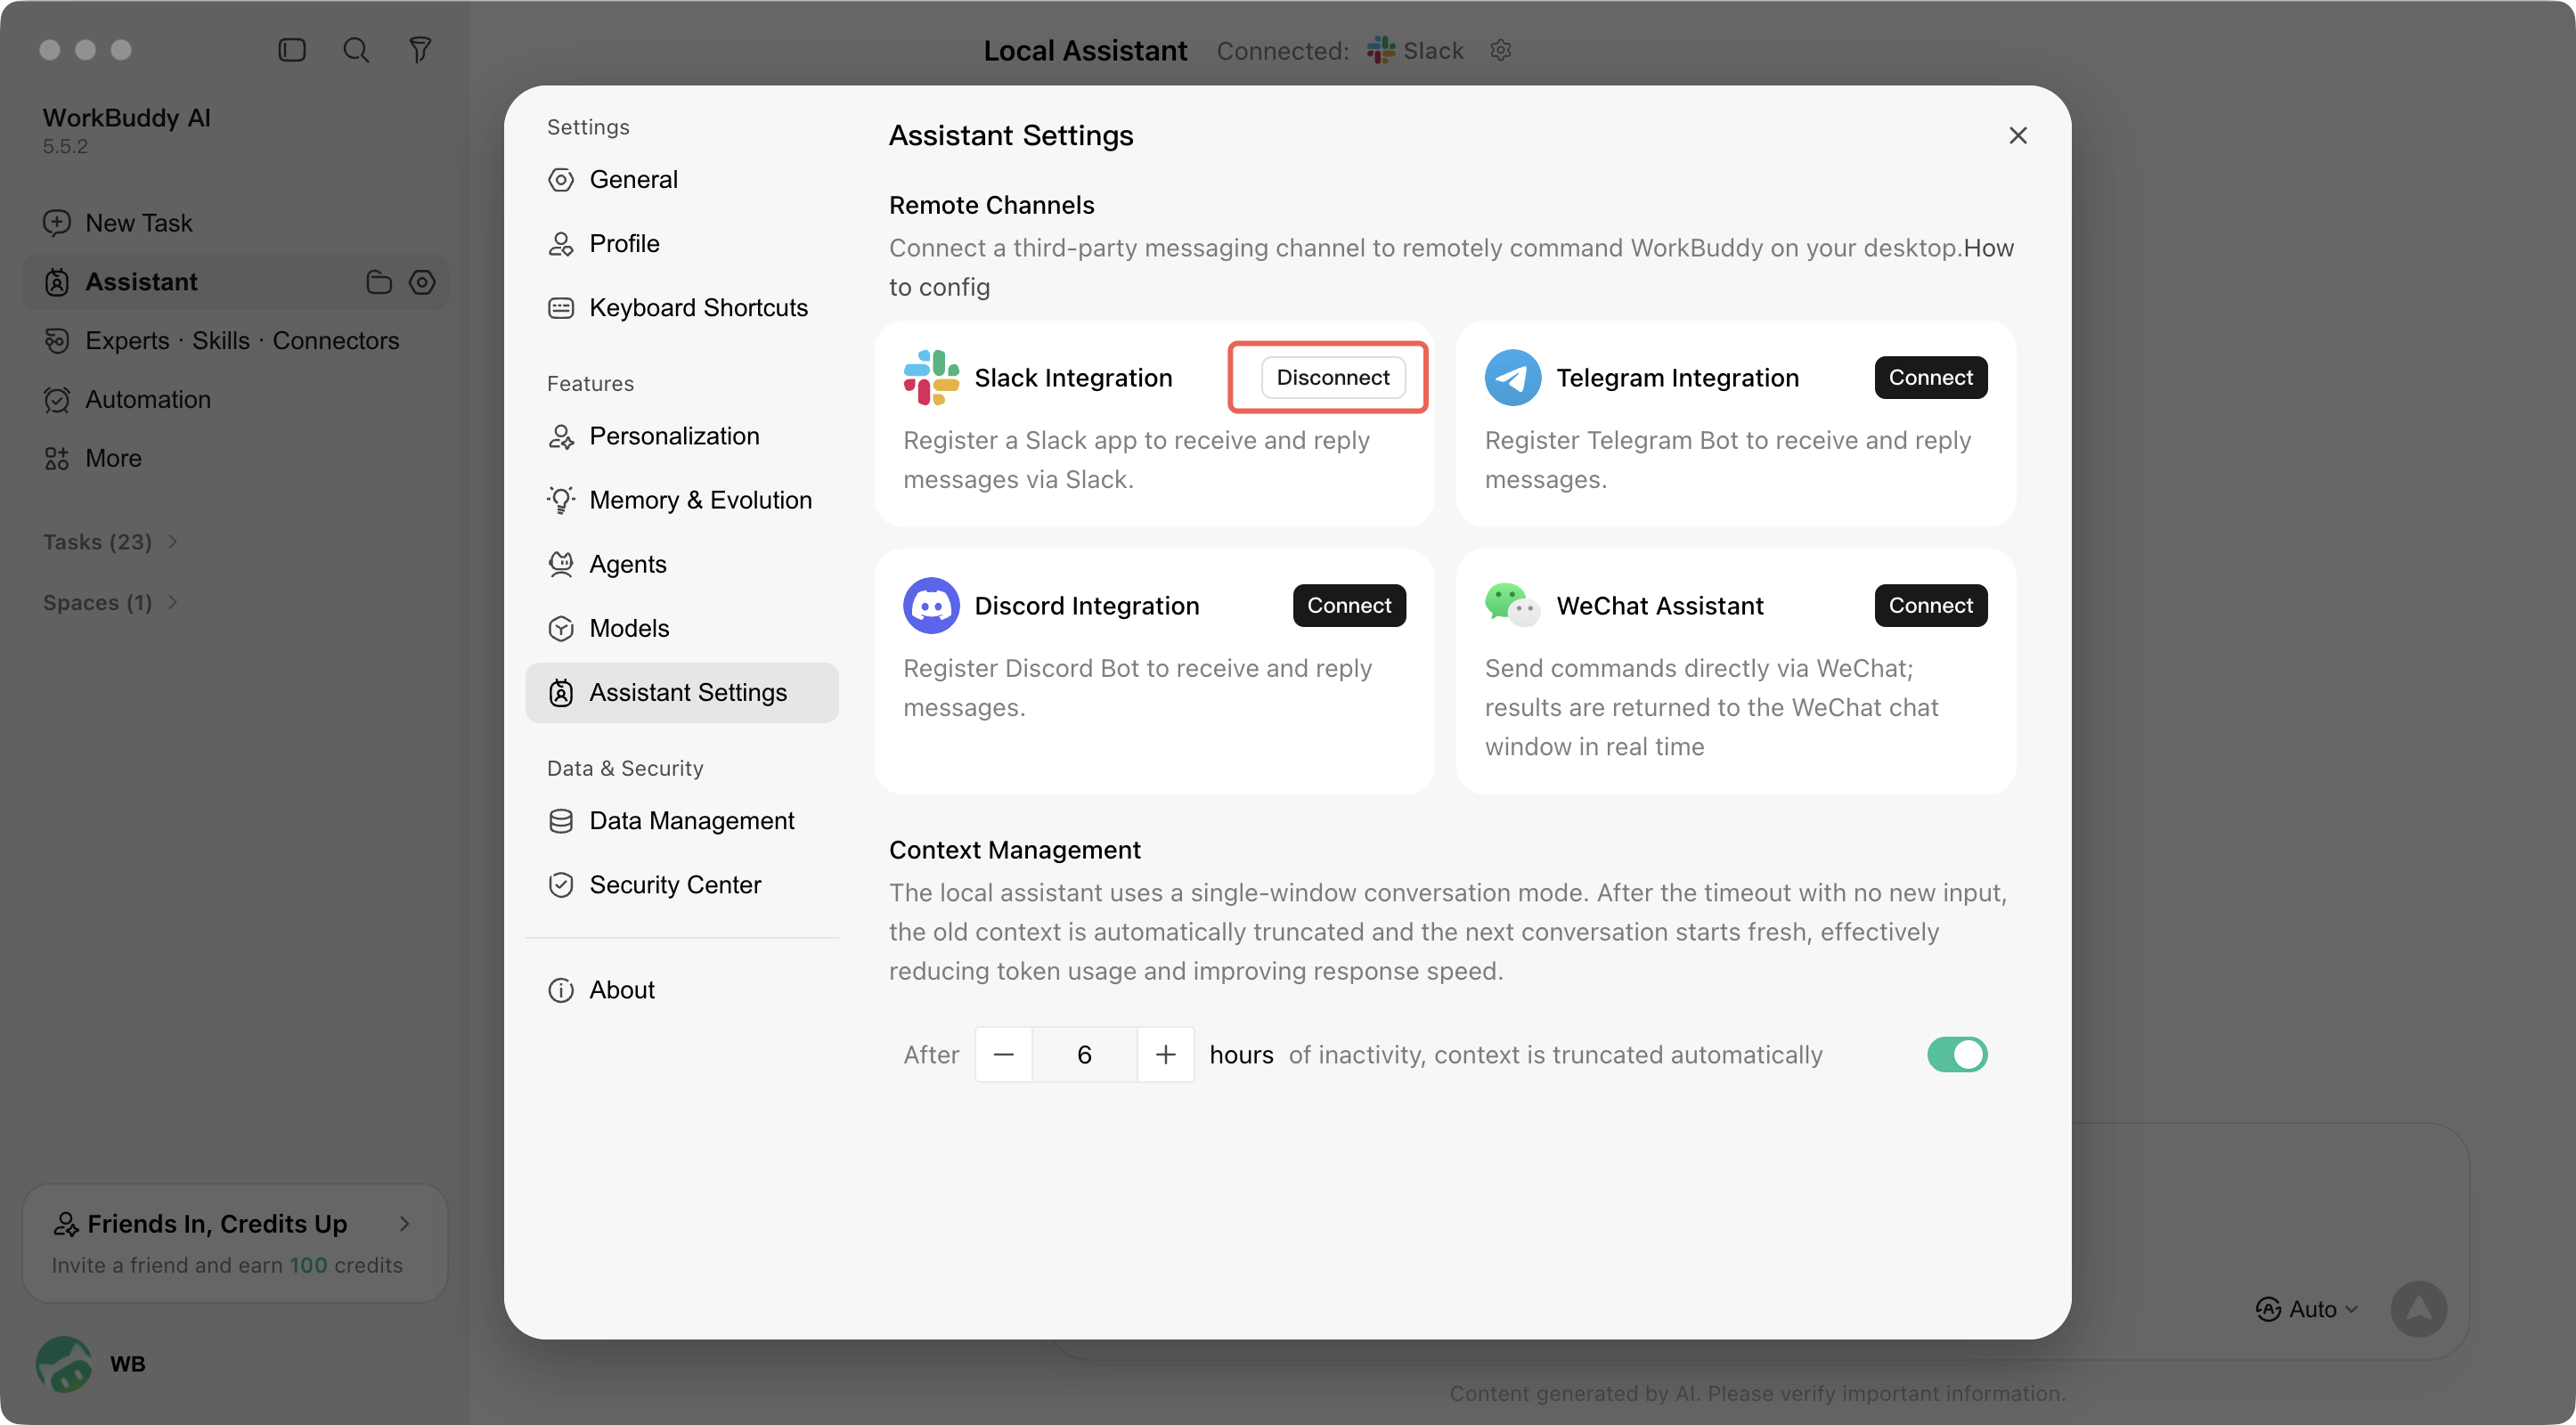
IV. Usage
Send a task directly to the WorkBuddy AI app in a private chat.
Mention the app in a channel via
@WorkBuddy AI to assign a task.Upload files and images as task context.
Receive task progress and result notifications in Slack.
V. FAQ
Issue | Solution |
The application is not responding. | Confirm that WorkBuddy AI is running on the computer and the channel status is connected. |
Socket Mode Connection Failed | Confirm that the App-Level Token includes the connections:write permission. |
Invalid Bot Token | Confirm that the copied token is the Bot User OAuth Token starting with xoxb-, not the User OAuth Token starting with xoxp-. |
Bot Token Not Found on OAuth Page | Click Install to Workspace to complete installation authorization before the token is displayed. |
Unable to Receive Message Events | Confirm that the message.im and app_mention events in the app manifest have taken effect. If the events are configured manually, check whether Event Subscriptions have been saved. |
No Response to @ in Channel | Run /invite @WorkBuddy AI in the channel to add the app to the channel. |
Unable to Install to Workspace | The workspace may have app approval enabled. Contact the administrator for approval. |
Connection Interrupted | Check the network connection. WorkBuddy AI will automatically attempt to reconnect. |
Help and Support
Was this page helpful?
You can also Contact sales or Submit a Ticket for help.
Help us improve! Rate your documentation experience in 5 mins.
Feedback