Assistant Channel Settings
Download
Focus Mode
Font Size
Assistant channel settings are used to manage the remote assistant channels (Slack / Telegram / Discord, and so on) available to enterprise members in the Assistant panel of the WorkBuddy client. Administrators can manage all channels at once with a master switch, or enable, disable, and limit the visibility scope (all users / specified departments or members) for individual channels. Changes take effect in real time, and the client syncs within approximately 5 minutes.
Note:
Manage the assistant channels available to the enterprise. Switch changes take effect immediately, and the client syncs within approximately 5 minutes.
Operation Steps
Step 1: Entering Assistant Channel Settings
Log in to the enterprise admin console, go to Client Configuration > Assistant Channel Settings in the left sidebar, and you can view the list of assistant channels currently manageable by your enterprise (Slack / Telegram / Discord, and so on, with the type "Built-in").
Step 2: Toggling the Assistant Channel Master Switch
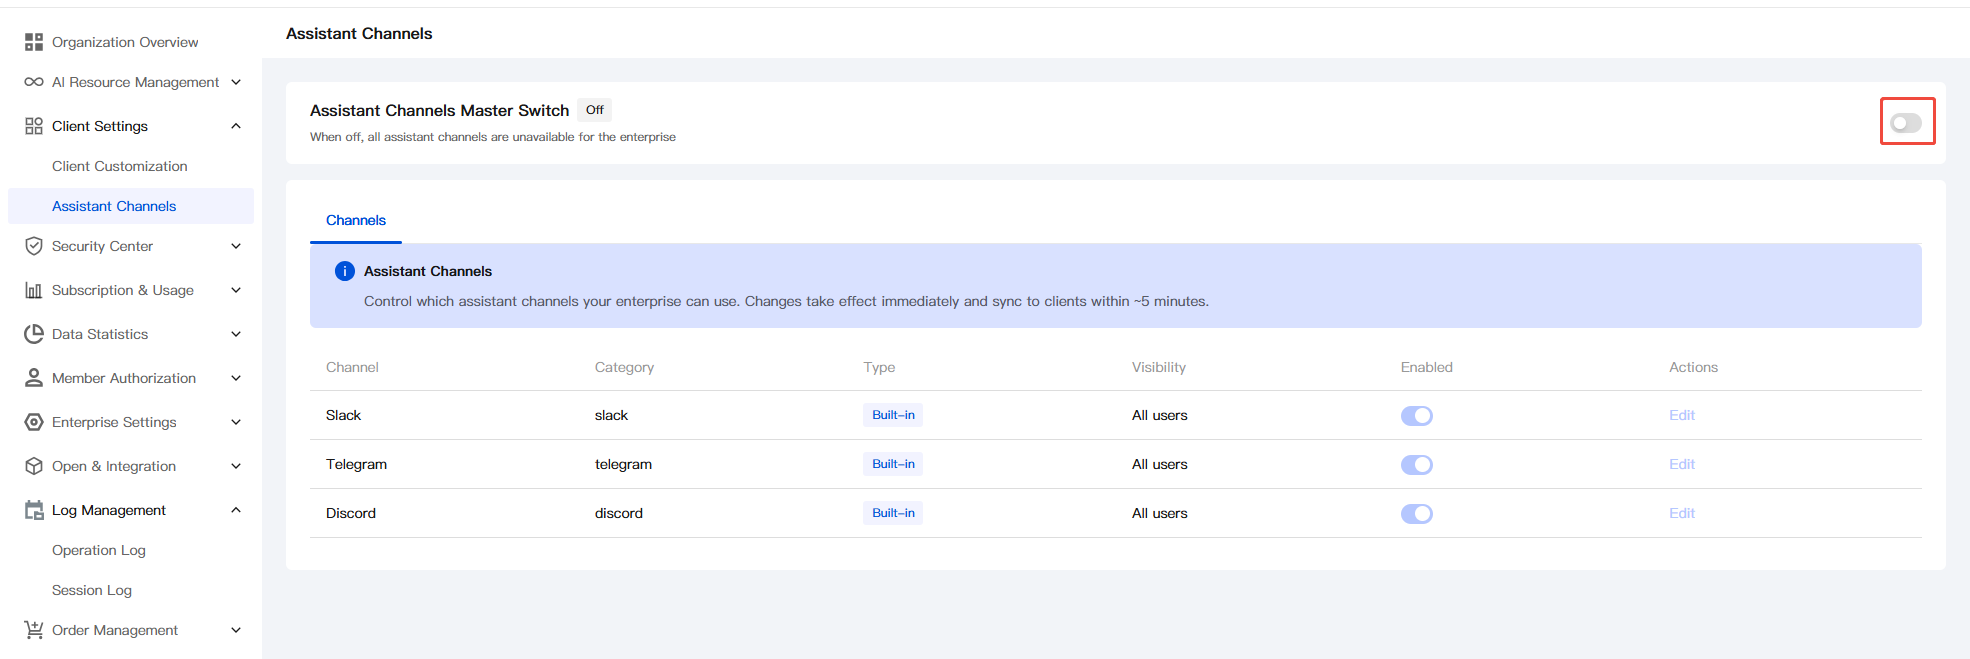
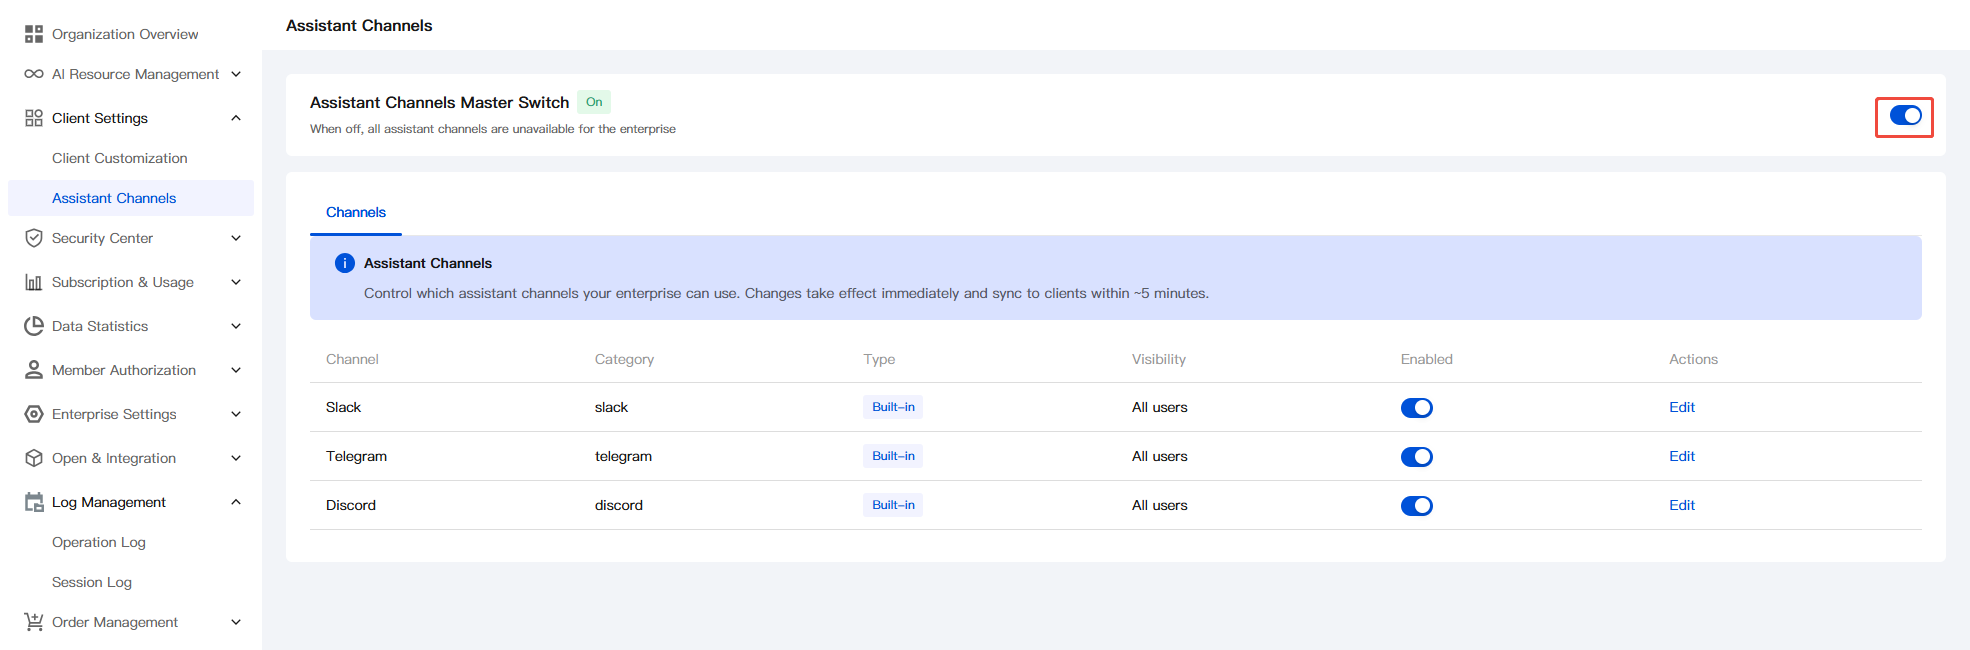
The top of the page provides the master switch for assistant channels:
Off: All assistant channels are unavailable to the enterprise, and the Assistant panel in the client no longer displays the entry points for these channels.
On: Channels managed in the admin console take effect individually according to their enable status and visibility scope in the channel list below.
Step 3: Enabling or Disabling a Single Channel
In the channel list, click the Enable switch on the right side of each channel to enable or disable that channel individually. After a channel is disabled, members will not see its entry point. List fields:
Field | Description |
Channel. | Channel display name, for example, Slack / Telegram / Discord. |
Category | Internal channel identifier ( slack / telegram / discord). |
Type | "Built-in" indicates that the channel is preset by the platform. |
Visible range | Visibility scope of the current channel to members (all users or specified departments / members). |
Enabling log access | Toggle for enabling or disabling a single channel. |
Operation | Click Edit to open the "Set Visibility Scope" dialog box. For details, see step 4. |
Step 4: Setting Channel Visibility Scope
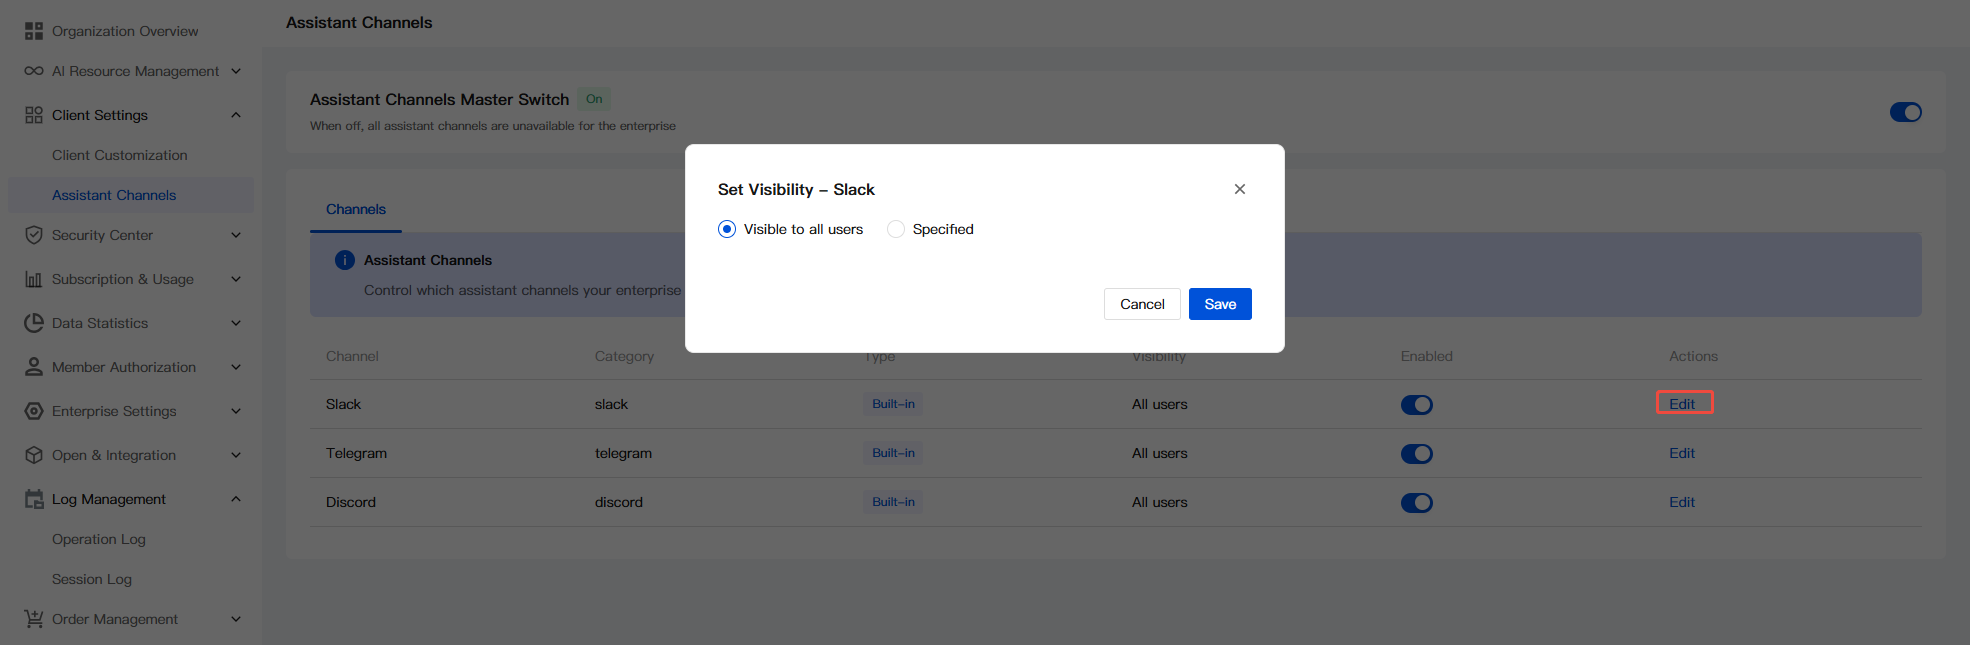
Click Edit in the operation column of a channel to open the "Set Visibility Scope" dialog box and select the visibility scope for that channel:
Visible Range | Description |
Visible to all users (default) | The clients of all members in the enterprise can view and use this channel. |
Specified visibility | Visible only to specified departments or members. After selection, further select departments or members in "Scope". |
When you select "Specified visibility", the page further expands the target objects and selector:
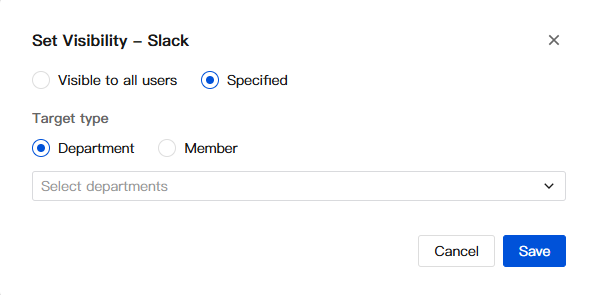
Department: Select a department from the organization tree, and all members under the department (including sub-departments) can see this channel.
Member: Targets specific members, suitable for small-scale grayscale testing or pilot programs.
After filling in the information, click Save. The visibility scope is updated immediately and written to the list.
Step 5: Client-Side Effects
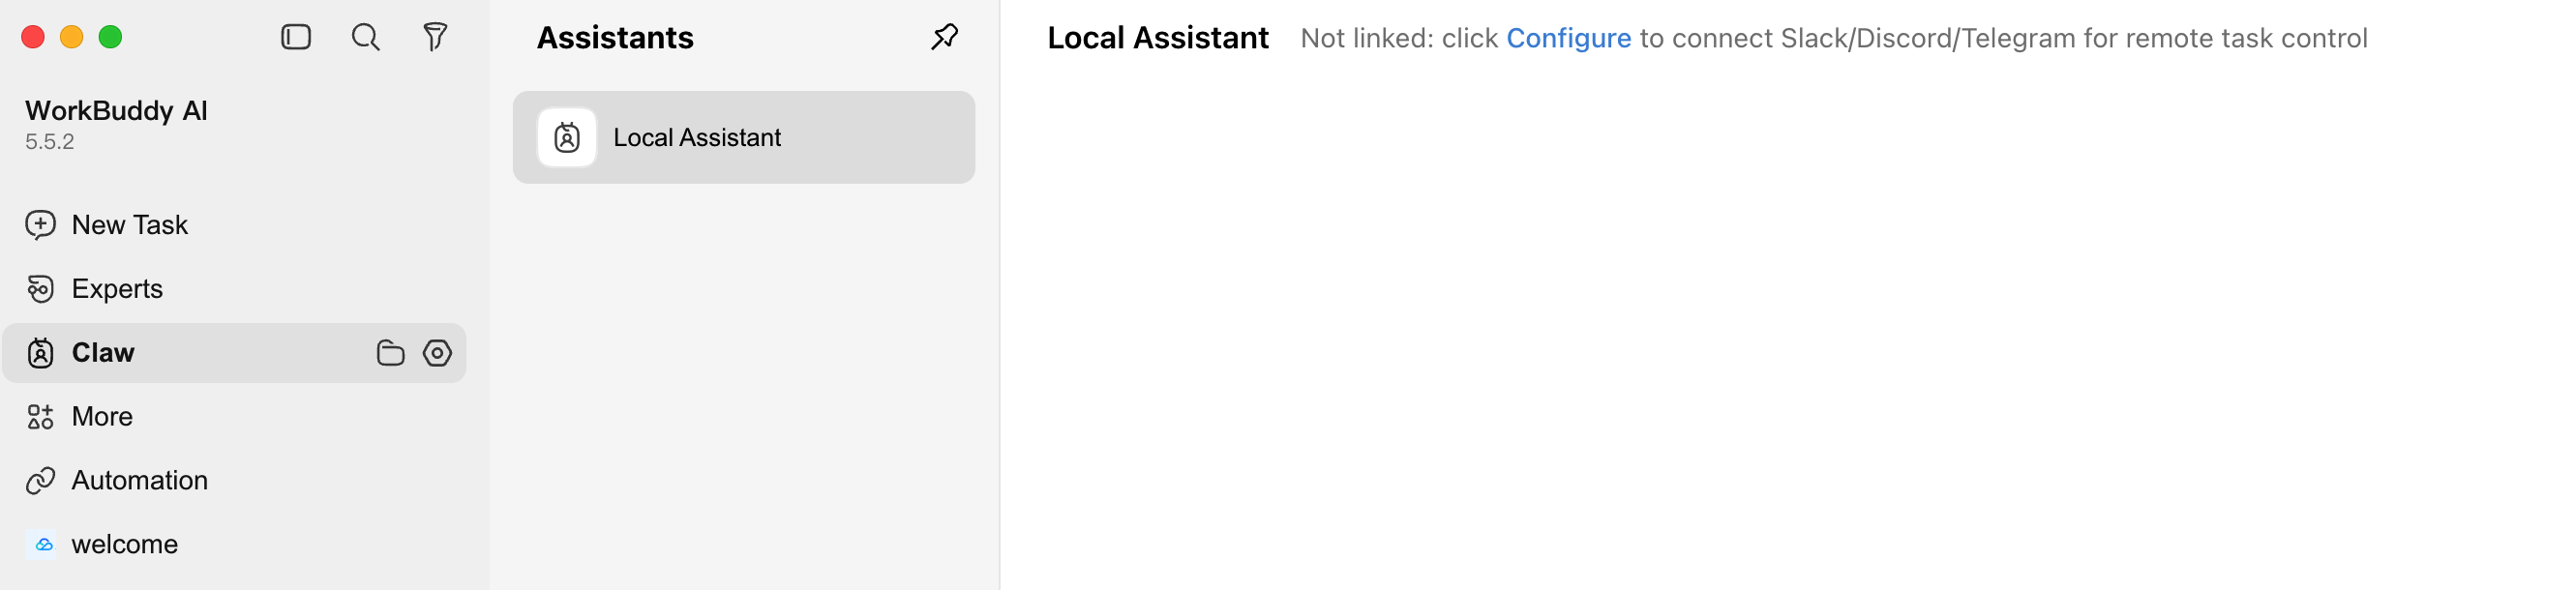
After an assistant channel is enabled, members can open the Claw panel (the Assistant) in the left sidebar of the WorkBuddy client, see the Configure entry on the right side of the assistant details, and follow the prompts to connect Slack / Discord / Telegram for remote task delivery.
Note:
Changes in the admin console take effect immediately, and clients sync within approximately 5 minutes. Members who are already online typically see the new visibility scope the next time they refresh or restart the client.
After you disable the assistant channel master switch, members cannot see the entry points for assistant channels regardless of the enable status of individual channels.
Only members who are granted visibility for a channel can see and use the Configure entry for that channel in the client.
Help and Support
Was this page helpful?
You can also Contact sales or Submit a Ticket for help.
Help us improve! Rate your documentation experience in 5 mins.
Feedback