Client Customization
Download
Focus Mode
Font Size
Client customization is used to customize the left-side navigation menu that enterprise members see in the WorkBuddy desktop client. Administrators can enable, disable, reorder, rename, and change icons for built-in menus, and can also add custom menus to embed enterprise-owned Web systems into the client. Changes are completed in drafts and are uniformly distributed to all members after being published as a whole.
Note:
Built-in menus: Preset by the platform. They can be enabled or disabled, reordered, renamed (in Chinese or English), and have their icons changed, but cannot be deleted.
Custom menus: Entry points to enterprise-owned Web systems (embedded via iframe). They can be freely added, deleted, or modified.
Disabled items do not participate in sorting and sink to the bottom of the list. All changes take effect only on this client.
Operation Steps
Step 1: Go to the Client Customization Page
Log in to the enterprise admin console, and in the left sidebar, go to Client Configuration > Client Customization. The page opens the Navigation Menu Tab, which displays the currently active menu list. The upper-right corner provides the Chinese Preview / English Preview option (for preview on this page only and does not affect data) and the Edit Menu button.
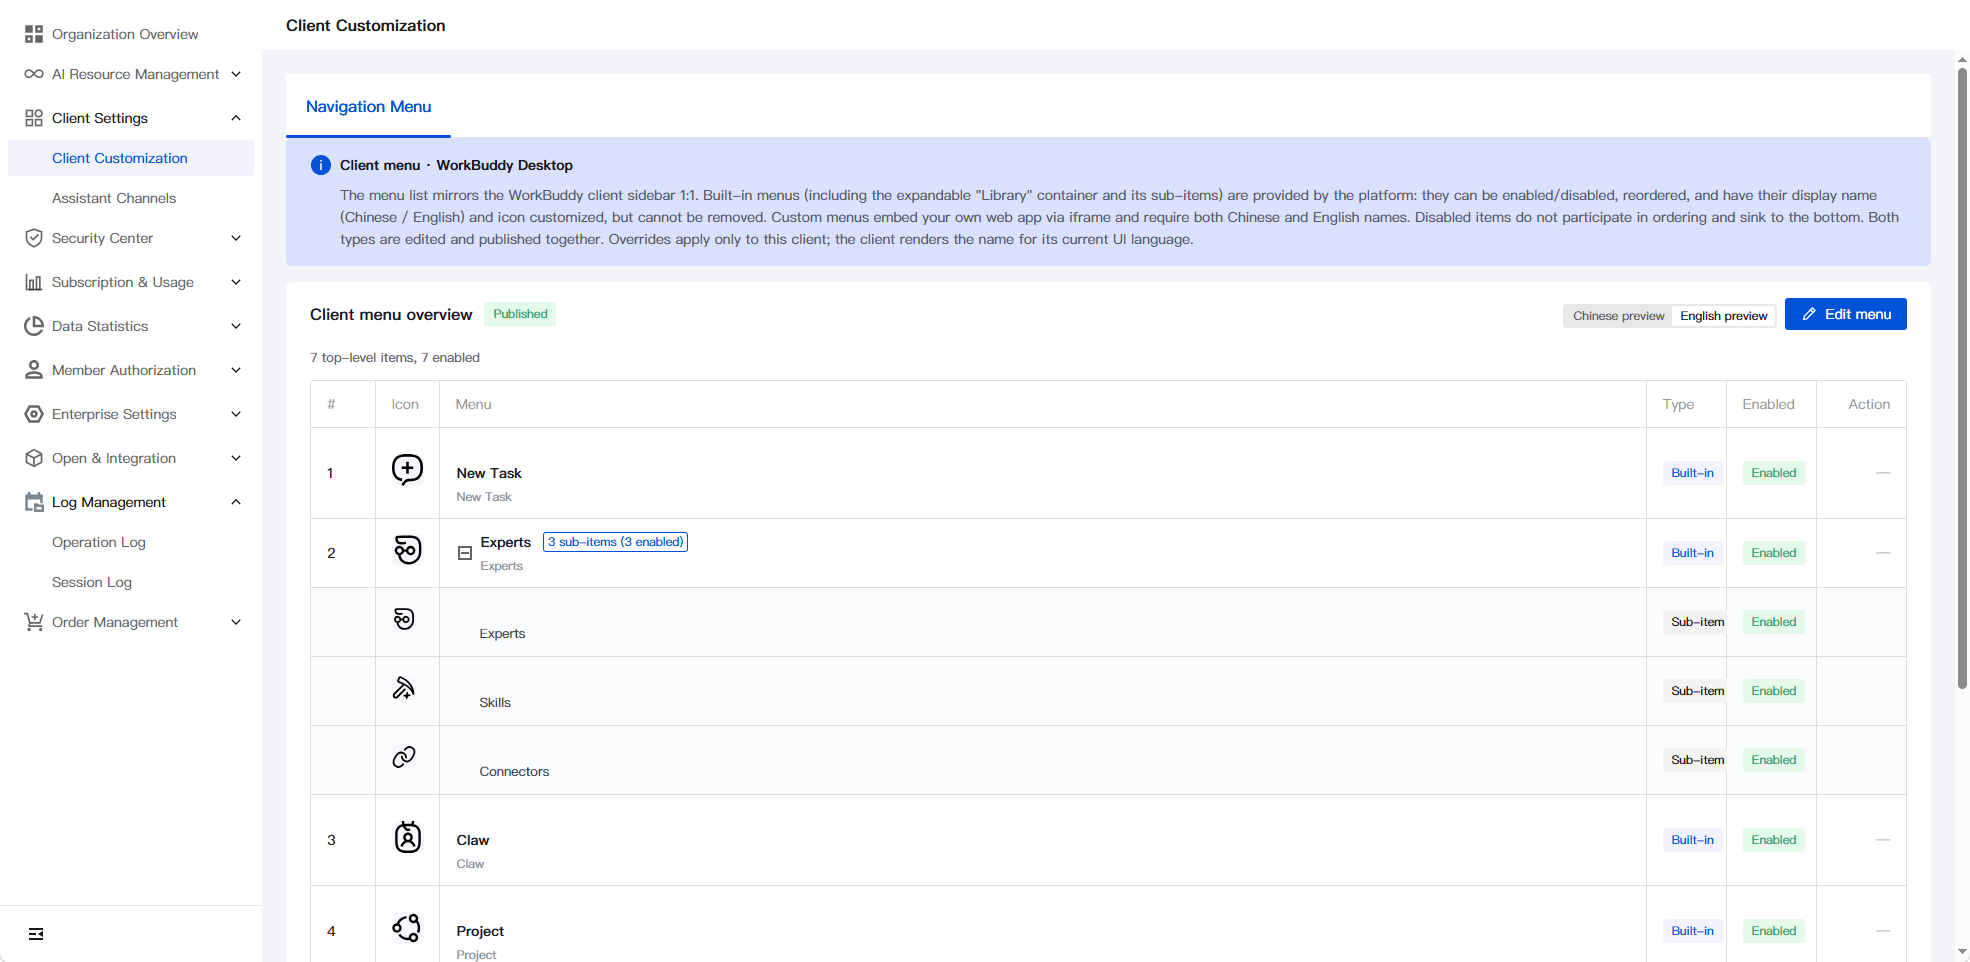
Step 2: Enter Edit Mode
After Edit Menu is clicked, the page switches to draft mode. Up and down move arrows and an operation column (Customize / Manage Subitems) appear in each row of the table, and buttons such as + New Custom Menu, Restore All Defaults, and Cancel / Publish are added in the upper-right corner.
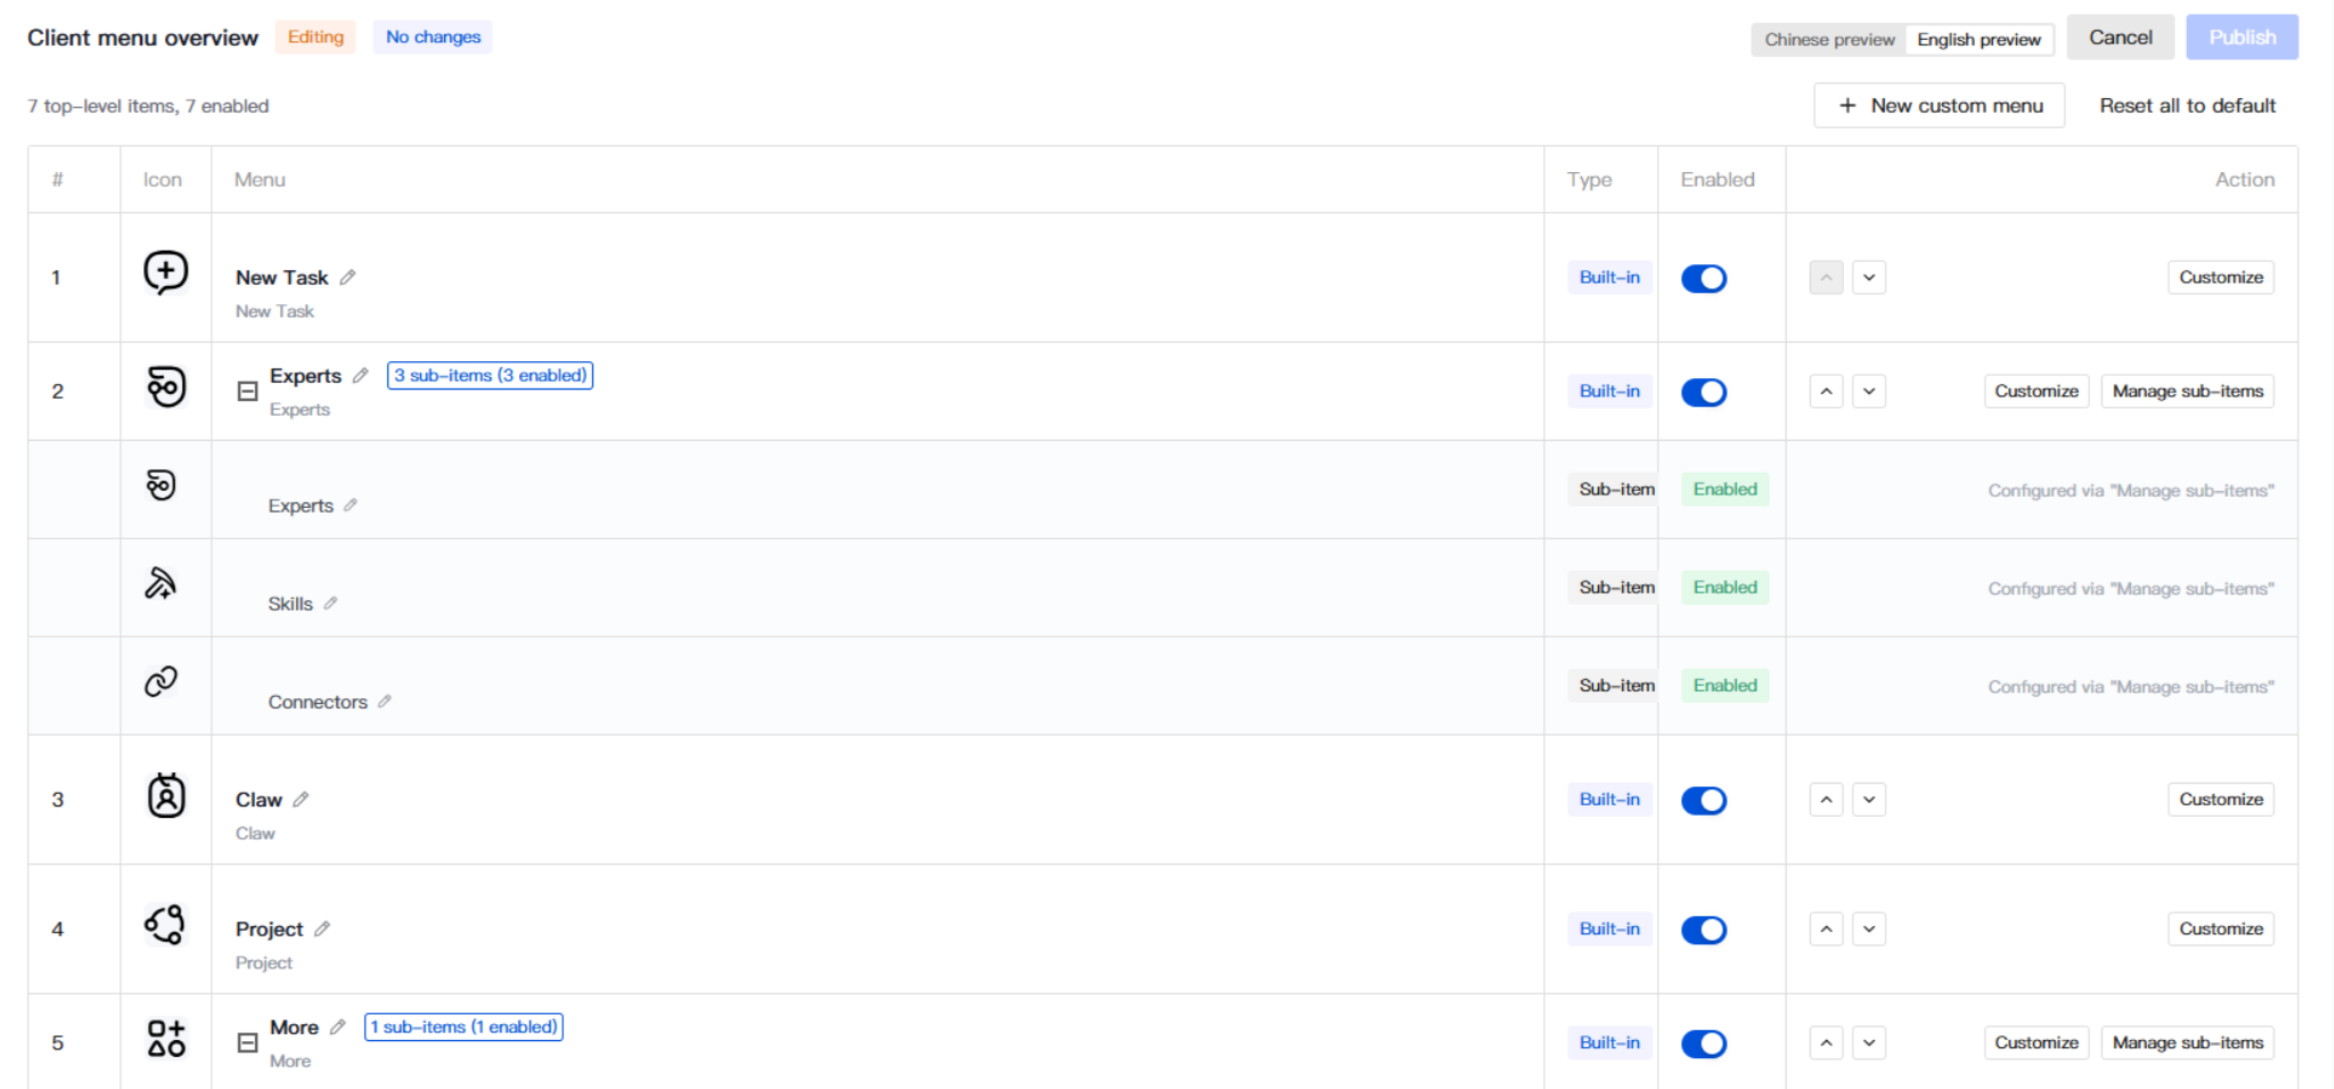
Operations available in edit mode:
Enable/Disable: Toggle the enable switch. Disabled items automatically sink to the bottom of the list.
Sort: Click the up and down arrows to move the menu position.
Customize: Modify the display name (Chinese / English) and icon of a built-in menu.
Manage Subitems: Container-type menus (such as "Experts") provide this additional entry for enabling or disabling subitems and customizing subitem names and icons.
+ New Custom Menu: Add an enterprise-owned Web system as a menu.
Restore All Defaults: Clear all overrides for built-in menus in the current draft and restore them to platform defaults. Custom menus are not affected.
Step 3: Customize Built-in Menus (Rename + Change Icons)
In edit mode, click Customize on a built-in menu row to open the customization dialog, where you can enter the Chinese name, English name, and upload a new icon. If any field is left empty, the platform default is used.
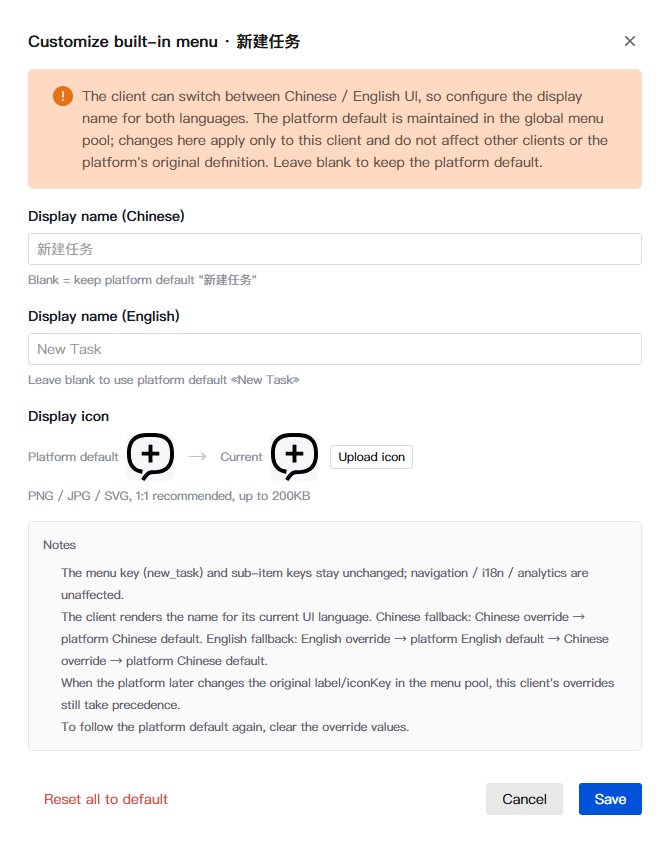
Icons support png / jpg / svg formats. A 1:1 aspect ratio is recommended, and a single file must not exceed 200 KB.
Click Restore All Defaults in red text at the lower-left corner to clear all Chinese, English, and icon overrides in this dialog at once.
Step 4: Create a Custom Menu (Embedding a Corporate Web Page)
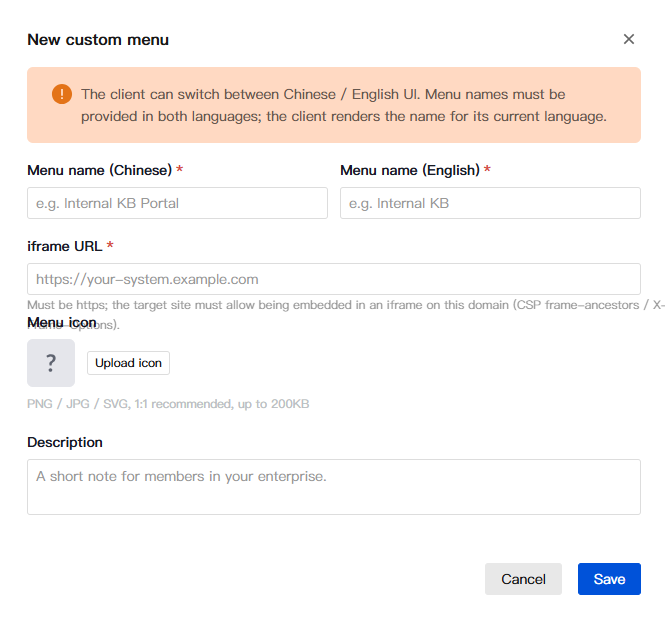
Click + New Custom Menu to open the creation dialog. Fill in the following fields and save:
Field | Required | Description |
Menu name (Chinese) | Required | Example: Internal knowledge portal. |
Menu name (English) | Required | Example: Internal KB. |
iframe URL | Required | The complete URL of the enterprise Web system. It must use https and be embeddable in an iframe. |
Menu icon | Optional. | Supports png / jpg / svg formats. A 1:1 ratio is recommended, and a single file must not exceed 200 KB. |
Description | Optional. | A brief description for internal enterprise members. |
After saving, the custom menu is appended to the end of the list as a "Custom" type. It can be enabled, disabled, reordered, and published together with built-in menus. The operation column has an additional Delete option compared with built-in menus.

Step 5: Publish and View the Client Effect
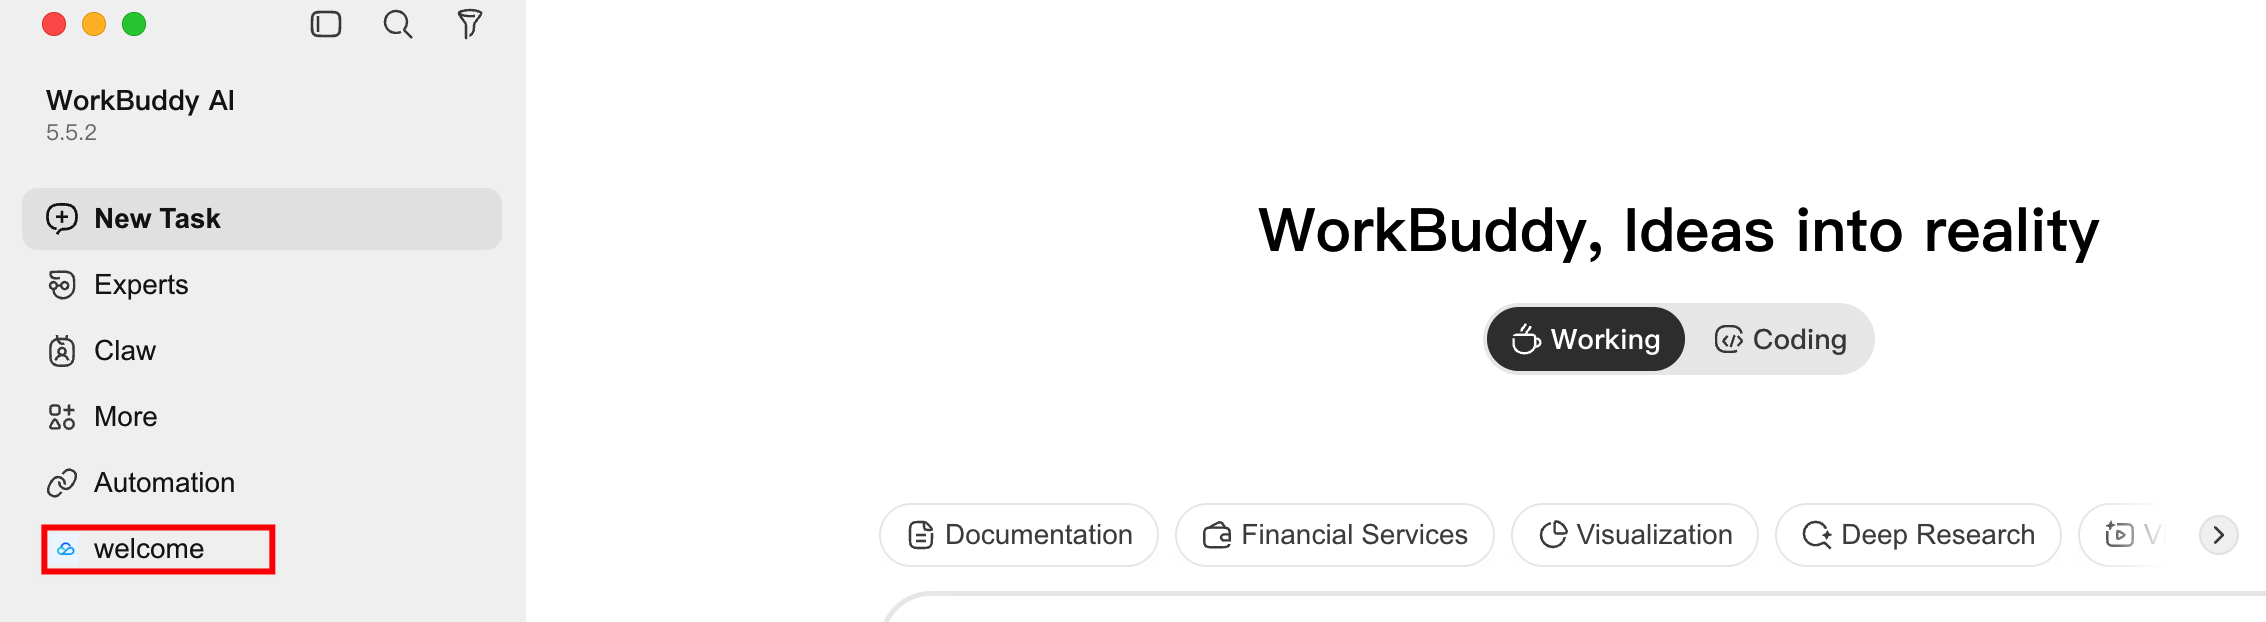
After draft changes are complete, the Publish button in the upper-right corner changes from gray to highlighted. Click Publish to deliver all changes as a whole to all members of this client. Members will see the new menu the next time they refresh the client.
Note:
Publishing is an overall action: a single click applies all draft changes. Before publishing, use Chinese Preview / English Preview to check the display in both languages.
Both the Chinese and English names of a custom menu are required. If either is empty, saving is blocked. For built-in menus, the Chinese name, English name, and icon can be left empty independently, and any empty field uses the platform default.
Help and Support
Was this page helpful?
You can also Contact sales or Submit a Ticket for help.
Help us improve! Rate your documentation experience in 5 mins.
Feedback