Conversation Logs
Download
Focus Mode
Font Size
Conversation logs are used to record the conversation inputs of enterprise members in the WorkBuddy client. They allow administrators to filter by time range, search by session ID, requester, or keyword, view the complete input of a single request, and export Excel files, facilitating enterprise usage auditing and troubleshooting.
Note:
Conversation logs are located under Log Management in the left sidebar, alongside Operation Logs.
The banner at the top of the page displays the time when log recording was enabled (for example, "Log recording was enabled at 2026-08-27 16:53:17").
Operation Steps
Step 1: Go to the Conversation Logs Page
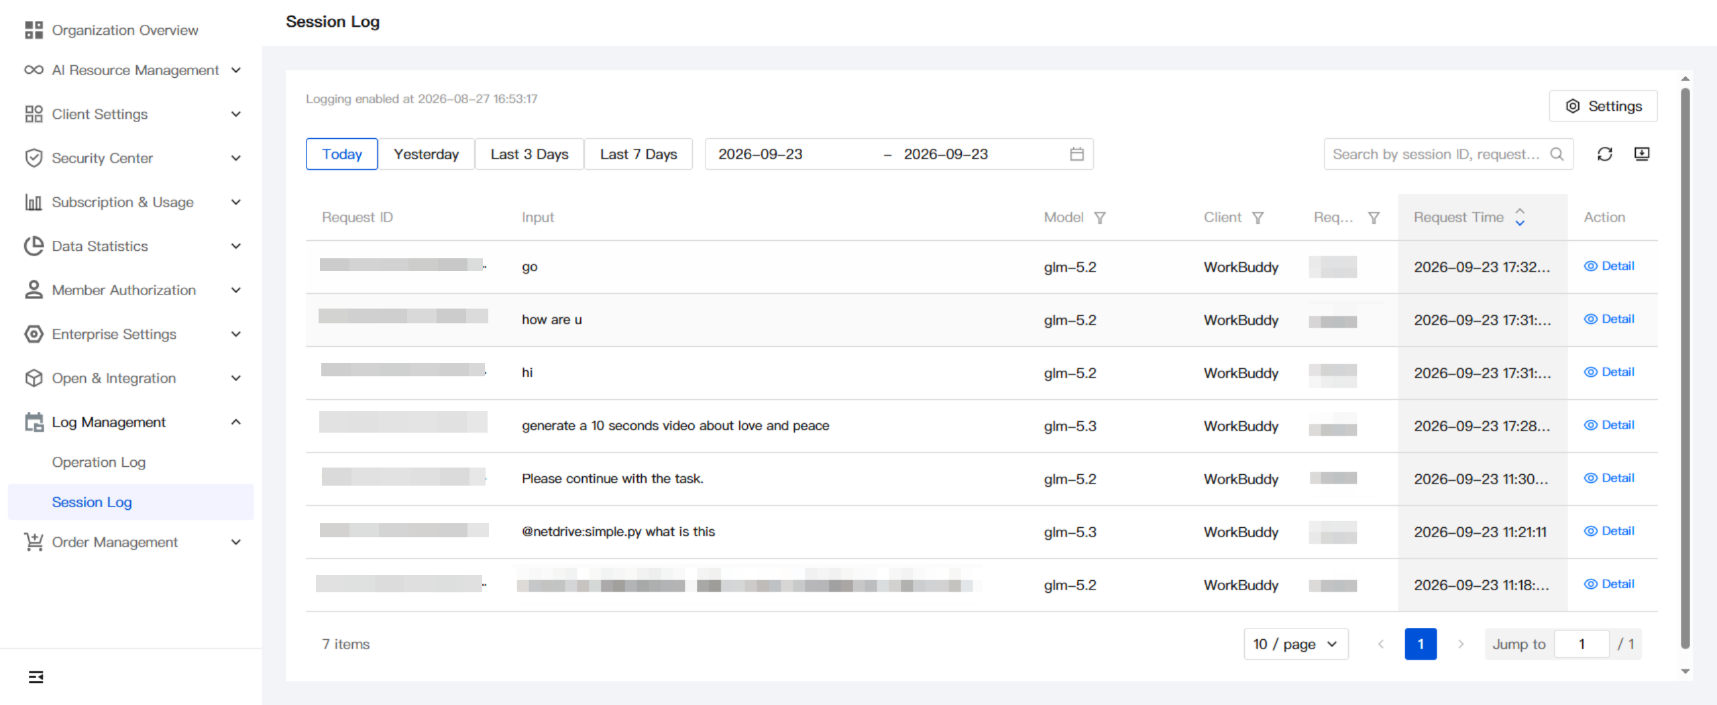
Log in to the WorkBuddy Enterprise admin console, and then go to Log Management > Conversation Logs in the left sidebar to view the list of conversation input records of enterprise members.
Step 2: Enabling or Disabling Logging
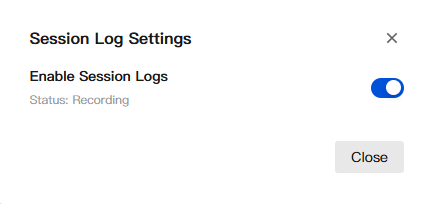
Click Settings in the upper-right corner of the page to open the "Conversation Log Settings" dialog box:
Field | Description |
Enable conversation log | Master switch. After it is enabled, the system records the conversation input of enterprise members; after it is disabled, recording stops. |
Current status | Display the current recording status (such as "Recording"). |
After completing the settings, click Close to exit the dialog box.
Step 3: Filtering and Searching Conversation Logs
Multiple filtering and search methods are provided above the list and can be used in combination:
Filter Method | Description |
Quick Time Filter | Click Today / Yesterday / Last 3 Days / Last 7 Days to quickly switch the statistical scope. |
Date Range | Customize Start Time - End Time through the calendar control to accurately query logs within any date range. |
Keyword Search | The search box on the right supports fuzzy search by session ID, requester, and keyword. |
Column Filter | The Model, Client, and Requester column headers provide filter icons for filtering by field values. |
Sort | Click the Request Time column header to switch between ascending / descending order. |
Step 4: Viewing Log Details
The list displays the following fields for each request:
Field | Description |
Conversation Request ID | Unique identifier of this request, which can be used for cross-system search and troubleshooting. |
Inputs | The conversation input sent by a member is truncated when it is too long. Click Details to view the full content. |
Model | Model used by this request (for example, glm-5.3). |
Client Type | Client type that initiates the request (for example, WorkBuddy). |
Requester | Member who initiated this request. |
Request Time | Time when the request was initiated. |
Operation | Click Details to view the full input. |
Step 5: Viewing the Full Input
Click Details in the Operation column of the target record to open the "Complete Input" dialog box and view the complete information of the request:
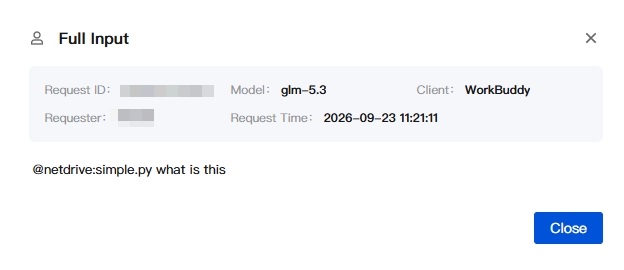
The top of the dialog box displays the session ID, model, client, requester, and request time, while the bottom shows the complete input sent by the member. After reviewing, click Close to exit the dialog box.
Step 6: Exporting Conversation Logs
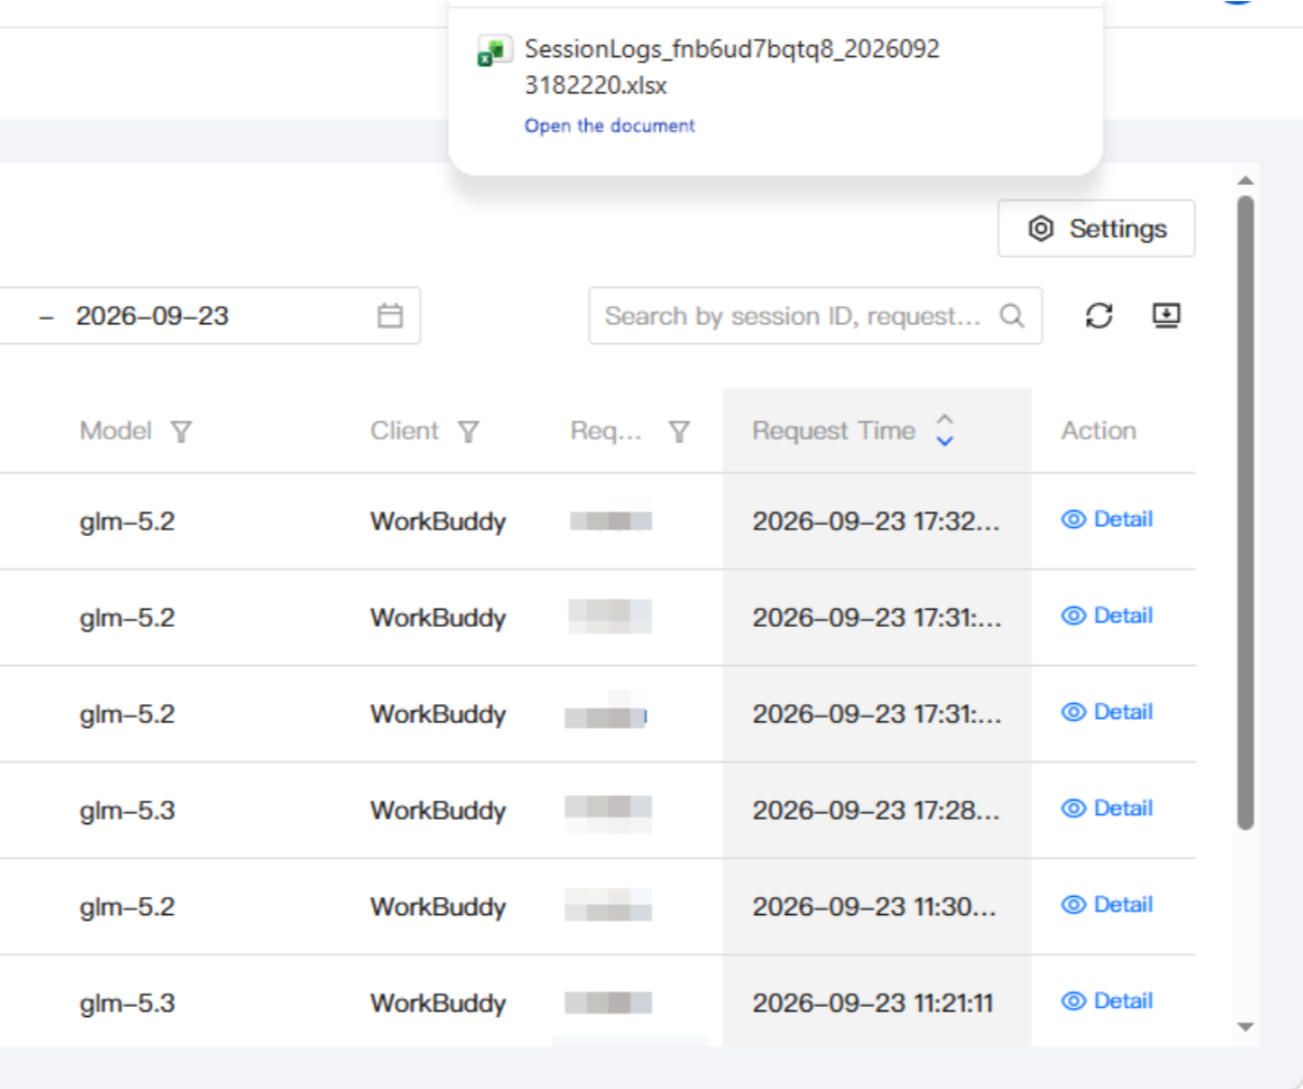
Click the Export icon on the right side of the search box, and the system will download the conversation logs to your local device as an Excel file:
File naming format:
SessionLogs_<Enterprise ID>_<Export timestamp>.xlsx, for example, SessionLogs_fnb6ud7bqtq8_20260923112940.xlsx.File content: It is consistent with the list fields and includes details such as the session request ID, input, model, client, requester, and request time for offline auditing and archiving.
Note:
Conversation logs contain members' conversation input and involve personal work data. It is recommended that enterprises grant access to this page only to administrators with auditing needs and comply with relevant privacy and compliance requirements.
The exported Excel file contains complete log details. Keep it secure to prevent sensitive information from being leaked.
Help and Support
Was this page helpful?
You can also Contact sales or Submit a Ticket for help.
Help us improve! Rate your documentation experience in 5 mins.
Feedback