Viewing Gateway Details
Download
Focus Mode
Font Size
This document describes how to view the basic information and access address of a gateway instance after it is created.
Operation Steps
1. Log in to the Microservices Platform console. In the left sidebar, click Cloud Native Gateway > Instance List.
2. On the Instance List page, click the ID of the created gateway instance to go to the Basic Information page, where you can view basic information and cluster group information of the instance.
Instance Information: In the Basic Information area, you can perform the following operations:
Click Edit in the upper right corner of the Basic Information module to modify the instance name and description.
Click the edit icon next to Public Network Billing Mode to modify the public network billing mode.
Click the edit icon next to Tag to modify the bound tag information of the gateway instance.
Cluster Group: A cluster group allows multiple clusters to use the same routing configuration, facilitating unified management of multiple cloud native gateway instances. A default group is generated for each gateway instance upon its creation.
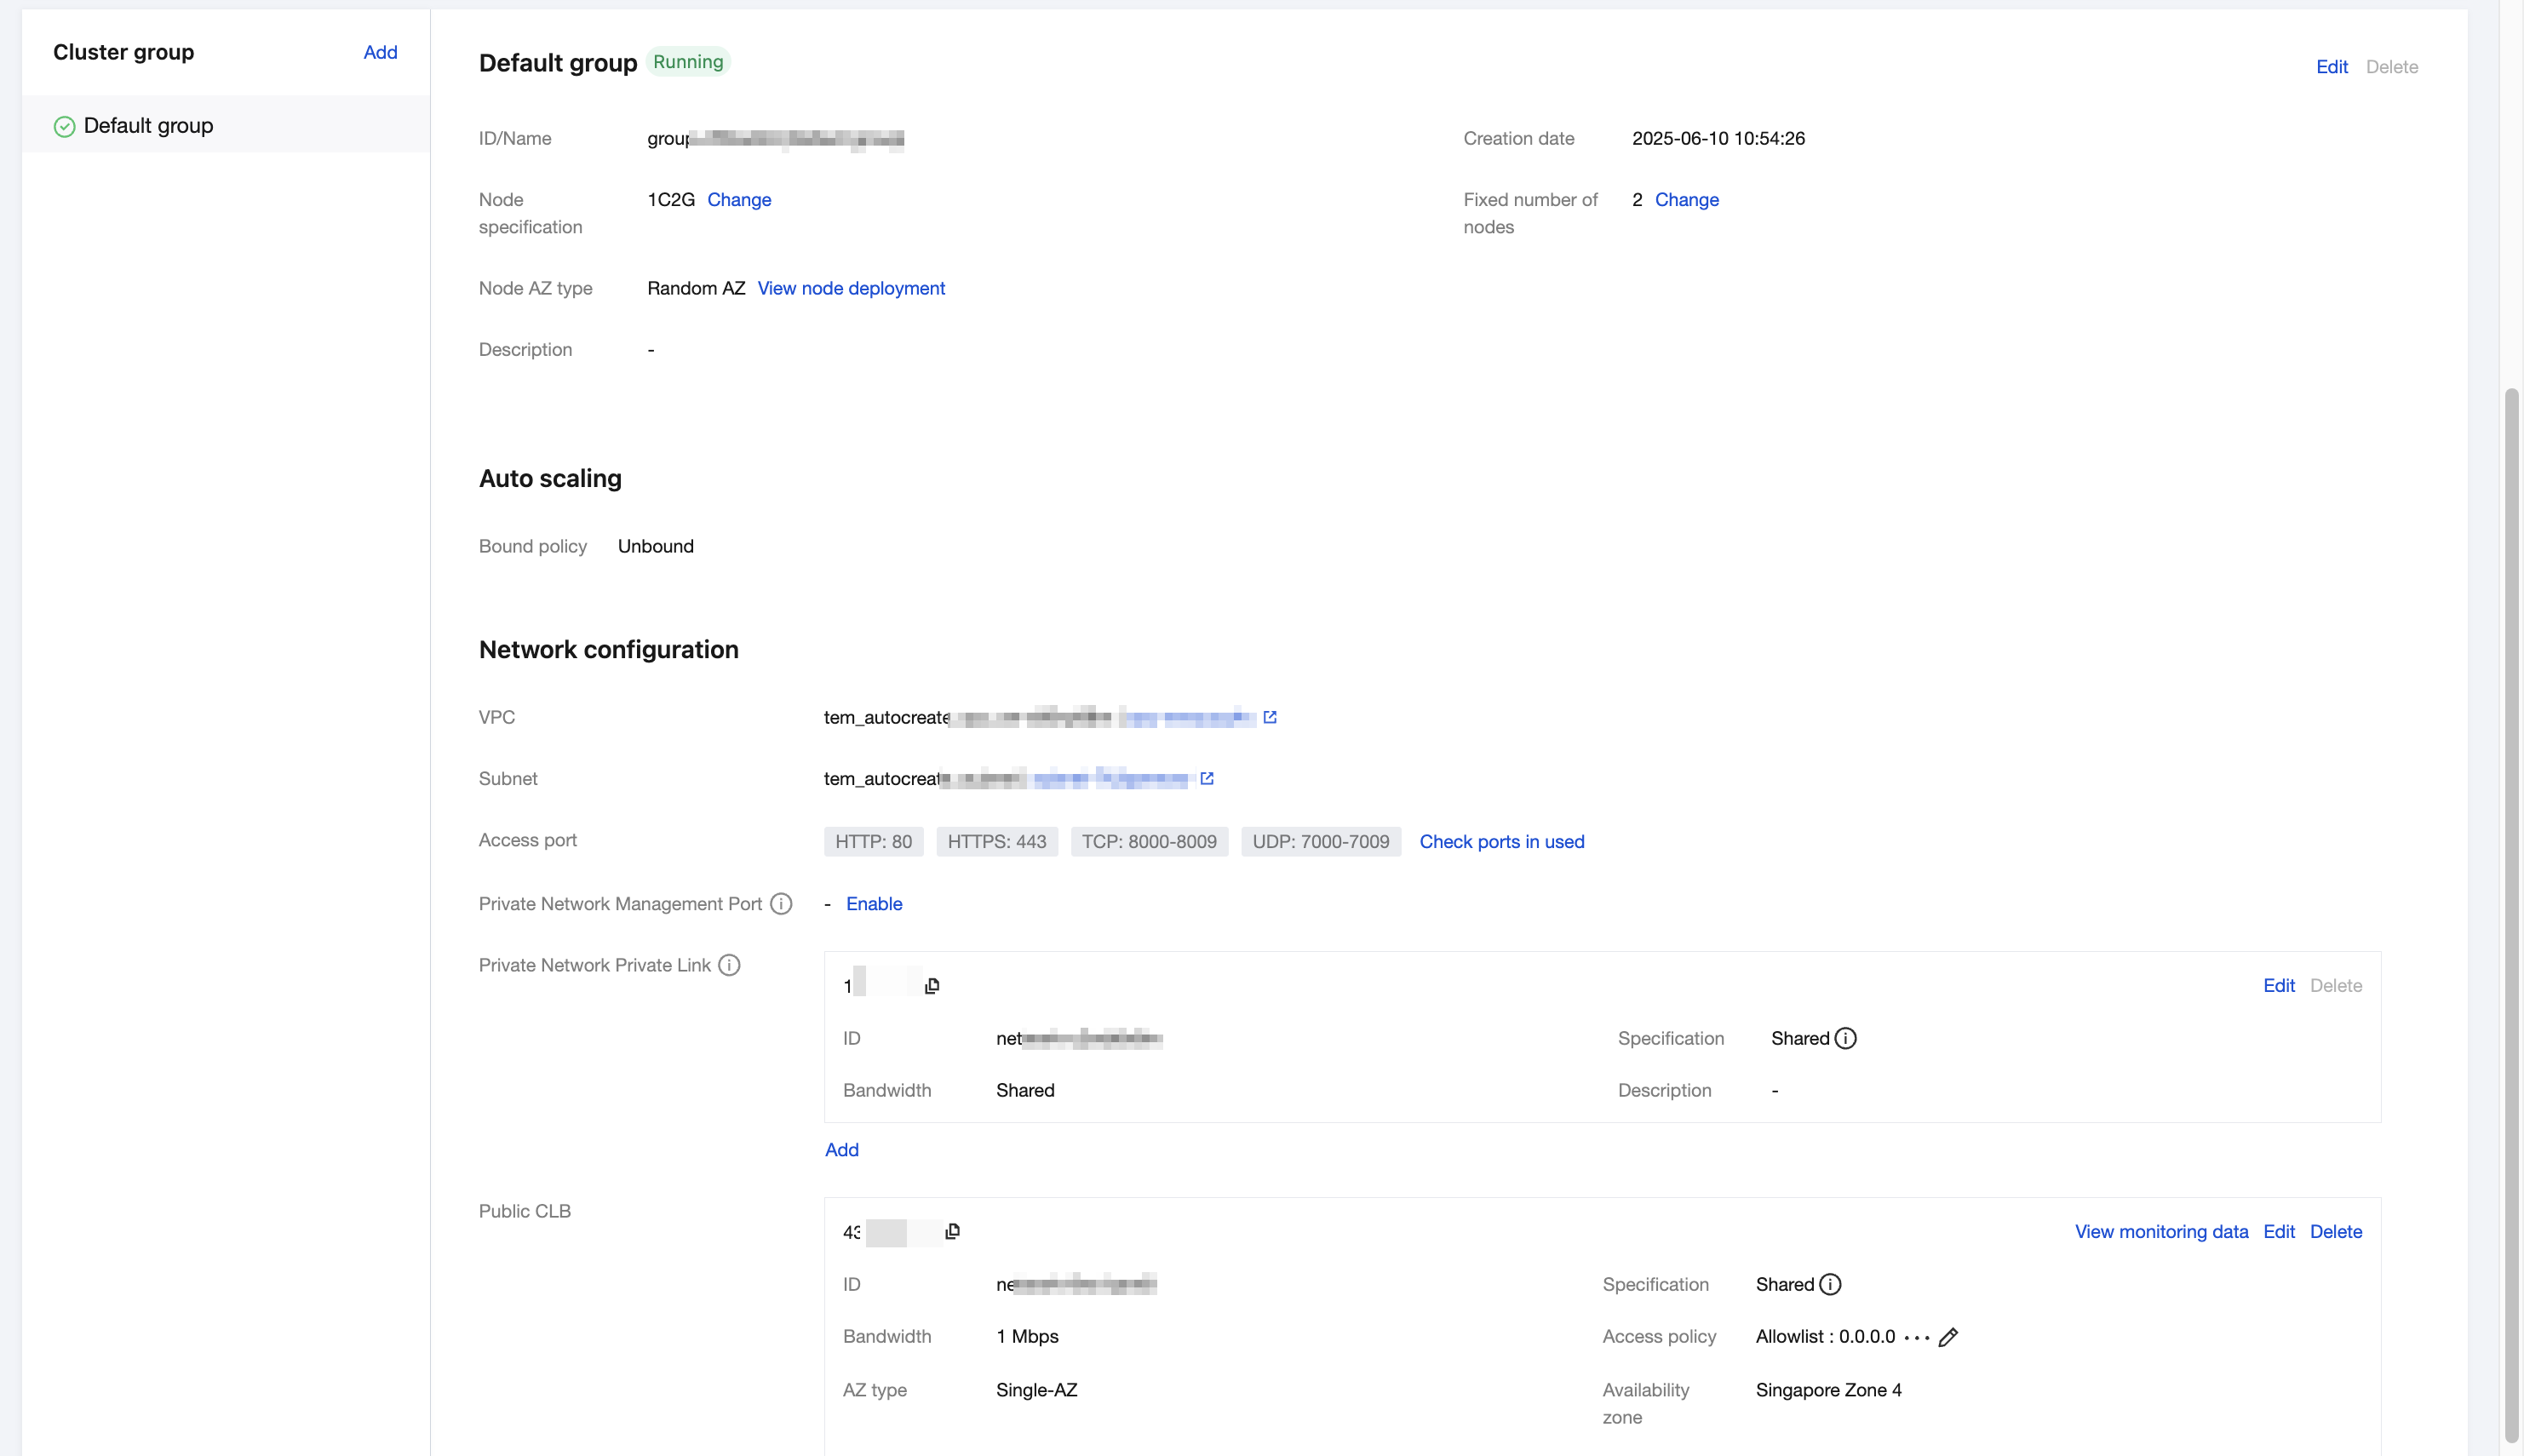
Group Information: For detailed descriptions and operations about cluster groups, see Cluster Groups.
Network Configuration:
Access Port: the access port of the Cloud Native Gateway.
Internal Management Port: the management port of the Cloud Native Gateway. The management port has no access control and can only be accessed via a private network Private Link.
Private Link: the private network address of the Cloud Native Gateway. Clients can access the gateway nodes of the Cloud Native Gateway via the private network node address.
Public Load Balancer: public load balancer instance configured for the gateway instance. You can modify the public network bandwidth and configure access policies. You are advised to set access security policies for public network access.
Note:
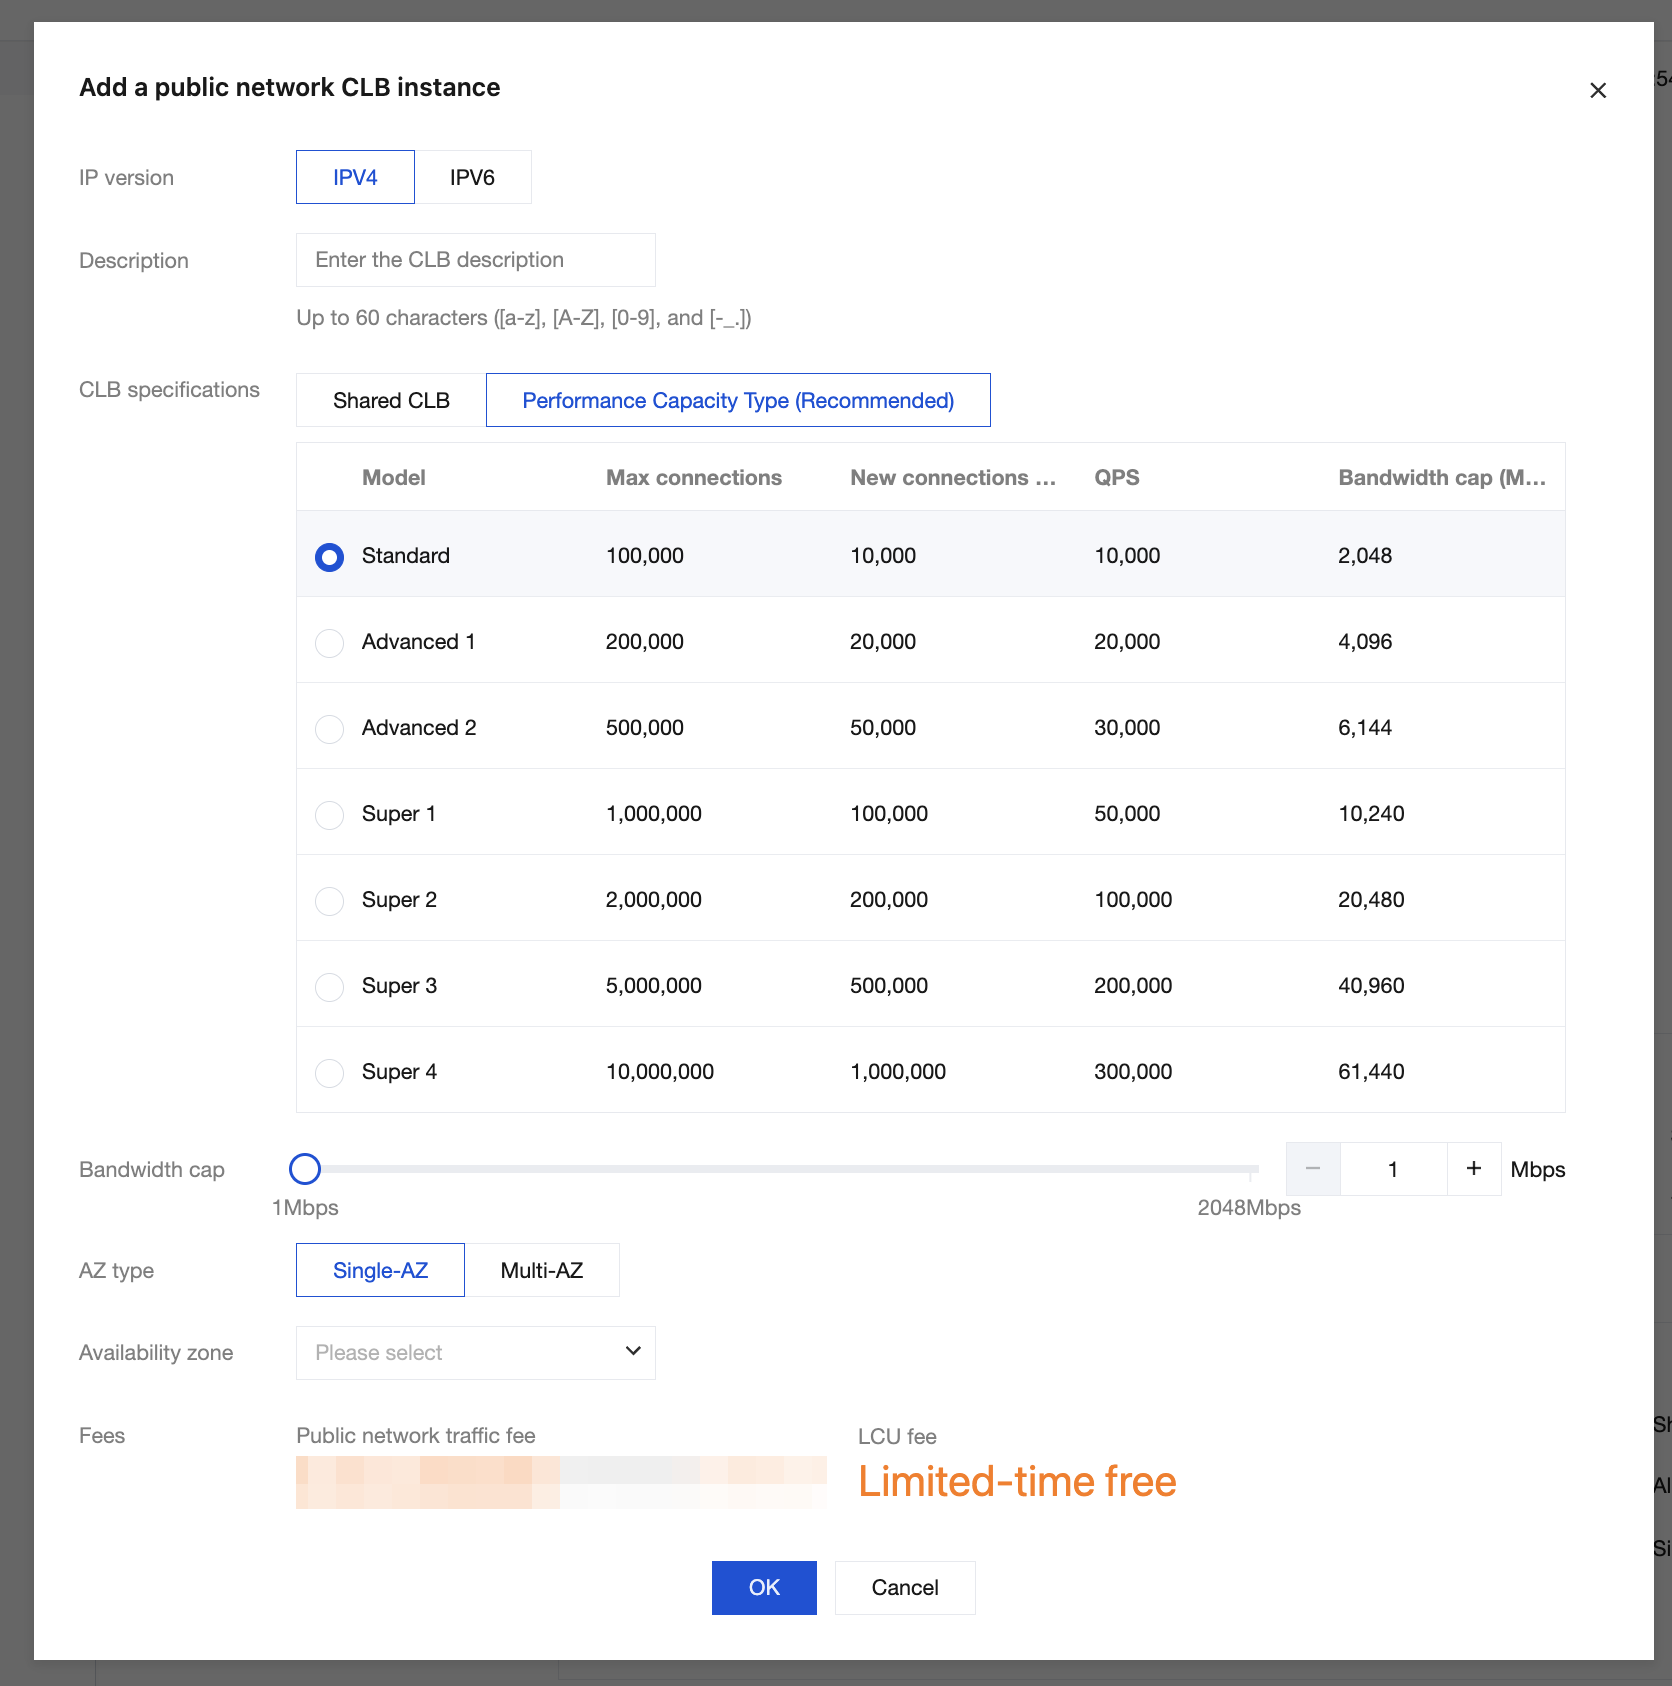
You can select the CLB specification for Private Link and Public Load Balancer. Click Add, set the CLB specifications, and click Confirm.
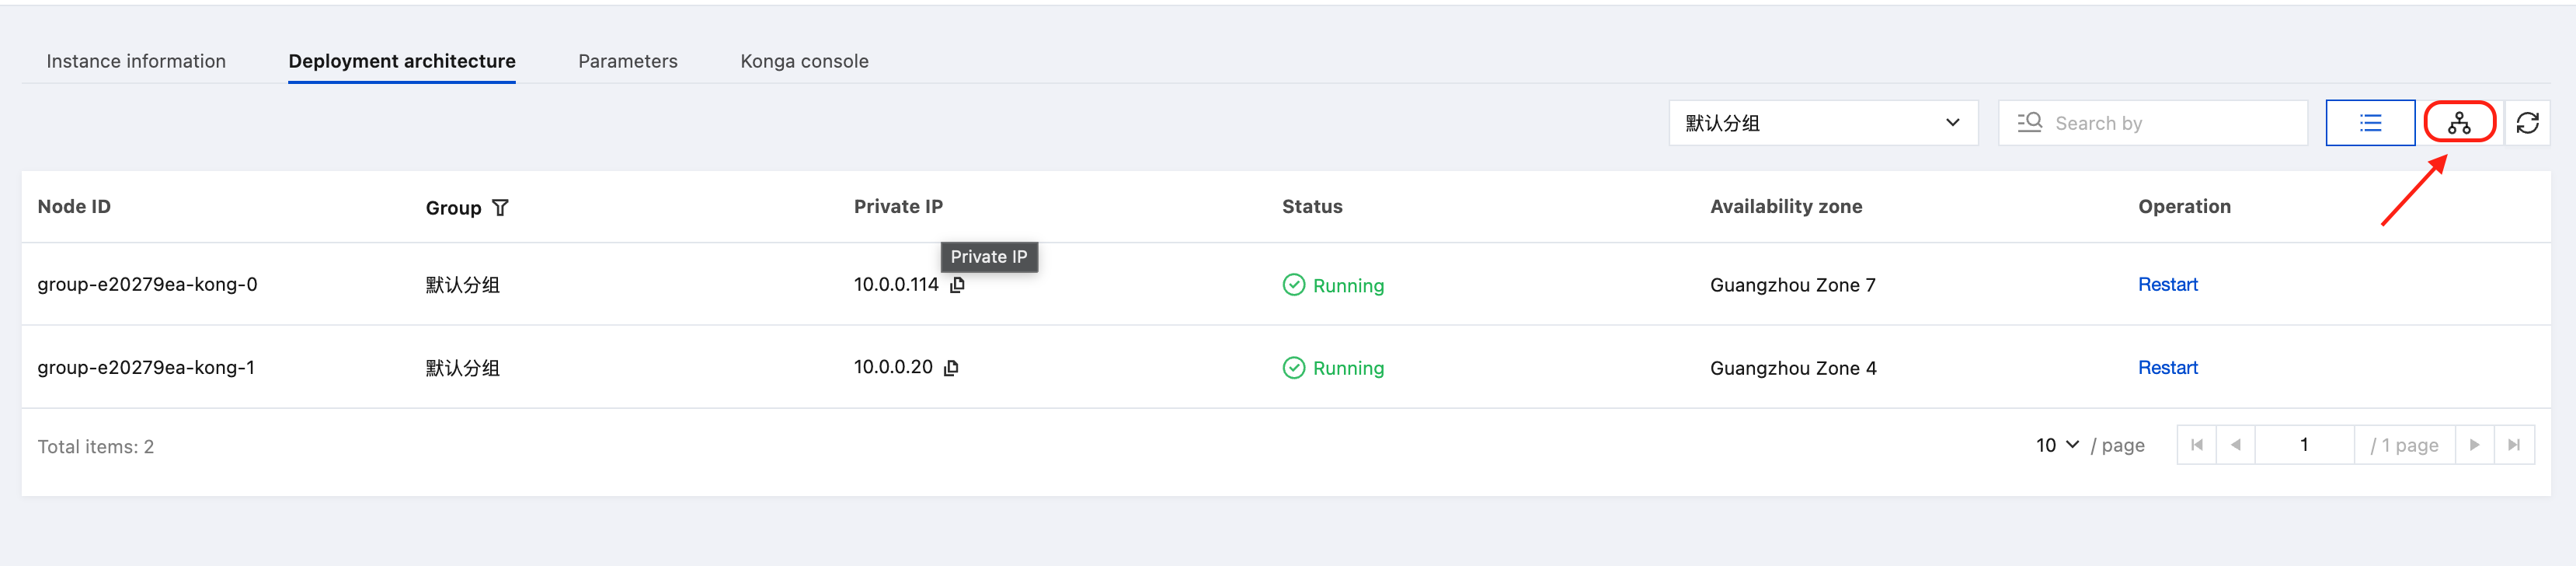
3. On the instance details page, click the Deployment Architecture tab, which displays the status and AZ information of gateway nodes under the selected group.
Click to switch the view to the deployment architecture diagram, which displays the deployment of the access layer (CLB) and gateway nodes under the selected group.
Note:
Nodes of the Cloud Native Gateway Standard Edition and Professional Edition are deployed across multiple AZs by default.
Help and Support
Was this page helpful?
You can also Contact sales or Submit a Ticket for help.
Help us improve! Rate your documentation experience in 5 mins.
Feedback